Application has been Blocked from Accessing Graphics Hardware Windows 10 {FIXED}
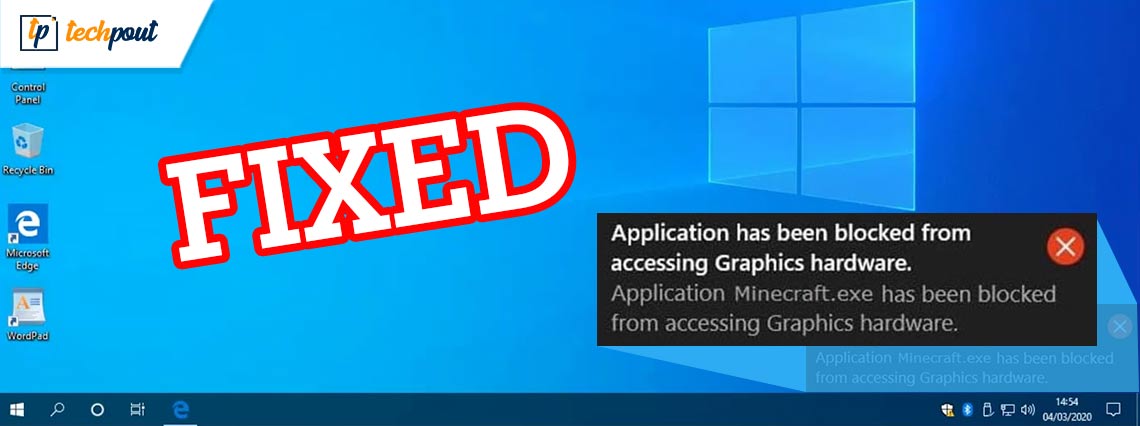
In this write-up, you will learn how to fix Application has been blocked from accessing Graphics hardware on Windows 10 PC.
You opened your Windows PC to play your most favourite video game and just tried to launch the application, sadly, something went wrong that ended up showing an error message. Rather than a loading page of the game, you got a dreadful error message saying the Application has been blocked from accessing Graphics hardware. Now, you must be thinking, even though “I haven’t made any modifications to the game since so long”. What’s preventing the game from launching accurately?
First and foremost, you have to be relaxed. We understand it’s frustrating, but don’t worry, you are not all alone who got this error message. We have seen numerous Windows 10 PC users complaining about this error. And fortunately, this error you can fix easily & quickly, that’s also on your own.
Simple Fixes to Solve Application Has Been Blocked from Accessing Graphics Hardware
This tutorial guide covers a few effective and simple ways to fix Application has been blocked from accessing Graphics hardware issues on Windows PC. Without further ado, let’s get started:
Fix 1: Update your Display Driver
This error is majorly caused when your graphics drivers also known as display drivers goes missing or become out of date. You can resolve it quickly by updating your graphics card driver.
There are two ways to update the display drivers; manually or automatically.
To update drivers manually, you can visit the official website of your display adapter manufacturer and download the latest drivers. After this, double-click the installer and install the drivers manually by following the on-screen instructions.
However, manual driver update takes a lot of time and a good amount of technical skills, hence we suggest you perform this task of finding and installing drivers automatically with Bit Driver Updater.
Bit Driver Updater is a well-known driver updating tool that requires only one or two clicks of your mouse to update all your drivers. Also, the driver updater utility comes with several in-built tools to make this process much easier like system optimizer, performance booster, scan scheduler, and backup & restore wizard. The software only provides WHQL tested and signed drivers.
To know how this amazing utility works, comply with the following steps:
Step 1: Download and install Bit Driver Updater.
Step 2: Invoke the driver updater utility tool and click on Scan from the left menu pane.
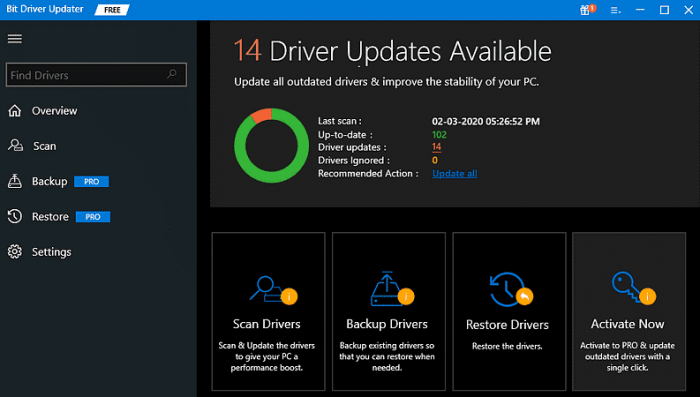
Step 3: Sit back and let the Bit Driver Updater scan your PC for broken or outdated drivers.
Step 4: Once done, then it displays a list of drivers that requires an update. From the list locate the problematic GPU or display drivers and click on the Update Now button adjacent to the driver. Alternatively, you can click on the Update All button. This will update all the outdated drivers with just a single click of the mouse.

However, it is worth noting that to use the one-click driver update feature of Bit Driver Updater, you need to rely on the pro version. Its pro version also gives you 24/7 technical support and a 60-days satisfaction money-back guarantee.
Also See: A DevOps Guide To Help You Automate the Process of Deploying Infrastructure
Fix 2: Run SFC and DISM Commands
You may get this error when your system files have become corrupted or damaged. Hence, to resolve the issue, you can use SFC and DISM commands to repair or replace the corrupted or faulty system files on your PC. Follow the steps below to use this fix:
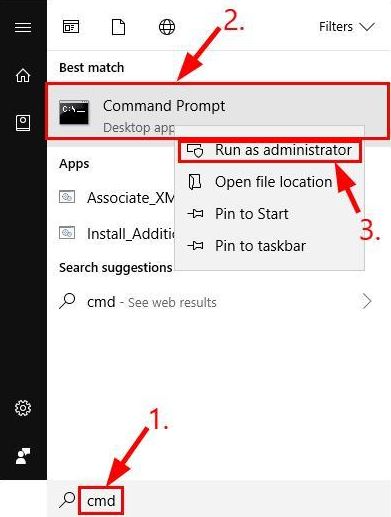
Step 1: Go to the search box and type cmd inside it. Then, right-click on Command Prompt to choose Run as administrator.
Step 2: If a prompt appears by UAC (User Account Control) click YES to continue.
Step 3: In the command prompt (admin), type sfc /scannow and hit the Enter button.

Wait for the verification to be completed.
Step 4: After that, write the following commands and hit the Enter keyboard button after each command.
DISM.exe /Online /Cleanup-image /Scanhealth
DISM.exe /Online /Cleanup-image /Restorehealth
Step 5: Be patient and let the process be 100% completed.
Once it’s done, restart your Windows 10 PC and test the issue. If you still experience Application has been blocked from accessing Graphics hardware error while launching the game, then move on to the next solution.
Also See: Windows 10: Microsoft Lowers the Frequency of Software Updates
Fix 3: Edit the Registry
None of the above-suggested hacks helped? Don’t worry, try to edit the registry as a final resort. Maximizing the Timeout Detection and Recovery (TDR) time is another way to deal with the Application has been blocked issue. PC users can increase the TDR time to about 8 seconds to fix the issue. Here is how to do that:
Step 1: In the search box of Cortana, type regedit.
Step 2: Click right on regedit and choose Run as administrator.
Step 3: After that, navigate to either ComputerHKEY_LOCAL_MACHINESYSTEMControlSet001ControlGraphicsDrivers or ComputerHKEY_LOCAL_MACHINESYSTEMControlSet002ControlGraphicsDrivers registry key path.
Step 4: On the left menu pane, choose the GraphicsDrivers key.
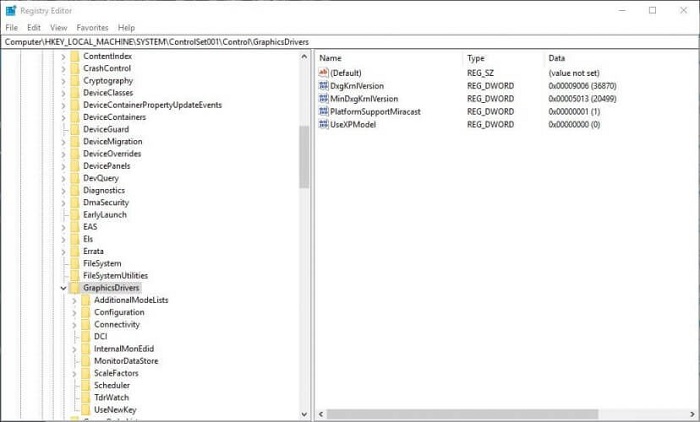
Step 5: Now, in the right pane of the window, click right on any empty space and choose QWORD (64-bit) Value. And, if you are using a 32-bit Windows OS version, then you can choose DWORD (32-bit) Value.
Step 6: Next, type TdrDelay as the DWORD or Qword name.
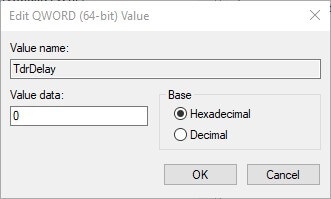
Step 7: Click double on the TdrDelay to launch the window that appeared directly below.
Step 8: Thereafter, input 8 in the text box of Value date and make a click on the OK option.
Lastly, reboot your laptop or computer system to validate the recent changes. Now, this error should be fixed and won’t bother you anymore.
Also See: Apple Released the Latest 15.0.2 Version of the iOS and iPadOS for Bug Fixes
Application has been blocked from accessing Graphics hardware on Windows 10: FIXED
We hope the aforementioned explained resolutions help you fix the “Application has been blocked from accessing Graphics hardware” issue on PC. If anybody has better resolutions to resolve the same issue, then please let us know in the comments box below.
Also, feel free to share your doubts or further queries in the comments below. If you have liked this troubleshooting guide, then do subscribe to our Newsletter for more tech-related articles & updates. In addition to this, you can also follow us on Facebook, Twitter, Instagram, and Pinterest.


