How to Fix or Bypass This PC Can’t Run Windows 11 Issue
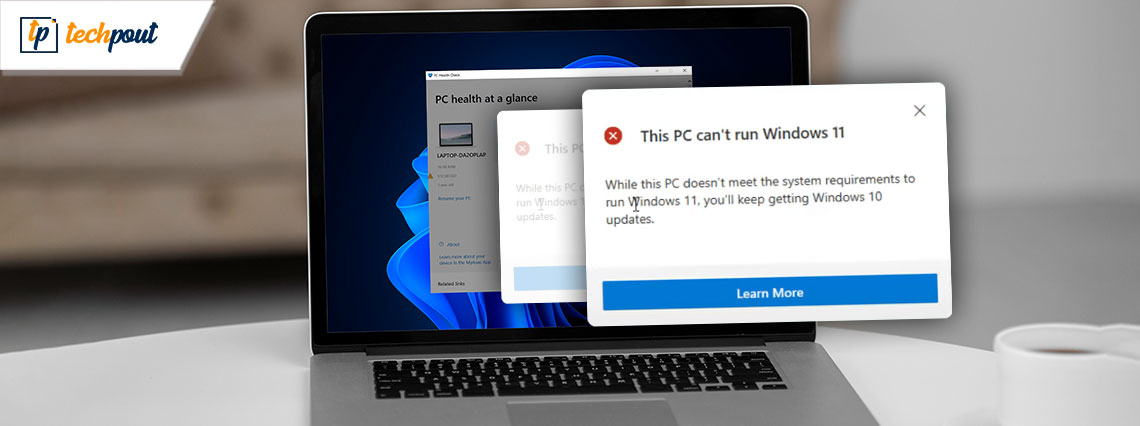
Looking for a guide that explains how to fix This PC can’t run Windows 11 issue? Then, you have come to the right place. Here are some potential solutions that help you deal with this inconvenience.
Every PC user wants to use and enjoy Windows 11 on their devices. And, many users have tried to run Windows 11 on their system but ended up with an error message that says, this PC can’t run Windows 11. The error appears while reviewing if the device is compatible or not.
Sadly, this occurs even for the systems that actually goes with the minimum system requirements. After receiving so many complaints about the same, we have also inspected this on a state-of-the-art machine – Dell XPS 17, with monster PC requirements, & we can state that the information is correct.
No matter if the PC has robust hardware specifications, still the PC Health Check tool indicates Windows 11 isn’t compatible. The problem exists with the system’s hardware itself, but a bit more with the existence of the TPM 2.0 chip and a setting of BIOS called Secure Boot that requires to be turned on. But, don’t panic, to help you, we have prepared this guide to bypass This PC can’t Run Windows 11 issue. Read more!
Methods to Fix This PC Can’t Run Windows 11
Following are the different ways that you can consider in order to fix error saying This PC can’t run Windows 11. Let’s get started:
Method 1: Check if your System has a TPM 2.0 Chip
To begin the process, you need to first figure out that your machine carries a TPM 2.0 chip. Below is how to do that:
Step 1: Open the Run terminal by pressing the Windows and R keys together.
Step 2: In Run box, input tpm.msc and hit the Enter key from your keyboard. 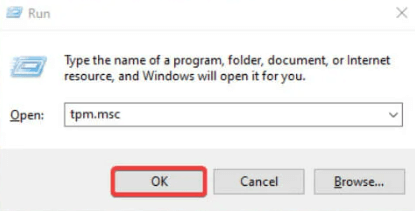
Step 3: This will invoke the TPM Manufacturer Information window on your computer screen, check the Specification Version’s value. This value should be equal to 2.0.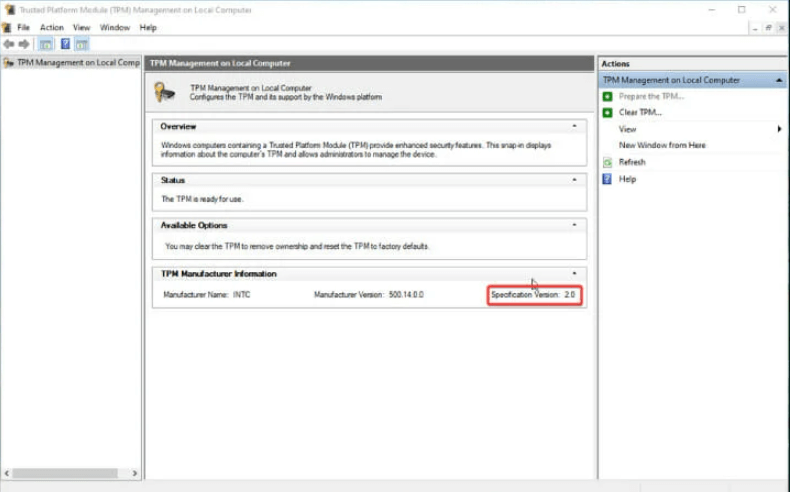
Step 4: If you are getting an error message saying Compatible TPM isn’t discovered instead, then it means that the TPM chip isn’t available on your motherboard, or it is possibly turned off in BIOS. 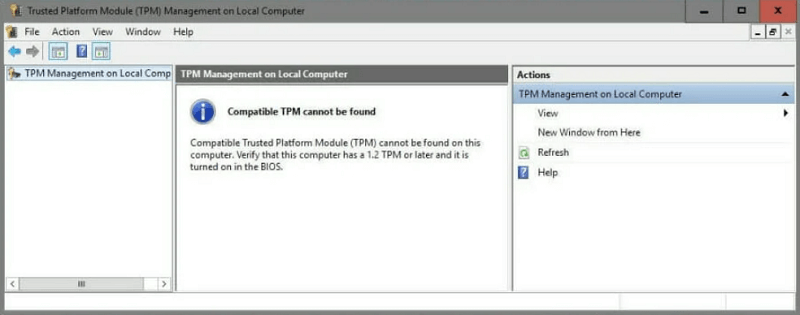
If that is the case, then in order to check if your PC has a TPM 2.0 chip, you can check it on your BIOS and trigger the TPM Support. Follow the instructions below:
- Reboot your machine and enter BIOS. Generally, you will need to hit Function or Del keys before Windows boots up but it is different for each manufacturer.
- After that, head to the Advanced Options, locate the TPM Support option and make it enable.
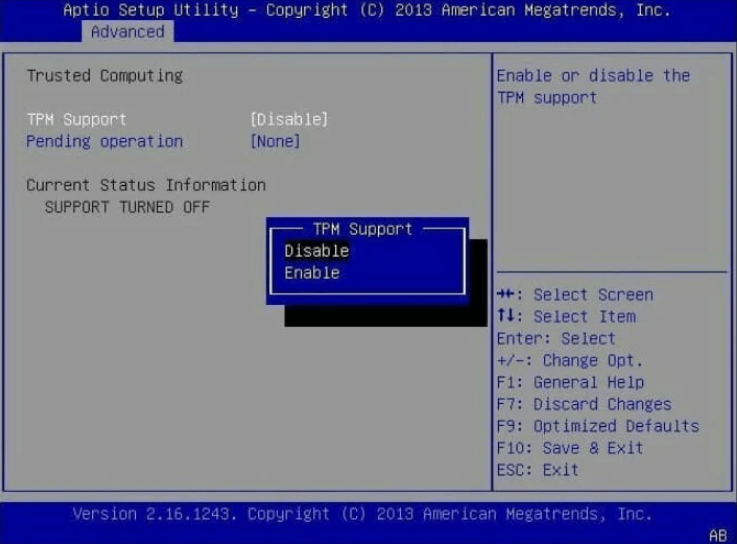
- Save new changes and close the window. You can even do that by hitting the F10 key.
Also Read: How to Fix Laptop Stuck on Hibernating
Method 2: Download & Modify the Appraiserres.dll File
The Windows 10 operating system does not check if a system has a TPM 2.0 chip, so basically by changing the file with the one in Windows 11, you force the system to bypass this process. Below are the steps you need to follow:
Step 1: Firstly, you need to get the Windows 11 and Windows 10 ISO files from Microsoft’s dedicated page.
Step 2: Then, in the Windows 10 kit, search for the appraiserres.dll file, click right on it, and choose Copy. 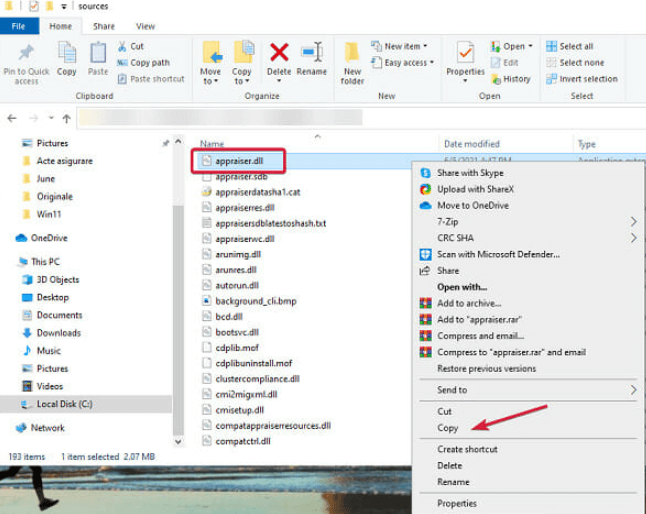
Step 3: Thereafter, Mount the Windows 11 ISO. 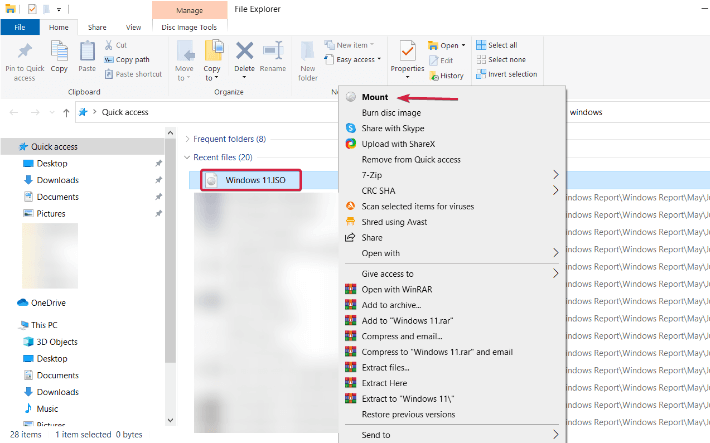
Step 4: After extracting the Windows ISO, go to the Sources folder and remove the appraiserres.dll file within the folder.
Step 5: Next, paste the appraiserres.dll file in the Windows 11 Sources folder that you have copied from the Windows 10 kit. 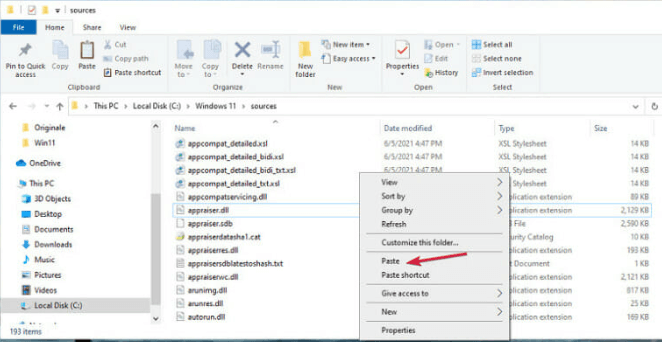
This should definitely get the error “This PC Can’t Run Windows 11” fixed. Try to reinstall Windows 11 on your machine.
Also Read: Why Hard Drive Not Showing Up In Windows 10 And How To Fix It
Method 3: Check if the Secure Boot Option is Turned On
As per Microsoft, in order to run Windows 11, the Secure Boot needs to be turned on. To do so, simply follow the procedure below:
Step 1: To get started, reboot your computer, then press the Function and Del keyboard keys together to enter BIOS.
Step 2: Go through the BIOS menu in order to detect the exact location of the Secure Boot option and enable it. You can generally get it under the Security settings but this varies for each BIOS. 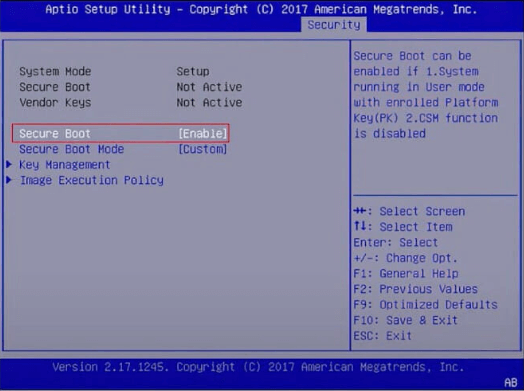
At the end of the process, you can once again check using the PC Health Check tool, and this time, you should receive a confirmation message. That’s how quickly you can fix This PC Can’t Run Windows 11 error.
Also Read: Stretched Screen Horizontally Issues in Windows
This PC Can’t Run Windows 11: FIXED
We hope our troubleshooting article on how to fix This PC Can’t Run Windows 11, helped you resolve all the compatibility issues. Now, you can finally be able to enjoy Windows 11.
If you still have any questions or doubts, then you can share them in the comments section below. Additionally, you can also share your suggestions in the comments. For more helpful troubleshooting tips, do subscribe to our Newsletter.


