How to Fix CS: GO VAC was Unable to Verify your Game Session
Are you wondering why VAC, i.e., Valve Anti-Cheat System was unable to verify game session, hampering your gaming experience? If yes, continue reading this article to learn everything about this problem and the quickest, easiest, and sure-shot ways to drive the error away.
Developed by Valve and Hidden Path Entertainment, Counter-Strike: Global Offensive (CS: GO) is a celebrated multiplayer first-person shooter video game. However, many players have reported an annoying CS: GO VAC was unable to verify your game session error, preventing them from playing their favorite game.
Are you also experiencing a similar issue? If yes, this article will help you. Having experienced this problem, we researched thoroughly to find the most effective solutions to this issue. This write-up is going to share the same.
However, it is crucial to understand VAC and the possible causes of the issue before trying to fix it. Hence, the subsequent sections of this article shed light on the VAC and the factors responsible for the error.
What Does VAC Mean
Valve Anti-Cheat System (VAC) is software designed to punish gaming offenders. It detects forbidden programs, called hacks and exploits. Whenever any account is found using these programs to get an unfair advantage, it receives a VAC ban. However, getting banned without breaking the rules is a serious concern.
If VAC was unable to verify your game session and banned you from the game despite not using any cheats or tampering with the game’s files, you can go through the following section to know what may have caused the issue.
Causes of CS: GO VAC was Unable to Verify your Game Session Error
The following factors may have resulted in the issue you are trying to resolve.
- Other processes or applications on your computer may be accessing the game files
- There may be a change in the regular framework of the device’s operating system
- Some essential game files may be corrupted or missing
- Drivers, particularly the graphics driver, are out of date or corrupted
- There are problems with your Steam client
- Your antivirus software may be interfering with the game
After getting familiar with the error and its causes, let us walk you through its most suitable solutions.
Fixes for CS: GO VAC was Unable to Verify your Game Session Issue
Below are the workable solutions for the problem you are experiencing while trying to play CS: GO on your computer.
Fix 1: Reboot your PC
VAC was unable to verify your game session because other processes or applications are using your game files. Rebooting the computer can solve this problem. Hence, you can follow these directions to reboot the PC.
- Before starting the reboot process, close all windows and applications.
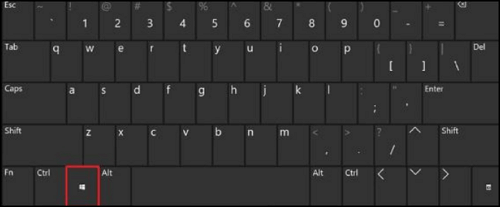
- After closing all apps and windows, press your keyboard’s Windows key to get the Start menu.
- You can now click on the power icon to view the boot options.
- Lastly, choose Restart from the options available on your screen to get the computer restarted.
Also Read: How to Fix Epic Games Launcher Not Working
Fix 2: Log out of your Steam account and log in again
Operating system framework changes often lead to gaming errors, such as the CS: GO VAC being unable to verify your game session issue. Hence, you can follow the below steps to re-login to your Steam account to get rid of the problem.
- Firstly, you are required to launch Steam on your PC.
- After opening the Steam application, choose your profile from the upper-right corner of the Steam window.
- You can now choose the option to Log out of account from the menu on your screen.
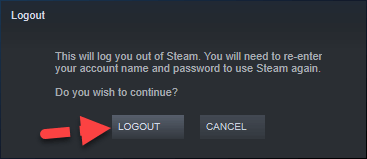
- A pop-up window will appear notifying you that this action will log out of your Steam account and you will need to input your account details (name and password) to log in again. Click on the LOGOUT button to proceed further.
- Lastly, follow the instructions on your screen to re-login into your Steam account.
Fix 3: Restart your Steam client
Restarting your Steam client can resolve the corruption or other client problems that may have led to the issue you are trying to fix. Thus, you can take the following steps to restart the Steam client.
- Firstly, open the Steam application on your computer.
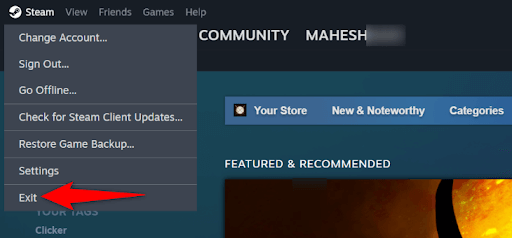
- After launching the Steam app, choose Steam from the top-left corner of the application window.
- Next, choose the Exit option.
- You can now launch the Steam application again.
- Once the application opens, click Steam and choose the option to Go Offline.
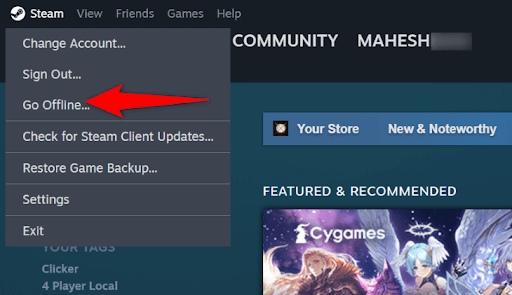
- Next, select the RESTART IN OFFLINE MODE option.
- Now, click Steam and choose Go Online from the available options.
- Lastly, click on the RESTART AND GO ONLINE option to restart Steam.
Also Read: How to Fix Gameloop Crashing on Windows 10
Fix 4: Update the graphics and other drivers
Outdated drivers hamper the communication between the computer system and connected peripherals (such as the graphics card). If the drivers are outdated, your computer may not be able to understand and execute your instructions correctly, leading to the “VAC was unable to verify your game session” CS: GO error and many other problems.
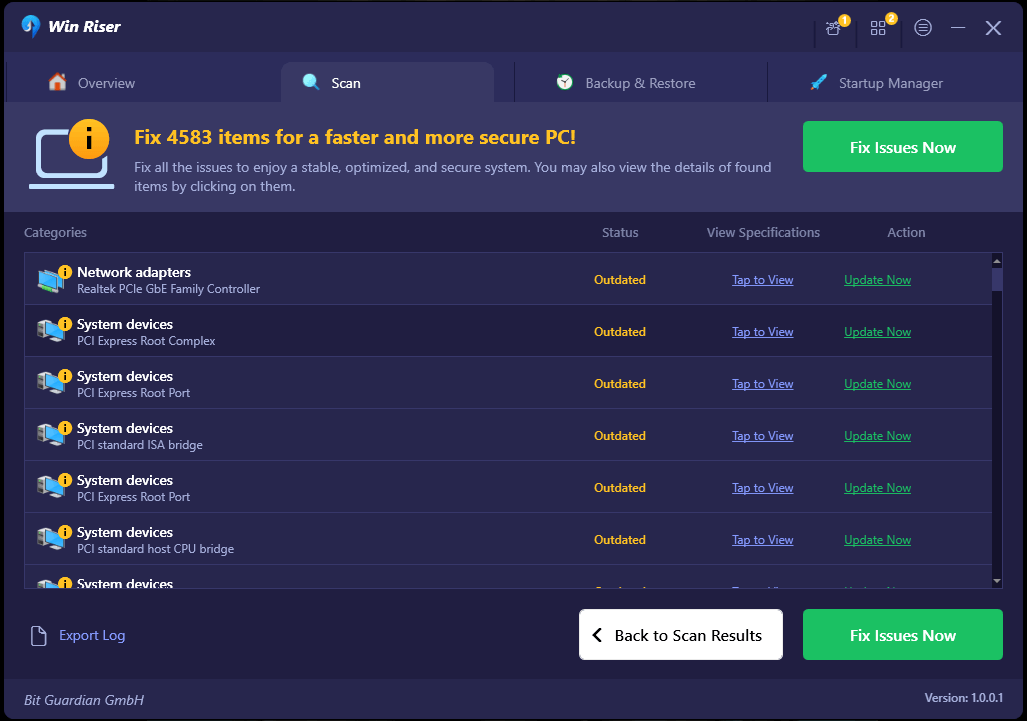
Hence, it is crucial that you keep all drivers updated at all times. You can update drivers in no time using one of the best driver update software, such as Win Riser. The Win Riser software updates drivers safely and automatically and takes the PC’s performance to the next level with a single click.
Moreover, this software boasts junk cleaning, invalid registry cleaning, an option to roll back to the earlier drivers, malware removal, and many other incredible features. The following quick and easy steps explain how to use this software.
- Firstly, click on the link given below to get the software setup downloaded.

- After downloading the software setup, double-click on the downloaded file and get Win Riser installed on your PC.
- Let the software scan your device for a few seconds (usually, the scan time is two to three seconds).
- Review the detected out-of-date drivers and other issues. After reviewing the scan results, click Fix Issues Now to fix all problems automatically.
Fix 5: Verify the integrity of CS: GO files
Corruption or absence of important game files is another reason you may experience Counter-Strike: Global Offensive (CS: GO) errors. Hence, you can follow these directions to check the game files and fix related issues.
- Firstly, open Steam.
- After opening the Steam app, choose LIBRARY from the top menu.
- You can now right-click Counter-Strike: Global Offensive and select Properties from the context menu.
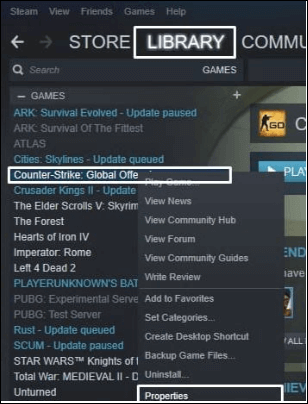
- After opening the Counter-Strike: Global Offensive properties, choose Local Files from the menu on the on-screen window.
- Next, click the option to Verify Integrity of Game Files to begin the file verification process.
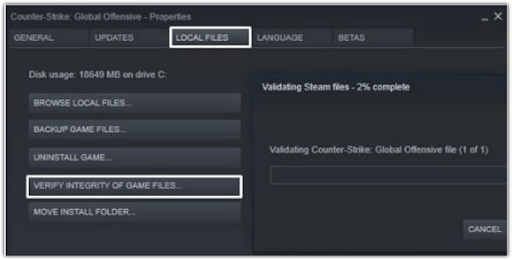
- Lastly, restart your computer after the above file verification process is complete.
Also Read: Why Do My Games Keep Crashing in Windows 10 {FIXED}
Fix 6: Run CS: GO as an administrator
Games, like Counter-Strike: Global Offensive (CS: GO), require administrative permissions to run smoothly. It may be possible VAC was unable to verify your game session as these permissions were not available. Hence, here are the steps to run the game as an administrator.
- Firstly, right-click the CS: GO shortcut file and choose Properties from the on-screen context menu.
- After opening the CS: GO properties, choose Compatibility from the top menu.
- Next, check the box to Run this program as an administrator to grant administrative privileges to your game.
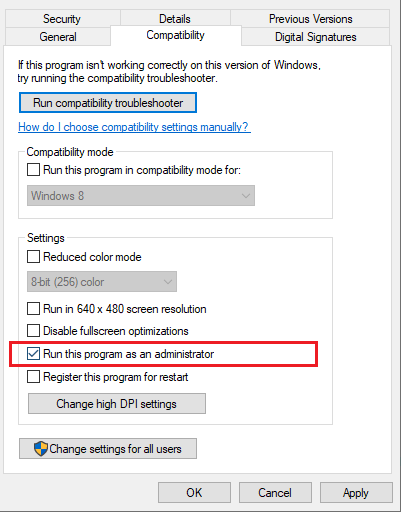
- Lastly, click Apply and OK to save the changes you have made.
Fix 7: Disable your antivirus software or uninstall it temporarily
Your antivirus software may have disturbed the VAC settings when scanning and repairing apps to keep your computer safe from virus attacks. Hence, if CS: GO VAC was unable to verify your game session, you can disable or temporarily uninstall the antivirus software. You can check your antivirus manual to learn how to disable it. Below is how to uninstall it from your computer.
- Firstly, open Search using the Win+S hotkey.
- Next, input the Control Panel in the on-screen text box and select it from the search results.
- Now, change the Control Panel view to category and select the option to Uninstall a program.
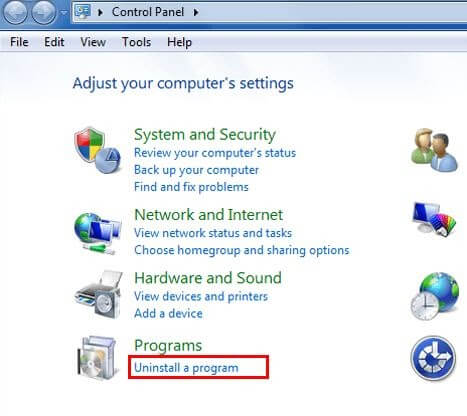
- You can now find your antivirus in the list of programs and features.
- Next, right-click your antivirus and choose Uninstall from the on-screen options.
- Lastly, follow the on-screen instructions to complete the uninstallation process.
Also Read: How to Fix Helldivers 2 Crashing on Windows PC
Fix 8: Use Command Prompt to repair your Steam client
Some corrupted or malicious Steam client files may be responsible for the error you are trying to fix. You can use Command Prompt to repair these files to solve the problem. Here is how to do so.
- Firstly, click Start. This button is located in the extreme left corner of the taskbar.
- Next, choose Command Prompt (Admin) from the on-screen power user menu.
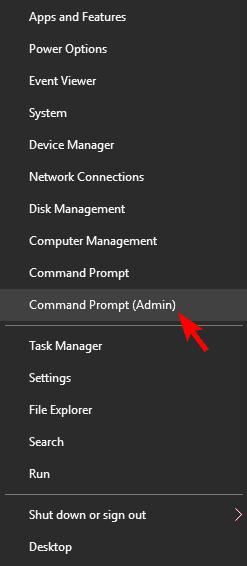
- Click Yes when the UAC prompt comes on your screen.
- You can now copy the C:Program Files (x86)SteambinSteamService.exe”/repair command and paste it into the Command Prompt window. Do not forget to press Enter after pasting the command.
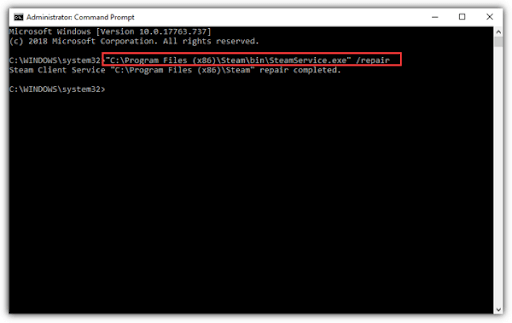
- Wait patiently for some time for the process to finish.
- Lastly, restart your PC after completing the above steps.
Fix 9: Uninstall CS: GO and reinstall it
If none of the above solutions fix the issue, completely reinstalling CS: GO is the last resort. You can follow these steps to uninstall and reinstall the game on your computer.
- Firstly, launch the Steam application.
- Secondly, go to the Steam LIBRARY.
- Next, right-click on Counter-Strike: Global Offensive and choose Uninstall from the context menu.
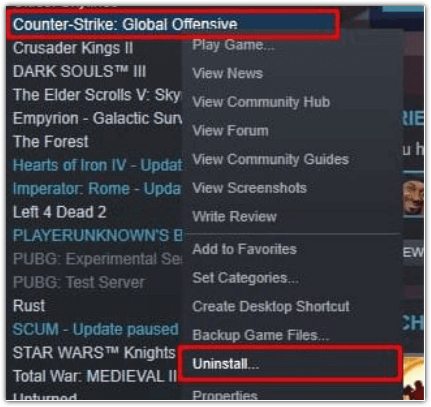
- A user prompt will now appear asking for your permission to delete the game files. Click Delete to complete the CS: GO uninstallation.
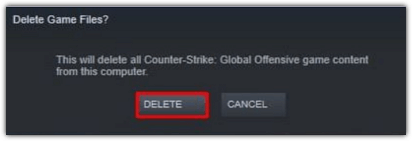
- Lastly, you can reinstall CS: GO on your PC.
Also Read: Roblox Keeps Crashing on Windows 10, 11 PC: Fix
CS: GO VAC was Unable to Verify your Game Session Issue Fixed
We hope one of the above solutions helps you fix the CS: GO error. You can begin your troubleshooting session with the first solution and keep moving forward until the error disappears. However, you can directly update drivers using Win Riser if you wish to save time and effort. In case of any tips to improve this guide, questions, or confusion, please do not hesitate to leave a comment in the comments section.


