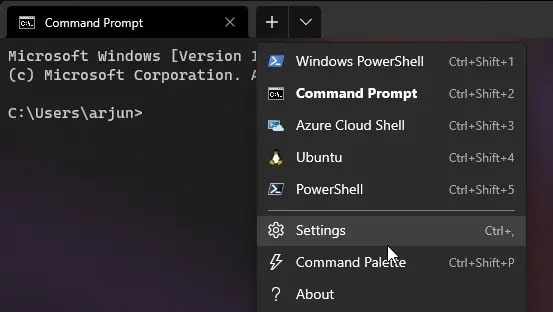
Learn about the best ways for performing Windows terminal customization like a pro on your Windows operating system PC from the article below.

Windows Terminal is a command-line tool available on Microsoft Store. The tool appears like Powershell, Command Prompt, and WSL. Windows Terminal comes with a bunch of advanced features like Multiple tabs, Full Unicode support, Split panes and many other useful features.

The interaction with the Windows Terminal command lines becomes boring when used in the same manner for a long period of time. Along with it, there are high chances of occurring mistakes in the commands when given with the same interface again and again.

But if you are a person who prefers a customized interface over the standard or default interface. Then this article is for you, here in this article we have explained the best ways through which you can perform Windows Terminal customization with great ease.

List of Ways To Customize Windows Terminal on Windows PCs

Here is a list of different ways in which a Windows user can easily customize the Windows Terminal. Some very useful and unique customizations for Windows Terminal are discussed in the list below.

1. Apply Acrylic Effect To Your Windows Terminal

The first way to perform Windows terminal customization is through applying the Acrylic effect to your Windows terminal. Follow the steps below for this purpose:-

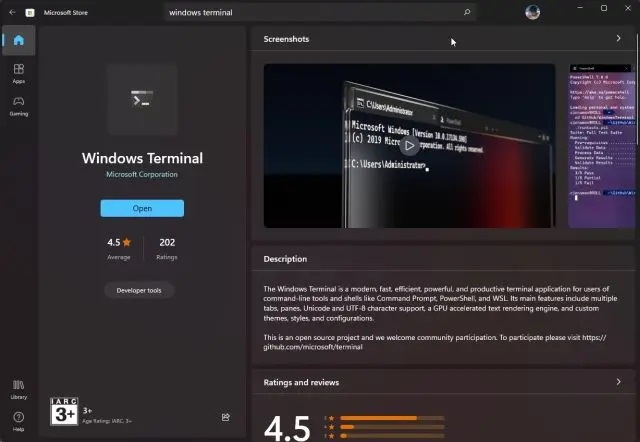
  1. First of all, visit the Microsoft Store and install the latest version of the Windows Terminal tool.
  2. Launch the Windows Terminal and go to the settings.
  3. Soon after that visit Windows PowerShell and switch to the Appearance tab using the sidebar.
  4. Now locate the Acrylic option and enable it on your desktop. Select the Acrylic opacity as per your requirements. (Recommended 70%)

  5. Save the changes made to the Windows Terminal.

This is the first way of customizing your Windows Terminal. You can follow the same procedure for Command Prompt, WSL and other shells that you use on your Windows OS computer device.

Also Read: How to Update Drivers Using Command Prompt in Windows 10? Try Easy Steps!


2. Use Caskaydia Cove Font for Windows Terminal

After applying the Acrylic effect to Windows Terminal, the second way to customize the Windows terminal is by using Caskaydia Cove font. The instructions to download and apply this font to the terminal are as follows:-

  1. Download Caskaydia Cove font from the official website.
  2. After downloading the font, unzip the font file correctly.
  3. Now select all font files and right-click on them.
  4. Choose the option that says Install for all users.
  5. After the installation, open Windows Terminal on your PC.
  6. Go to the settings and switch to Windows PowerShell.
  7. Select the Appearance tab, in the same way as explained above.
  8. Now click on the newly installed Caskaydia Cove font and save your preference.

The font for the Oh My Posh prompt on your Windows PC will be completely changed soon after you finish with the last step. Know how to customize Windows Terminal for PowerShell and WSL from the heads below.

Also Read: MSVCR100.dll Missing or Not Found on Windows PC [FIXED]


3. Customize PowerShell Using Oh My Posh in Windows Terminal

Now that you have applied the Acrylic effect and used Caskaydia Cove font for Windows Terminal. It’s time to install the Oh My Posh prompt and customize the Windows PowerShell. The instructions to customize PowerShell using the Oh My Posh prompt in Windows Terminal are as follows:-

  1. Launch the Windows Terminal in Administrator mode.
  2. Now move to Windows PowerShell and give the following command to install the Oh My Posh prompt.
    Install-Module oh-my-posh -Scope CurrentUser

  3. After that import the Oh My Posh by giving the command.
    Import-Module oh-my-posh

  4. Now you are required to install the Terminal by running the command.
    Install-Module -Name Terminal-Icons -Repository PSGallery

  5. Check all your previous actions by giving the command.
    oh-my-posh –init –shell pwsh –config ~/jandedobbeleer.omp.json | Invoke-Expression

  6. Make the Oh My Posh prompt your default custom prompt. To do that give the command given below.
    $PROFILE

  7. Copy the path which you get after giving the above command and paste it on the Notepad.
  8. Save the file and exit from the Notepad.
  9. Rename the file with Microsoft.PowerShell_profile.ps1.
  10. Open the same notepad file and save the below two lines in it.
    Set-PoshPrompt -Theme jandedobbeleer
    Import-Module -Name Terminal-Icons

  11. Now go back to the PowerShell window and reload the profile by giving the command.
    $PROFILE

  12. Lastly, exit the Windows Terminal and relaunch it on your PC.

The whole interface of Windows Terminal will be changed completely after performing all the above steps in the correct and same order. Go through the additional tips given below for these steps.

Additional Tips – Users need to press “A” and hit the enter key before they start giving commands on the prompt. One needs to press the enter key after giving every command on the prompt. If the prompt shows an error message press the “A” and hit the enter key to resolve the error.

Also Read: How to Fix MSI Dragon Center Not Working on Windows PC


4. Customize WSL Using Oh My Posh in Windows Terminal

The last way on how to customize Windows Terminal is by using the Oh My Posh prompt for WSL customization. The steps that need to be followed for this purpose are as follows:-

  1. First of all, open the Windows Terminal in Administrator mode.
  2. Move to Windows Subsystem for Linux (WSL) on your PC.
  3. You are now required to give the following commands one by one.
    sudo wget https://github.com/JanDeDobbeleer/oh-my-posh/releases/latest/download/posh-linux-amd64 -O /usr/local/bin/oh-my-posh
    sudo chmod +x /usr/local/bin/oh-my-posh
    mkdir ~/.poshthemes

    wget https://github.com/JanDeDobbeleer/oh-my-posh/releases/latest/download/themes.zip -O ~/.poshthemes/themes.zip
    unzip ~/.poshthemes/themes.zip -d ~/.poshthemes
    chmod u+rw ~/.poshthemes/*.json
    rm ~/.poshthemes/themes.zip

  4. Check all your previous actions by giving the following command.
    eval “$(oh-my-posh –init –shell bash –config ~/.poshthemes/jandedobbeleer.omp.json)”

  5. Now you need to set Oh My Posh as the default prompt in Windows Subsystem for Linux (WSL). For this give the command
    nano ~/.bashrc

  6. In the Nano editor search for the eval “$(SHELL=/bin/sh lesspipe)” command and replace it with
    eval “$(oh-my-posh –init –shell bash –config ~/.poshthemes/jandedobbeleer.omp.json)”

  7. Now press the combination (Ctrl + O) to save the changes and then exit the editor window by pressing (Ctrl + X).
  8. Relaunch the WSL Shell on your Windows PC and give the below command.
    . ~/.bashrc
  9. Soon after that, the prompt’s interface will be changed completely.
  10. If in case you come across any issue, make sure to set the right Caskaydia Cove font for Windows Terminal.
  11. After resetting the font, reload the Windows Terminal prompt and give the following command.
    . ~/.bashrc

After following all the steps in the same order as mentioned above, the Windows Terminal prompt interface will be changed the same as shown in the image above. Follow the additional tips while performing these steps.

Additional Tips – It is advisable to use the latest version of Windows Subsystem for Linux (WSL) on the PC. Confirm and allow the installation of Windows Terminal by pressing the “y” and hitting the enter key, when asked for the confirmation. And lastly, hit the enter key after giving every command on the prompt.

Also Read: How to Fix Critical Structure Corruption Error in Windows 10


Concluding Words: How To Customize Windows Terminal Like a Pro

Here we conclude the write-up on how to customize Windows Terminal tools on a Windows operating system PC. Some of the best ways for Windows Terminal customization can be found in the above write-up.

Customizing the terminal makes it much more attractive and beautiful. With high-end graphics and advanced font styles, the overall interface of the prompt becomes more user friendly and futuristic.

Lastly, if you liked this piece of information and want to learn more about such topics then do subscribe to our Newsletter. Along with it, you can also follow us on Facebook, Twitter, Instagram, and Pinterest for regular updates.

Chandra Mamnani

Chandra Mamnani is passionate about simplifying the technical stuff for his readers. His writings are all about engaging and educating his readers with rich content. He climbs a little extra to fetch recent trends and bring fresh content to the plate. He is logical by nature and takes a keen interest in everything that holds value in the real world — business administration, law, finance and of course, technology. In his leisure time, he can be found exploring different cuisines.

Recent Posts

  • Top 10

Best Smartwatch for Swimming 2024

If you are a swimmer looking for a way to track your swimming and improve…

3 hours ago
  • Top 10

Remove Unwanted Objects in Image with the Best Image Object Removers Online

Let’s remove an object from any photo or remove people from a photo using some…

1 day ago
  • How To

How to Fix iMessage Activation Unsuccessful Error

If you want to fix the state where the iMessage activation is unsuccessful and you…

2 days ago
  • How To

502 Bad Gateway Error: Best Ways to Fix This Problem

If the 502 bad gateway error appears on your screen repeatedly, it’s time you target…

3 days ago
  • Games

What is Micro-Stuttering and How to Fix It Easily in Games

Let’s understand what is Micro-stuttering and learn about some techniques to fix this issue with…

6 days ago
  • Top 10

Best Data Visualization Software to Use in 2024

Let’s have a look at a set of 7 different data visualization software that will…

6 days ago