How to Fix DRIVER VERIFIER DMA VIOLATION in Windows 10,11
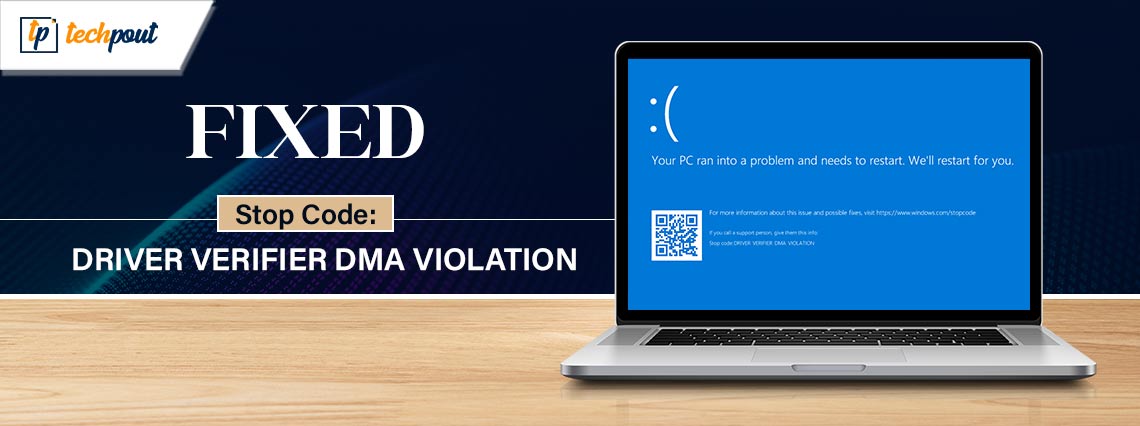
This article acquaints you with the best, easiest, and quickest ways to fix the DRIVER VERIFIER BSOD issue on Windows 10/11.
Blue Screen of Death or BSOD errors are among the most frightening scenarios a user can experience on Windows. These stop errors occur when Windows bumps into a critical issue from which it fails to recover. DRIVER VERIFIER DMA VIOLATION is an example of such annoying Blue Screen of Death errors.
With not enough information available on the screen about this error, it becomes an uphill battle to fix it. However, you can solve this problem effortlessly since you have found this article.
This article guides you through tried and tested solutions to the Blue Screen DRIVER_VERIFIER_DMA_VIOLATION Windows 11/10 error. However, let us discuss the possible causes of this issue before trying to fix it for easy troubleshooting.
Causes of Stop Code DRIVER VERIFIER DMA VIOLATION
The below factors may be responsible for the Blue Screen of Death error you are experiencing.
- Corrupted or outdated drivers
- Out-of-date operating system
- Unexpected issues with the Driver Verifier
- Corrupted system files
- Outdated BIOS or SSD firmware
Above, we listed various causes of the problem you are struggling with. Let us learn how to fix this issue in the subsequent section of this article.
Fixes for DRIVER VERIFIER DMA VIOLATION (Quick and Easy)
You can apply the following solutions to get rid of the Blue Screen error you are trying to solve.
Fix 1: Try disabling the Driver Verifier
The DRIVER VERIFIER DMA VIOLATION stop code may appear as a result of some unexpected problems with your computer’s Driver Verifier. Hence, disabling the verifier can fix the issue. Here is how to disable it.
- Firstly, input the Verifier in the search bar on the taskbar.
- Secondly, click on the best match to launch the Verifier.
- Click Yes if a UAC prompt appears on your screen.
- Now, select the option to Delete existing settings and click on the Finish button.
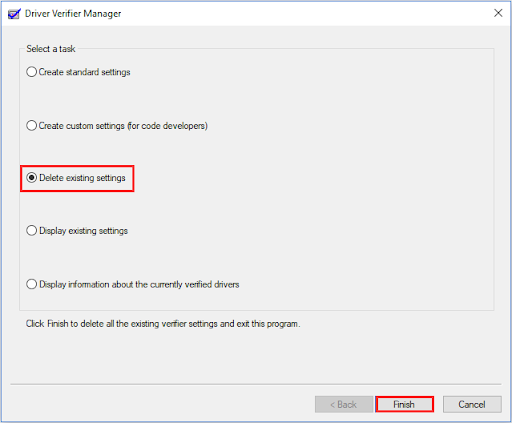
- Lastly, restart your computer and check if the error disappears. If the error persists, you can try the following fixes.
Also Read: Windows Cannot Initialize The Device Driver For This Hardware
Fix 2: Reset your Driver Verifier
If disabling the Driver Verifier does not solve the problem, you can try resetting it. Here is how to reset the Driver Verifier.
- To begin with, use the Windows+R keyboard shortcut to access the Run tool.
- Secondly, input Cmd in the on-screen box and use the Shift+Ctrl+Enter shortcut to launch Command Prompt as an administrator.
- Now, input Verifier /reset in the command line and press the Enter key.
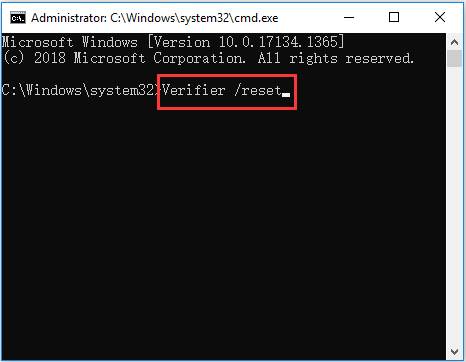
- Lastly, restart your PC to complete the Driver Verifier reset.
Fix 3: Perform Windows update
Your operating system may be buggy or outdated, resulting in the issue you have encountered. Hence, you can update Windows to fix the issue. Here are the steps to do it.
- Firstly, use the Windows+I shortcut to access the Settings panel.
- Secondly, select Update & Security from the on-screen options.
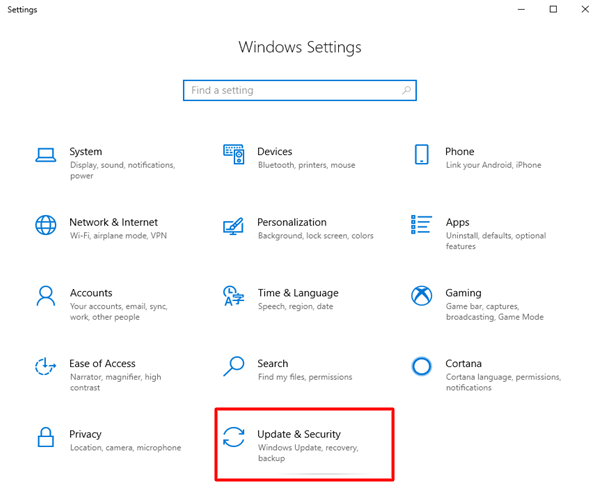
- Now, select the Check for updates option from the right panel.
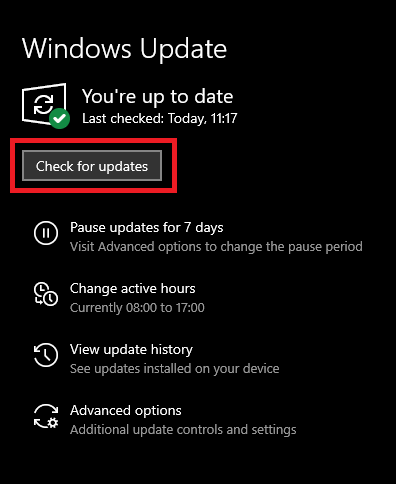
- Lastly, reboot the computer.
Also Read: How to Fix ene.sys Driver Cannot Load on Windows 11
Fix 4: Update outdated drivers (Recommended)
Outdated drivers break the communication between the connected peripherals and the system, leading to BSOD DRIVER_VERIFIER_DMA_VIOLATION stop code and many other issues. Hence, updating drivers is one of the most recommended solutions to your problem.
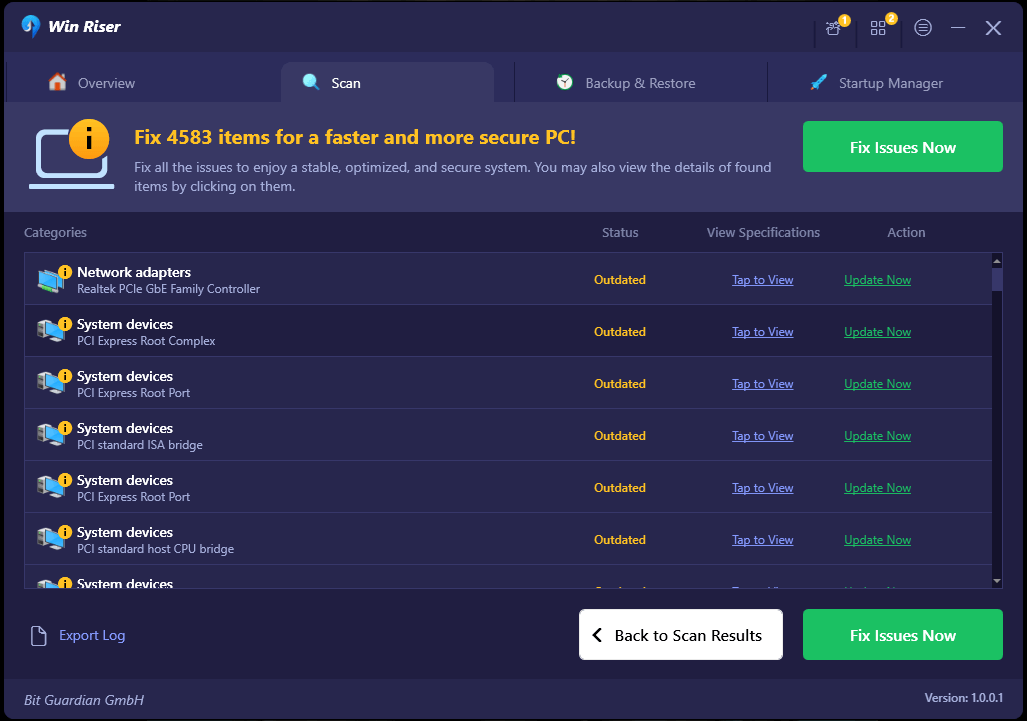
You can update drivers hassle-freely via Win Riser, a renowned program to update drivers and optimize PC performance. Win Riser is best known for its driver backup and restoration, junk removal, malware detection, and a lot of other incredible features. You can experience this wonderful software by downloading and installing it from the following link.
After installing the software, you can follow the below quick series of steps to update all outdated drivers automatically.
- Wait for a few seconds until Win Riser scans your computer for outdated drivers and other issues.
- Secondly, review the scan results to understand what is hampering your computer’s performance.
- Click on the Fix Issues Now button to solve all problems automatically.
Fix 5: Perform SFC scan
Corrupted system files are another reason you may experience problems such as DRIVER DMA VIOLATION Windows 11/10 error. Hence, you can follow the below steps to scan and repair the system issues.
- To begin with, launch Command Prompt as an administrator.
- Secondly, input the sfc /scannow command in the on-screen window and press the Enter key.
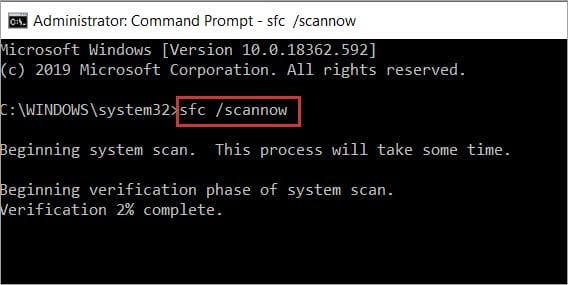
- Now, wait for the process to complete.
- Lastly, restart your computer after the process completes.
Note: If the SFC command fails to solve the problem, you can try the DISM.exe /Online /Cleanup-image /Restorehealth Command Prompt command to repair corrupted system files.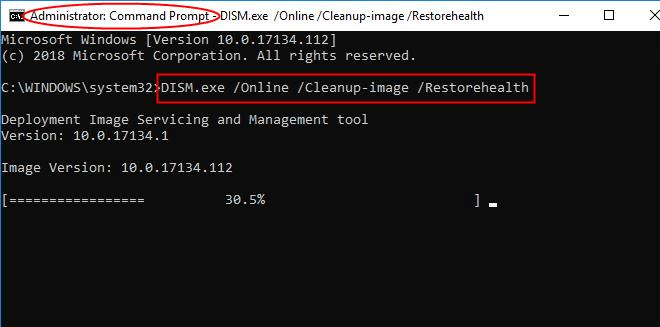
Also Read: How to Fix GeForce Experience Driver Download Failed
Fix 6: Update BIOS
Outdated BIOS may lead to many issues like the one you have encountered. Thus, you can update BIOS to drive the problem away. You can use one of the best BIOS update software to perform this task hassle-freely.
Fix 7: Try updating your SSD firmware
Outdated SSD firmware can cause BSOD errors. Hence, you can follow the below directions to update the boot driver’s firmware.
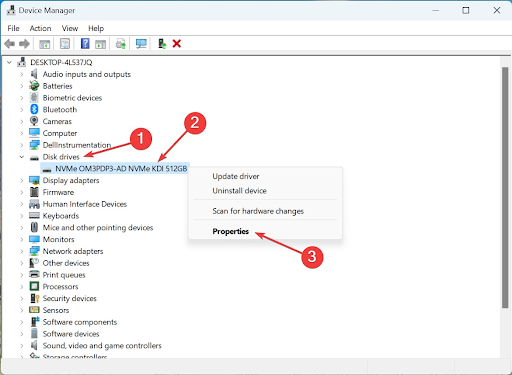
- To begin with, right-click on the Start button and choose Device Manager from the on-screen options.

- After opening the Device Manager, double-click the Disk drives category to expand it.
- Now, right-click your SSD and select Properties.
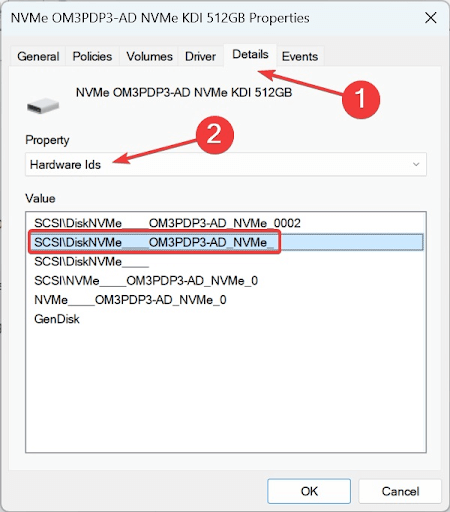
- Navigate to the Details tab and select Hardware IDs from the Property dropdown.
- You can now note your SSD’s hardware ID.
- Search the hardware ID you noted in the previous step using your search engine.
- Navigate to the firmware update section on the website of the manufacturer.
- You can now get the firmware downloaded, run the setup, and complete the firmware update installation.
Also Read: Windows Could Not Find Driver for Your Network Adapter (FIXED)
DRIVER VERIFIER DMA VIOLATION Error Fixed
You can follow the above guide to fix the Driver Verifier Blue Screen of Death error. However, if you have any confusion or have any suggestions for us, feel free to use the comments section below to contact us. We will be more than happy to assist you. Also, kindly stay connected with us to learn how to fix other tech problems quickly and efficiently.


