Epson L380 Resetter Adjustment Program Free Download for Windows 10, 8, 7
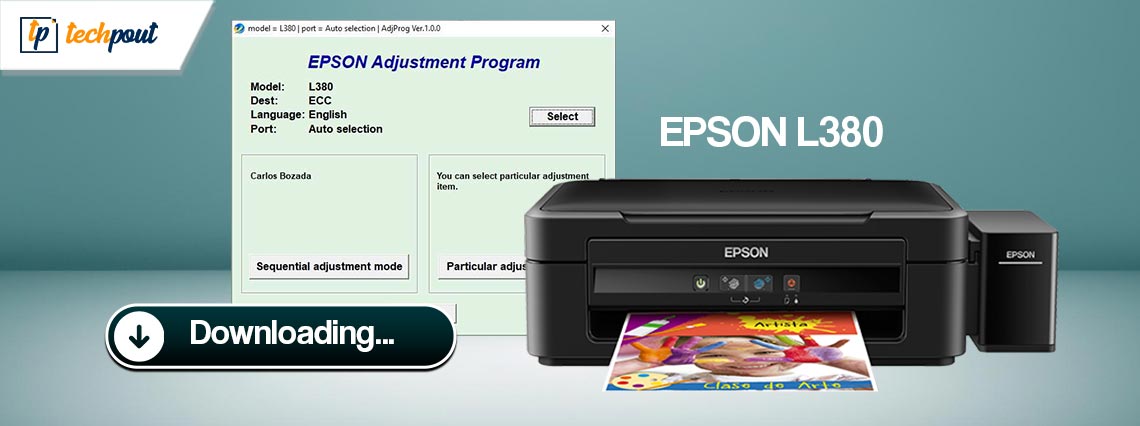
Take the help of this simple guide to learn how to execute the Epson L380 resetter free download and update on Windows 11/10/8/7 and other operating systems with ease.
One of the most often used printers is the EPSON L380 InkTank. It can offer a vast volume of printing pages at minimal printing expense. But then, when a huge page is printed, it displays the words “Service Required.” If you’re anxious because your Epson L380 Printer stops working and flashing red LED lights one at a time, try these steps.
You may go online in quest of advice on how to solve the problem but fail to do the same. If resetting the Epson L380 printer was your response, then you’ve come to the correct location. And we’ll talk about it here in this piece. But forest, let’s look further into the topic.
Why Does My Epson L380 Printer Keep Giving Me This Massage When I Print?
The Epson L380 printer has a lot of sponge pads that are filled with waste ink and are referred to as “Waste Ink Pads.” The printer head produces waste ink when being cleaned. These pads were designed to pick up excess ink. The Epson L380 will immediately shut down when the Waste Ink Pads are full.
This is when you need to execute the Epson L380 resetter software download.
In other words, the printer produces wasted ink during the head cleaning process. This excess ink was easily absorbed by InkPad. A full Waste Ink Pad will cause the Epson L380 printer to cease functioning. To get the printer working again, you’ll need to run the Epson Resetter or Adjustment Program software and swap out the InkPad.
How to Tell Whether Epson L380 Needs a Complete Reset?
If any of the below cases are present, then you need to reset the printer using the Epson L380 adjustment program:
- The Epson L380 printer is displaying the error message
- An indicator is displayed that states End of Life
- The printer is reminding me to consult the Epson Support Center
- Each of its red LEDs is blinking, yet the green Power LED remains on.
So, relax, and check out the answers to the executed Epson L380 resetter free download for Windows 10 that will be presented below.
Instructions Epson Adjustment Program l380 Download for Windows 11/10 and Usage
Further down the line, you will find multiple steps and methods to help you execute the Epson L380 resetter free download. Follow the instructions provided below very closely and reset the printer with ease.
Step 1: Instructions for Obtaining a New Epson L380 Resetter
The first step in fixing your printer is pinpointing the exact issue. You may refer to the post’s instructions if you have any doubts. If you are sure you need to reset the printer, you may do so by following the instructions below and proceeding to execute the Epson L380 adjustment program.
Also Read: Epson L3110 Resetter Adjustment Program Free Download
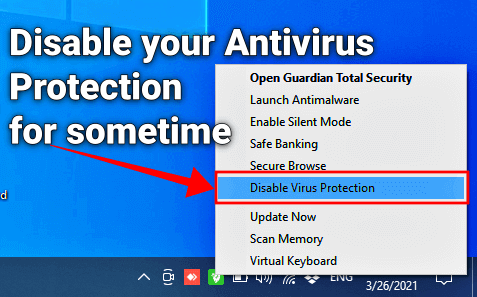
Step 2: Turn off your virus protection software for a while.
Disabling your antivirus program is a good idea before downloading the software. The Epson Adjustment Program cannot be installed or executed if your antivirus software is set to remove certain files as potential threats. Not stating that the Epson L380 resetter free download RAR is harmful in any way, but it’s just a precautionary action done by the antivirus software.
Step 3: Download the Resetter for Epson L380
The next step is to execute the Epson L380 resetter free download for Windows 11/10. For this task, you can either take the help of this link or download the extension for Google Chrome. If you choose to proceed with the former, then continue with the process below. However, if you decide to go with the Chrome Extension, follow the procedure described at the end.
Step 4: Open the RAR File
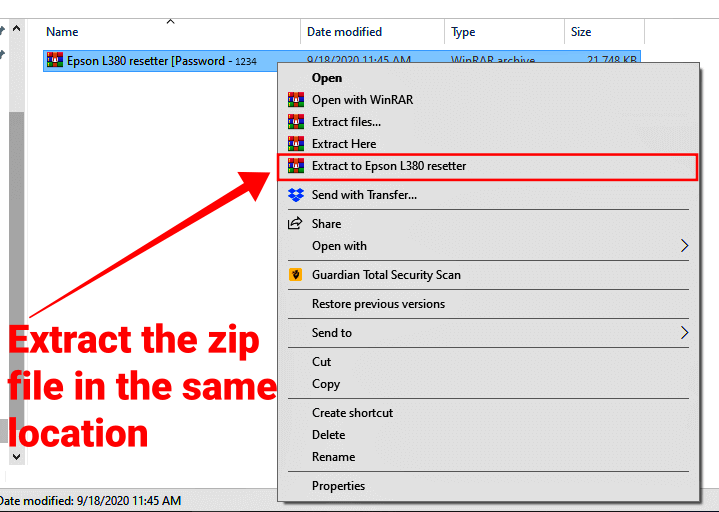
If you don’t have the WinRAR tool installed on the system, you may not be able to proceed. You can download and install the WinRAR software from the official website of WinRAR. Once you do the same, run the saved file on the system to proceed (select the WinRAR tool to open the RAR/ZIP file). After running the file, extract all the files and data from the folder to the system (right-click on the file and select the option named Extract here).
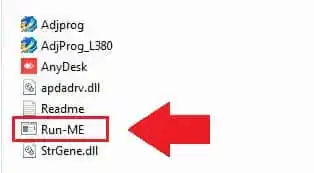
Step 5: Launch the Run-Me File
Once you click the button above to get a compressed file containing the Epson L380 adjustment program, proceed as directed. From the extracted folder, launch the “Run-ME” file. The current window will be replaced with a new one.
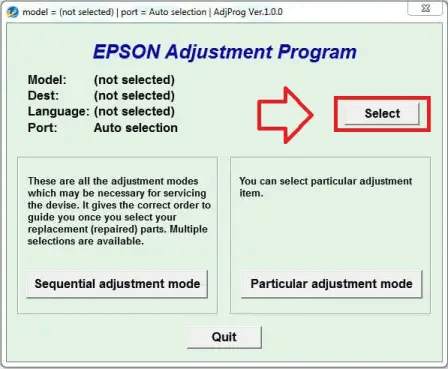
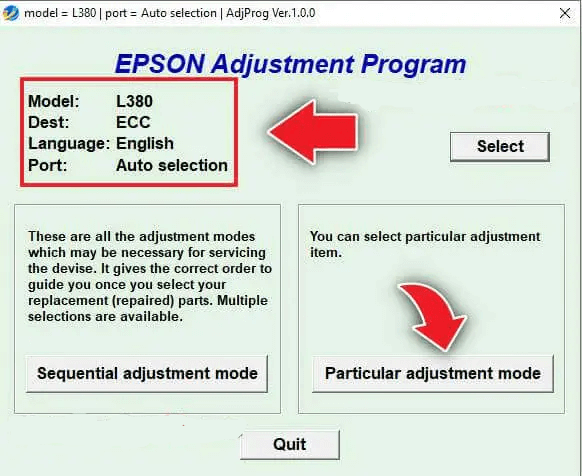
Step 6: Click on the Select Button
A new window will open when you choose the “Run-ME” file in the Epson L380 Resetter folder and click the “Select” button. You may need to click the Run button to get to the Select button. In this box, you may choose from four options by clicking the Select Button button.
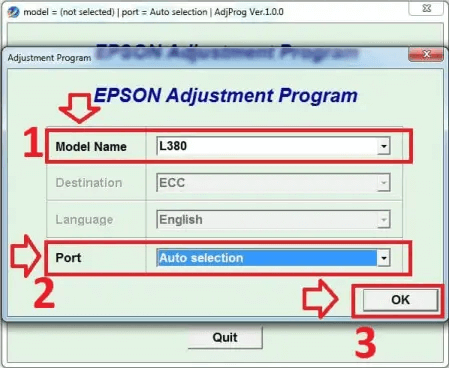
Step 7: Pick The Model Number and the Port Type
Within this window’s Model Name drop-down option, choose “L380” to indicate the printer model you’ll be using. Then click the Port pull-down menu’s “Auto Selection” option, followed by the OK button.
Step 8: Particular Adjustment Mode
To proceed with the Epson L380 adjustment program usage, a certain method of tweaking may be accessed by clicking the corresponding button. You need to click the “Particular adjustment mode” button after you’ve selected the “OK” button.
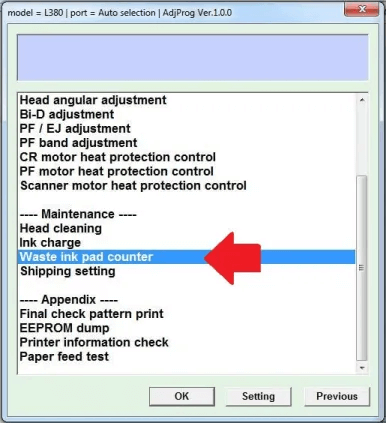
Step 9: Go to the Counter for Spent Ink Pads
The “Waste Ink Pad Counter” option is the one you’ll want to choose here.
Step 10: Select “Main Pad Counter” and hit the “Check”
When you choose the “OK” button, a new window will pop up. First, enable the “Main pad counter” option on the screen. Next, choose “Check” from the menu. As you can see, Inkpad is completely filled. The ink cartridge in your printer has reached capacity.
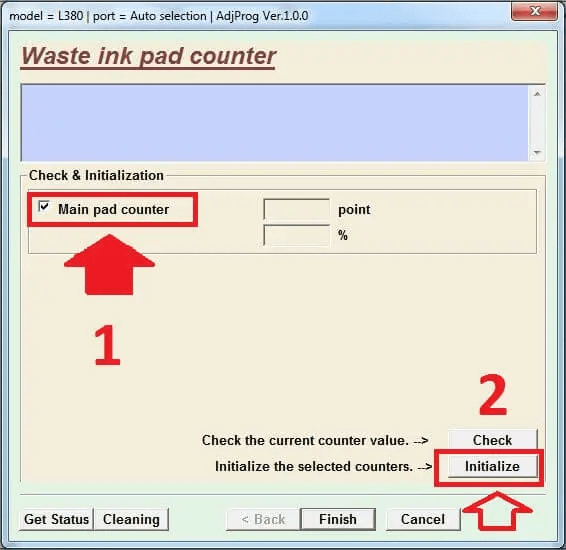
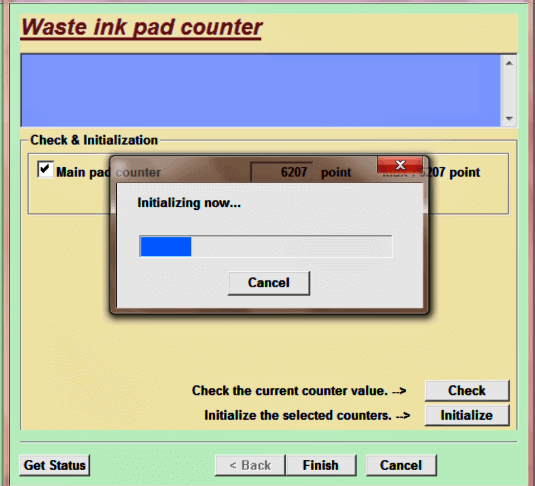
Step 11: Select the Main Pad’s Counter and Initiate by Pressing the Button.
First, choose the option labeled “Main pad counter” from this screen. Select the “Initialize” option then.

Also Read: Epson L360 Resetter Tool Free Download | Epson Adjustment Program
Step 12: The OK button must be clicked.
You’re finished with it now. The Epson L380 resetter tool was successfully used. Printing services are now available from your printer.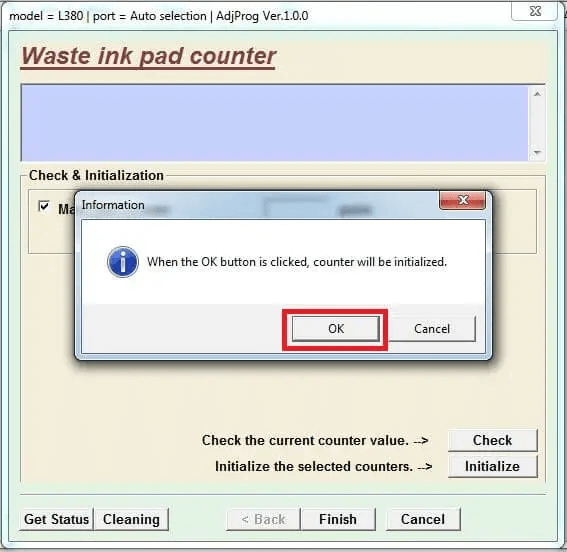
Step 13: Put the Printer to Sleep
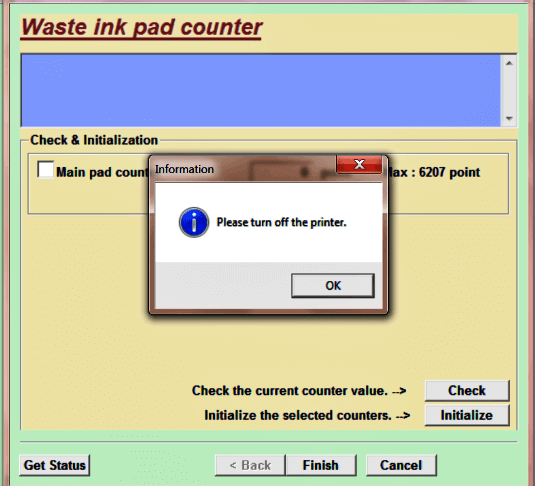
Next, to use the Epson adjustment program L380 proceeds as directed. The printer will start in less than a second after you press the “Initialize” button, at which point it will display a message reading “Please turn off the printer.” Turn the printer’s power off and then back on.
So, this is how you can easily execute the Epson L380 resetter free download for Windows 7 and reset the printer as well. If you have decided to proceed with the Chrome Extension, then all you need to do is install the extension and run it to reset the printer. The same extension can also reset other printers from the series.
Download the Resetter for Epson L380: Completed
So, in the previous sections of this guide, we had a look at how to execute the Epson L380 resetter download and use the tool. Once you execute the above solutions the printer will start working perfectly and won’t show any error light. Moreover, the printer will also start running smoothly.
If we were able to help you with the Epson L380 resetter free download for Windows 11/10/7, then do follow our social media pages. Also, subscribe to our newsletter for daily blog updates.
