How to Fix No Signed Device Drivers Were Found Error in Windows 11/10
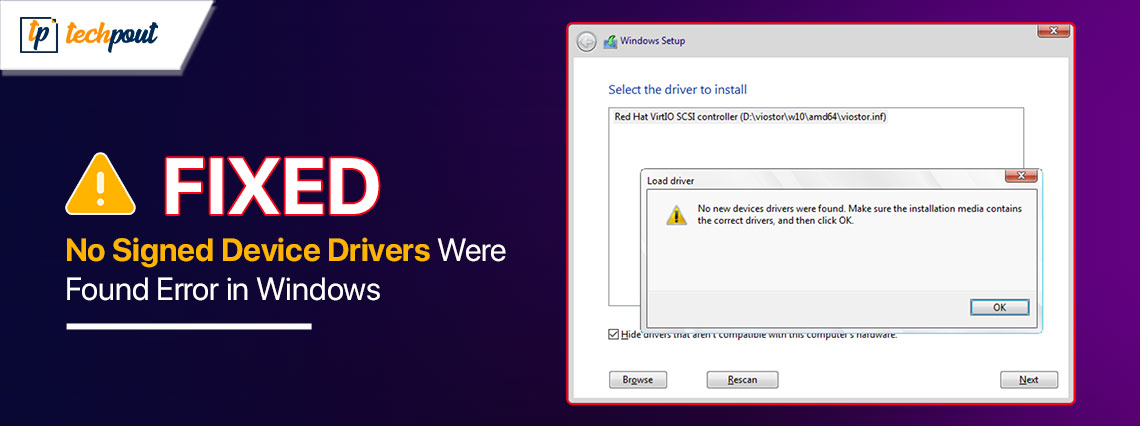
This article presents an effective guide to the device driver error you encounter when performing Windows installation or repair.
The “no signed device drivers were found” issue can be frustrating. However, you are not alone in experiencing this error. Many other Windows users row the same boat. Hence, we are here to help.
We have prepared this quick and easy guide with the most suitable solutions to this problem. However, before moving ahead to the solutions, it is crucial to understand the factors that may have triggered the issue. Hence, let us discuss them in the following section of this article.
Why No Signed Device Drivers Were Found
The following factors may be responsible for the issue you are experiencing.
- The primary partition is inactive
- Your computer does not have the needed disk drivers
- The drive connection is improper
- A disk drive is not enabled in the BIOS
- The USB 3.0 port is malfunctioning or problematic
The above section of this article discusses the reasons you may encounter the signed device driver error on your PC. Let us now learn how to fix this issue.
Fixes for No Signed Device Drivers Were Found Error
You can apply the following solutions to get rid of the problem you are experiencing when installing or repairing Windows on your computer.
Fix 1: Try using a USB 2.0 port
A malfunctioning or problematic USB 3.0 port may be why no signed device drivers were found when installing a Windows operating system. Hence, you can switch from USB 3.0 to USB 2.0 port to solve this problem. However, if the problem remains unsolved, do not lose heart, as there are more fixes to try.
Fix 2: Activate your system partition
After accepting the license agreement, during Windows installation, you are required to choose the hard drive section (partition) where the operating system and its files will be installed. If the selected partition is inactive, Windows may struggle to boot, resulting in the issue you are trying to fix. Hence, you can follow these directions to set the system partition as active.
- The first step is to use the Windows installation USB to boot your computer.
- Next, choose the option to Repair your computer. Selecting this option will take you to the preinstallation environment.

- You can now choose Troubleshoot from the available options.
- In this step, select Command Prompt from the on-screen menu.
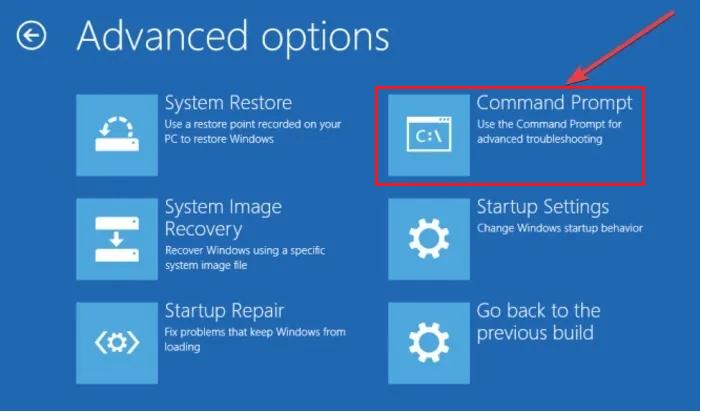
- Next, input the diskpart and press your keyboard’s Enter key.
- Input list disk to get a list of all the available disks.
- You can now input Select disk X (here, replace X with the number of the disk in which you wish to activate your system partition.
- In this step, input the list partition and press the Enter key.
- You can now choose the partition that you wish to install Windows through the select partition X command. Please remember to input your partition number in the place of X.
- Next, input active and press the Enter key.
- After executing the above commands, input exit and hit Enter to close the diskpart tool.
- Lastly, reboot your computer using the Windows installation media.
Also know: How to Fix IDT High Definition Audio CODEC Driver Problem on Windows PC
Fix 3: Get the necessary disk drivers downloaded
You may experience the “No signed device drivers were found” error if your computer does not have the needed disk drivers. Without the driver, the Windows Installation media cannot access the connected drives. Hence, if your computer is bootable or from another bootable computer, you can download the disk drivers. Here is how.
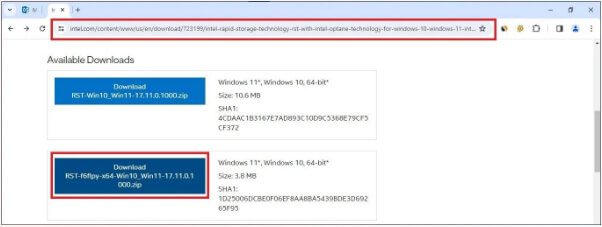
- First, go to your browser and look for Intel Rapid Storage Technology drivers or AMD Rapid Storage Technology drivers (if your computer has AMD).
- Next, navigate to the manufacturer’s official website and search for the driver compatible with your Windows version.
- In this step, download the driver file (one that has a .zip extension).
- Unzip the driver file after downloading it.
- Next, connect and open the Windows OS installation media.
- After opening the Windows installation media, create a drivers folder.
- In this step, navigate to the directory where the driver folder is extracted.
- Next, paste that folder into the recently created drivers folder present in the Windows installation directory.
- After completing the above steps, use the bootable media to reboot your computer.
- Click on Browse and select your driver folder when you get the Windows setup “No signed device drivers were found” error message.
- Click OK to proceed to the next step.
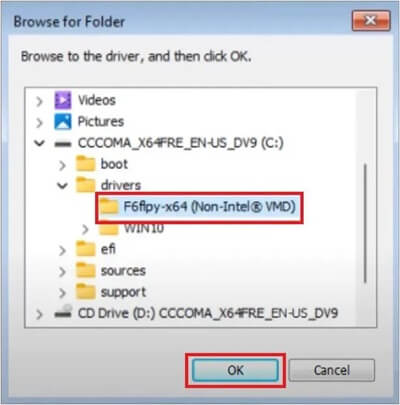
- You will now get a list of drivers on your screen. Select the compatible driver from the on-screen list and click Next to install the driver.
Pro Tip: If you find the above steps complicated and wish to save time and effort, you can download and install the updated driver automatically using Win Riser, i.e., one of the best driver update software available for Windows computers.
Fix 4: Format your hard drive
Hard drive problems are another reason “No signed device drivers were found” on Windows 11/10. Hence, formatting the hard drive is also a solution to this problem. You can follow these steps to format the hard drive.
- First, launch the Windows installation wizard.
- In this step, choose the language and click Next.
- You can now choose Repair your computer.
- Next, go to the Advanced Options and select Command Prompt.
- Input your password and click Continue to proceed to the next step.
- You can now enter the following commands.
diskpart
list disk
select disk [disk-number]
clean
create partition primary
format fs=ntfs quick
- Lastly, exit all windows and start the installation process again.
Fix 5: Try creating a new disk
Creating a new disk has fixed the error for some users. Hence, there is no harm in trying this solution by following the below directions.
- First, get the Windows Media Creation Tool downloaded.
- Secondly, run the downloaded tool on your computer.
- After following the on-screen directions, select Create installation media for another PC.
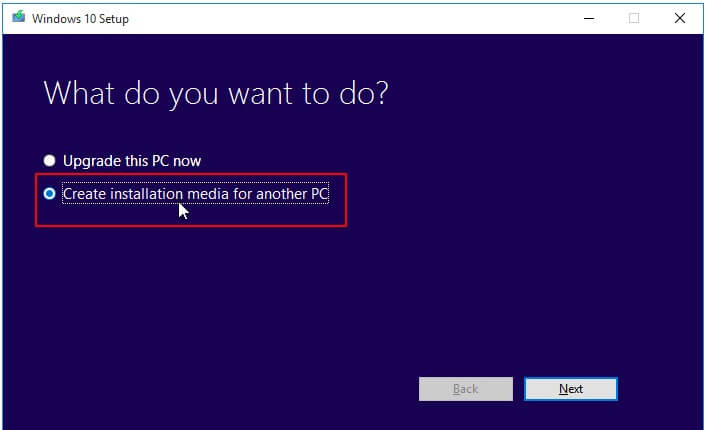
- In this step, select language, edition, and architecture to proceed to the next step.
- After making the above selections, choose Create a USB installation drive or an ISO file option. If you select ISO file, make sure you mount it to the CD, USB, or DVD.
- Next, connect to the PC to install the OS and check whether or not the issue is fixed. If the issue persists, jump to the next solution.
Fix 6: Get the xHCI Hand-Off options enabled in BIOS
According to some users, enabling the xHCI Hand-Off options in BIOS fixes the problem. Hence, you can enable it by following the below steps.
- The first step is to open settings using the Win+I keyboard shortcut.
- Next, navigate to the System setting and select the Recovery option.
- In this step, choose Restart Now from the options available in the Advanced Startup.
- Next, choose UEFI firmware settings from the on-screen options.
- You can now select Restart to let your PC boot into BIOS.
- After the BIOS setup screen appears, navigate to the Advanced tab and choose USB Configuration from the available options.
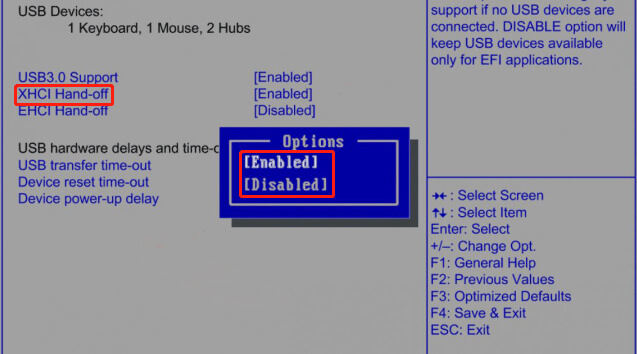
- In this step, go to the XHCI Hand-Off option (available in the USB options) and Enable it.
Also know: Best Ways to Fix Common Driver Problems on Windows 10, 8, 7
Fixed “No Signed Device Drivers Were Found”
This article elaborated on the best possible solutions to the device driver error you are struggling with. You can begin troubleshooting with the first solution and keep moving down the list until the problem is resolved. We hope you found this guide helpful. However, if you have any questions or concerns about this write-up, you can drop us a comment.

