How to Fix System Restore Failed to Extract the File Windows 10,11
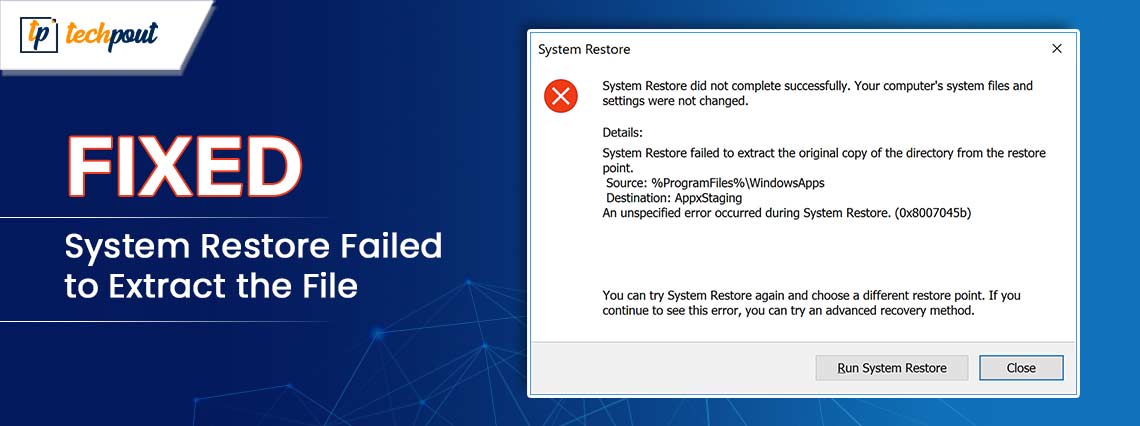
You can read this article to learn the best ways to solve the System Restore failed to extract the file problem.
Windows is an operating system with mechanisms like System Restore in place to help you if anything goes wrong. System Restore is an in-built Windows feature that lets you revert your PC to the previous state at an earlier point in time so that your computer can recover from malfunctions or other issues. However, many users have reported their System Restore failed to extract the file.
If you are also concerned about the same problem, this article is here to help you. This article walks you through the tried and tested solutions to this issue.
However, before learning how to troubleshoot the Windows 11/Windows 7/Windows 10 System Restore failed to extract the file issue, let us understand what may have triggered the issue.
Understanding the causes of an issue helps fix it better. Hence, the following section shares the same.
Why System Restore Failed to Extract the File
Below are the reasons behind the System Restore file extraction failure error.
- Closed System Restore
- Disk corruption
- Corrupted system files
- Windows build issues
- Insufficient storage space
Above, we listed all the top factors that may have caused the problem you are experiencing. Now, let us go through the solutions you need to get rid of this issue.
Fixes for the System Restore Failed to Extract the File Error
Here are the solutions you can apply to solve the Windows System Restore file extraction problem.
Fix 1: Use safe mode to perform System Restore
Running System Restore from the safe mode solved the System Restore failed to extract the file problem for many users. Hence, you can perform the restore via Safe Mode. Here are the directions to do it.
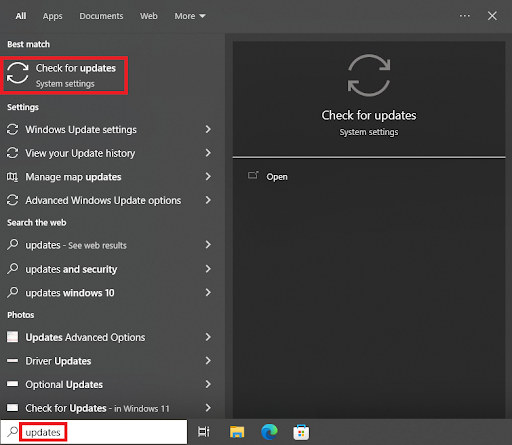
- To begin with, input Windows Update in the search box present on the taskbar.
- Secondly, choose the Check for updates option.
- Now, select Recovery from the Update & Security menu.
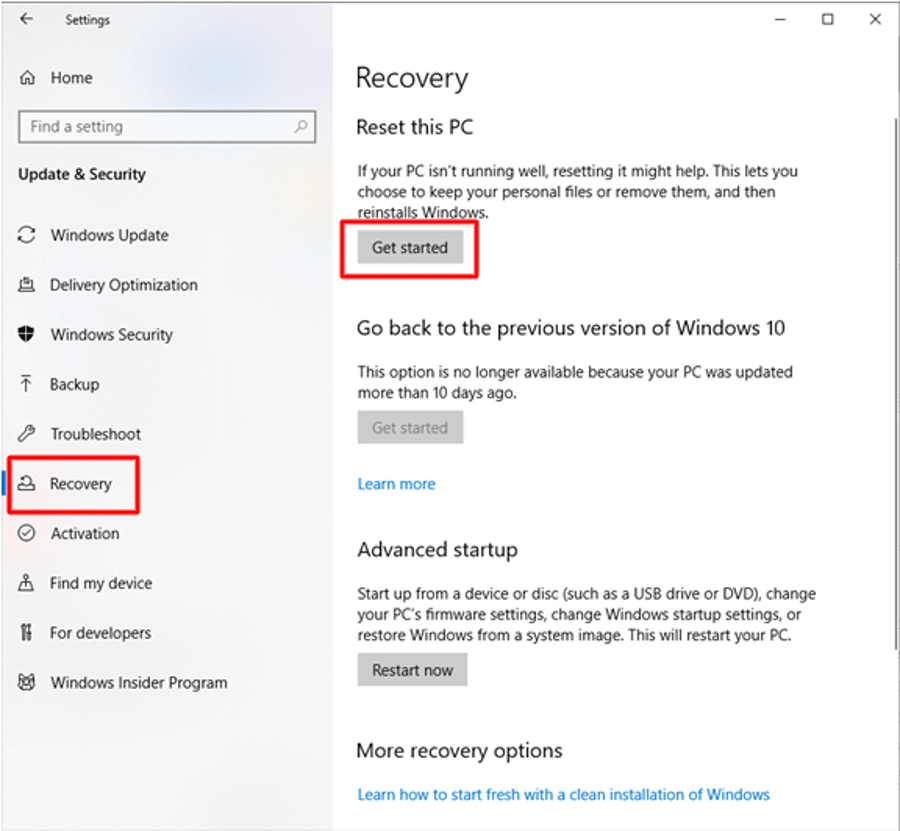
- Navigate to the Advanced Startup and select the Restart Now option.
- Select Troubleshoot from the options on your screen.
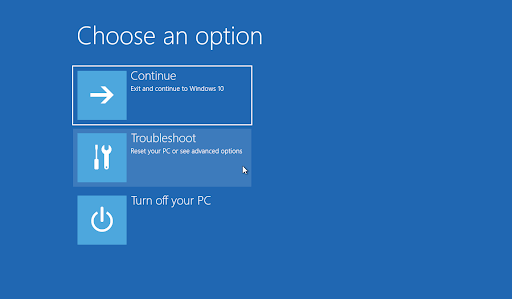
- Choose Advanced Options from the Troubleshoot menu
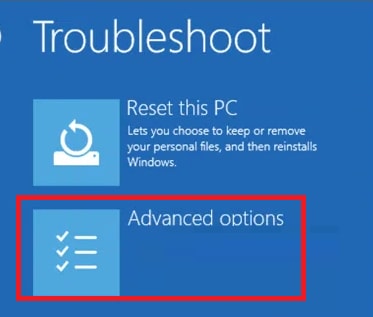
- Select Startup Settings from the on-screen menu.
- Now, you can use your keyboard’s arrow keys to select and Enable Safe Mode.
- After enabling the safe mode, input CMD in the search bar.
- Right-click Command Prompt and choose the Run as administrator option.
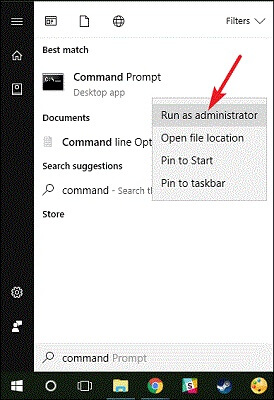
- Now, turn off the network and input the rstrui.exe command in the on-screen window.
- Press the Enter key on your keyboard and wait for the System Restore to start.
- Lastly, select your desired restore point and check if the file extraction error has disappeared. If it still exists, we have more fixes for you to try.
Also Read: How to Backup and Restore Files in Windows 10
Fix 2: Check the hard drive
A faulty or corrupted hard drive is another reason System Restore failed to extract the file. Hence, you can follow the below steps to check and fix the file system errors or bad sectors to drive the problem away.
- Firstly, search and open Command Prompt (as an administrator).

- Secondly, input the chkdsk D: /f /r command in the elevated Command Prompt (remember to replace D: in the command with your drive letter) and press Enter.
- Lastly, try performing the system restore after completing the scan.
Fix 3: Check the system files
Corrupted system files cause a plethora of problems (including Windows 7/Windows 10/Windows 11 System Restore failed to extract the file issue). Hence, repairing the system files can help you fix the issue. Here are the steps to do it.
- Firstly, launch Elevated Command Prompt, i.e., Command Prompt as an administrator.
- After opening the Command Prompt, type the sfc /scannow command and press Enter on your keyboard.
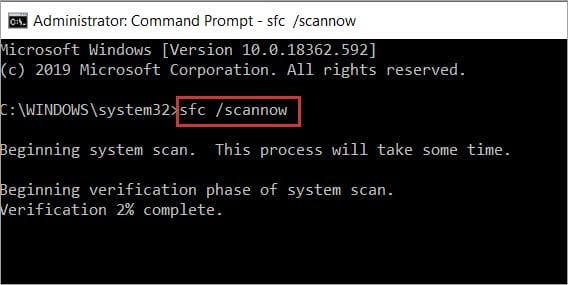
- Wait patiently for the scan to complete.
- Check whether or not the issue is fixed. If the SFC scan does not fix the issue, execute the following commands one after the other in the elevated Command Prompt.
DISM.exe /Online /Cleanup-image /Scanhealth
DISM.exe /Online /Cleanup-image /Restorehealth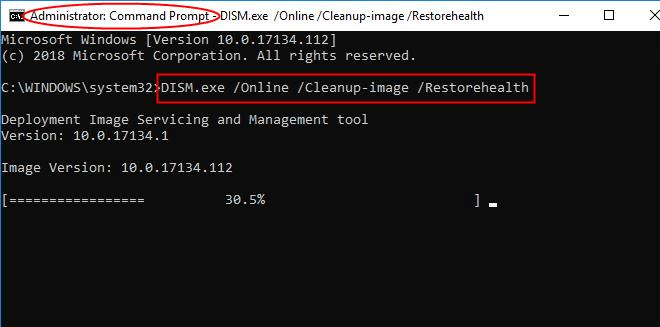
- Lastly, restart your computer after executing the above commands.
Also Read: How to Use System Restore on Windows 10
Fix 4: Ensure System Restore is enabled
The file extraction error may appear if the System Restore is not active on your computer. Hence, here is how to enable it to solve the problem.
- Firstly, open the settings panel using the Windows+I keyboard shortcut.
- Secondly, choose System from the available settings.
- Choose About from the left pane of the system settings window.
- Now, select System Protection from the available options.
- Lastly, turn on the system protection settings to enable system restore.
Fix 5: Try creating a new system restore point
Creation of a new restore point is yet another approach that helped users fix the System Restore failed to extract the file issue. Hence, you can follow the below-mentioned steps to create a restore point.
- Firstly, input Create a restore point in the Windows search.
- Now, select the first result.
- Navigate to the System Protection tab and select the Create option.
- Lastly, input the restore point’s name and select the Create button to get the restore point created.
Fix 6: Try reinstalling Windows
If none of the above solutions solve your problem, you can reinstall Windows as a last resort. Though Windows reinstallation is a lengthy process, here is how to perform it.
- To begin with, open Settings (you can use the Windows+I shortcut).
- Secondly, select the Update & Security setting.
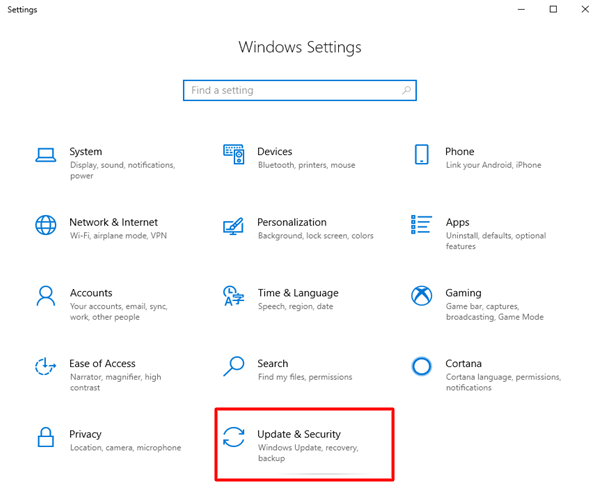
- Now, choose Recovery from the left pane.
- Select Get Started from the right pane.
- Now, you can choose to remove everything or keep your files.
Note: Keeping files saves your personal files and removes all the applications and settings.
- Lastly, select the option to Reset your computer.
Also Read: How to Restore Deleted Notes from iPhone, iPad, Mac, or Windows PC
System Restore Failed to Extract the File Issue Fixed
This article tried to help you fix the System Restore file extraction error on Windows 11/10/7. You can begin troubleshooting the issue with the first fix and continue trying all the solutions until the problem vanishes.
If you need more assistance or have any suggestions regarding this post, you can comment without any hesitation. We will be happy to help.


