Fixed: A Device Which Does Not Exist Was Specified Windows
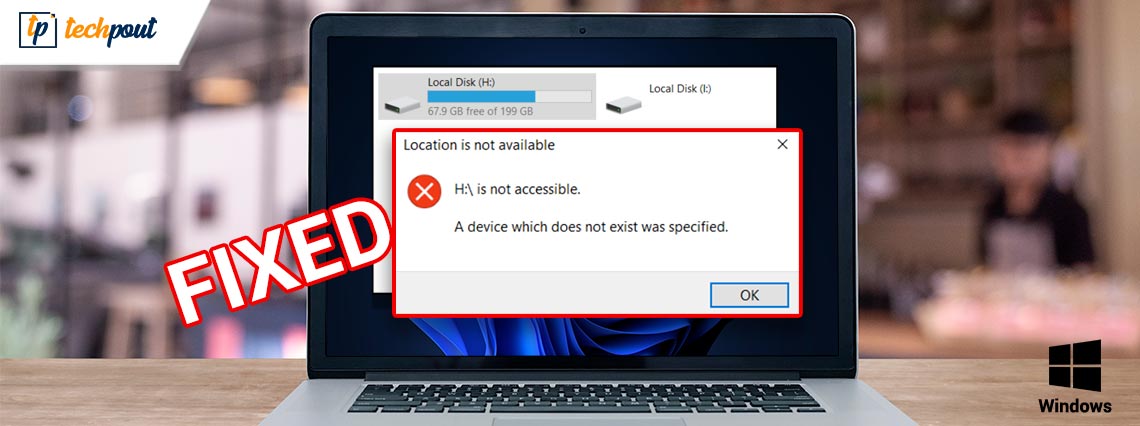
Fix the A Device Which Does Not Exist Was Specified error on Windows 11/10 quite easily with the help of this simple guide providing some of the most helpful solutions.
The error reading A Device Which Does Not Exist Was Specified on Windows 11/10 may appear quite commonly on File Explorer. There can be various reasons behind this error, the most common one of which is the system is unable to find the drive. When you connect some external storage device like the memory card, pen drive, external storage disk, etc. and the same is unrecognizable by the system, this message appears. However, this does not mean that the error can never appear with internal devices.
The error can be fixed very easily. There are certain solutions that you can follow and fix the error instantly. To help you, and all those who are facing this error, we have curated this guide. Here, you will find the best and most viable solutions to fix the error pop-up once and for all. So, let’s have a look at solutions right away for detailed inquiry.
How to Fix “A Device Which Does Not Exist Was Specified”
The further sections of this guide bring together a list of methods to fix A Device Which Does Not Exist Was Specified. Our only suggestion is that you follow the solutions chronologically until the error is fixed permanently.
Solution 1: Change the Connection Port and Restart the System
What you can do to fix the error at the first is to unplug the device and try using another port. Disconnection and reconnection will allow the system and the device to get a fresh start and run the same properly. Try switching the port to rule out any problems with the port. Restart the device as well. If changing and restarting do not help you get rid of the error, then you can try using the next fix.
Also Read: How to Fix Critical Process Died BSOD Error in Windows 10
Solution 2: Grant the Required Drive Access
One of the most common reasons why the A Device Which Does Not Exist Was Specified error appears is the lack of drive access. At times, the system may turn off access to the drive for any user. This commonly happens when more than one user is using the system with different profiles. Hence, in such a case, you need to provide system access to the drive for it to work properly. The steps provided below will help you with the same:
- Open the File Explorer window. Look for the device that’s showing the error, and open its Properties by right-clicking the drive.

- Click on the tab named Security and select Edit.
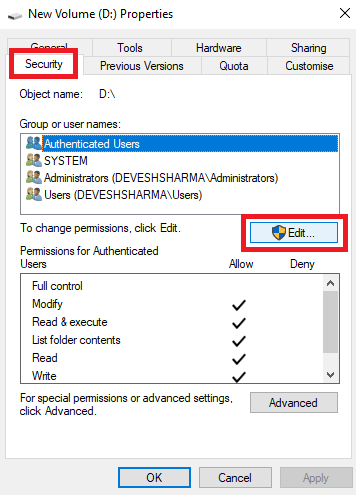
- Now you will see a series of users. Select your profile and checkmark the box stating Full Control. (This option will offer full control to the user to access and modify the system attributes with ease.)
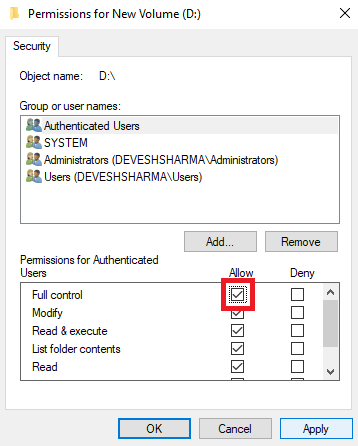
- To successfully apply the settings, click on Apply and Ok.
The above process would not harm your system but will provide advanced and complete control over the connected drive. If the error is not resolved after executing the solution, jump on to the next one.
Solution 3: Refresh the Drive
Although the system refreshes the drives automatically, at times may fail to do the same. In such a case, you need to refresh the drive manually. The process to do the same is quite easy to follow and harmless. So, you can move right away and fix the problem using the set of steps provided below for refreshing the drive:
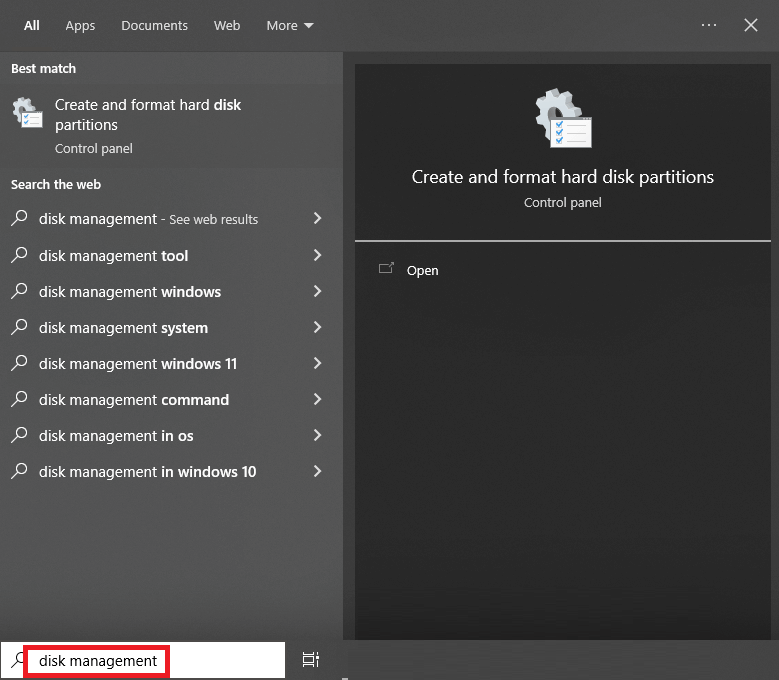
- Press the Win+S keys, type Disk Management, and hit the Enter key.
- Click on the drive that is showing the error and click on the Action tab.
- Select the option to Rescans Disks.
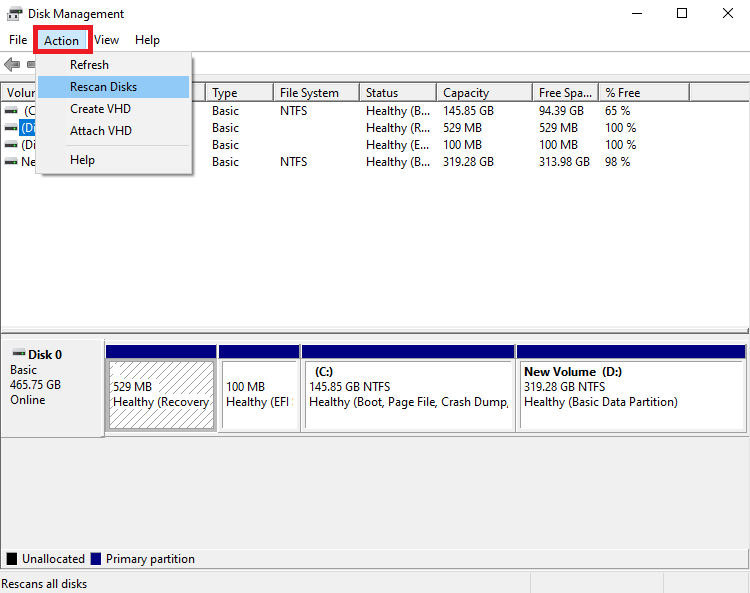
Once the process is complete, try to access the refreshed drive to see if it is working properly or not. If not, then the issue may be related to the driver of the device. Follow the next solution to address the driver-related issues.
Also Read: How to Fix Critical Structure Corruption Error in Windows 10
Solution 4: Update the Outdated Drivers Using Bit Driver Updater
The easiest approach to fix A Device Which Does Not Exist Was Specified on Windows 10/11 is to keep your drivers up to date on your system. For this, it’s best to utilize a third-party driver updater. Nevertheless, because all third-party programs cannot be trusted, we recommend that you utilize the Bit Driver Updater. This is an incredible service that millions of users rely on to satisfy driver update needs.
The application is much more extensive than a simple driver updater. It provides you with vast capabilities that are difficult to discover in other programs. Bit Driver Updater can do everything for you including:
- With a single click, you can update drivers for printers, network adapters, graphics cards, and other devices.
- Backup current drivers and restore them if necessary.
- Modify the interface’s language with ease.
- If the user prefers, ignore any driver updates.
- Provides only WHQL-certified drivers without exception.
Not only these but there are various other capabilities available with the tool. Nonetheless, let us not overburden this guide by detailing all of these. When you utilize the tool, you will have access to all of these features. For now, let’s understand how the tool fixes A Device Which Does Not Exist Was Specified error from the steps provided below:
- Download the Bit Driver Updater setup by clicking the button below.

- Install the software on your device by running the installation.
- Allow the software to check the system for device updates. If required, use the Scan Drivers button.
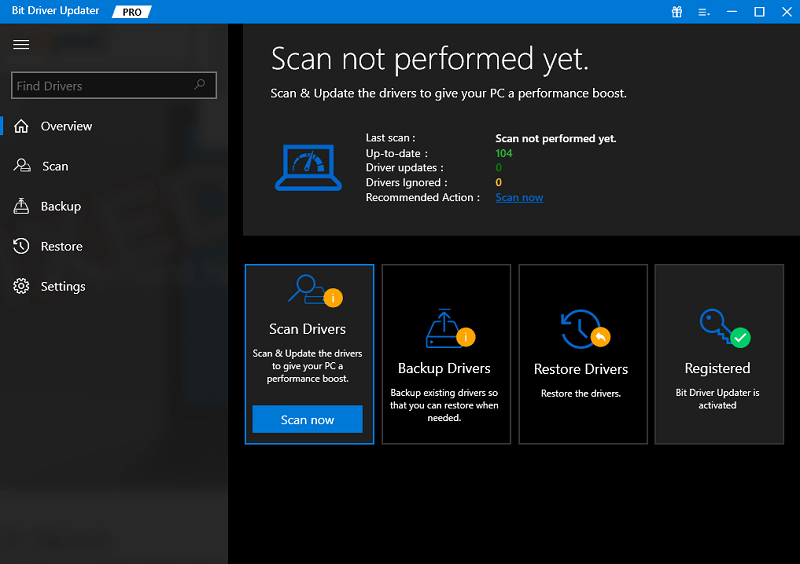
- To install the appropriate driver, select the Update Now or Update All option (s). The former allows you to download individual drivers, whilst the latter does it in a single click. To utilize the Update All button, you must have a premium version.
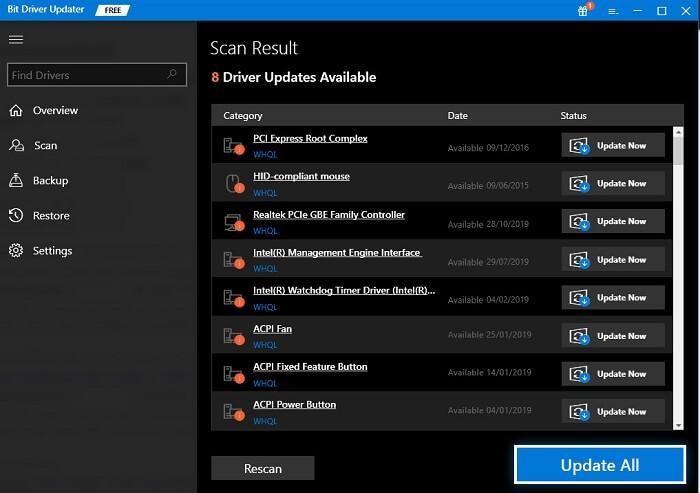
- When the necessary driver has been installed, restart the system.
If the drivers are not the reason behind the error, the same will persist. Follow the next solution to fix the error.
Solution 5: Reinstall the Drive
If the above methods fail to fix A Device Which Does Not Exist Was Specified, then the error can be with the device. To fix such errors, you can try uninstalling and reinstalling the device. This will allow all the bugs to set away and the drive will run properly with the system. Follow the steps below to know how to do the same:
- To begin, go to the taskbar’s search section, type Device Manager, and open it.
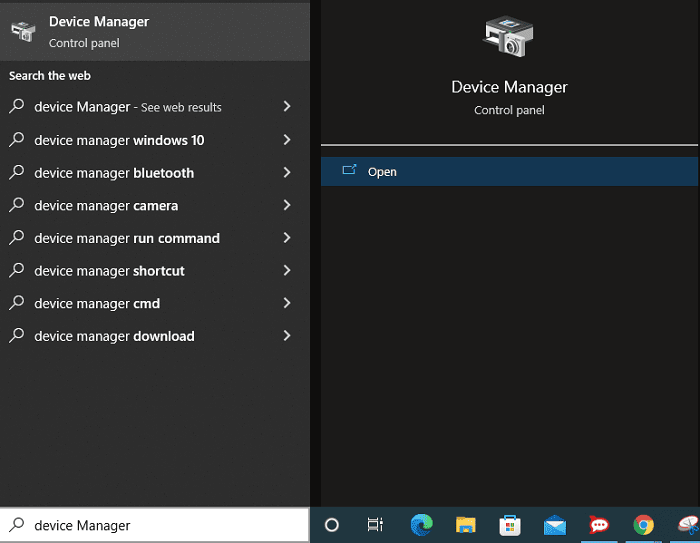
- When the tool opens, after a few seconds, seek the Disk Drives category and expand it by double-clicking.
- One of them may include the printer. Right-click the drive device and click on the Uninstall Device option.
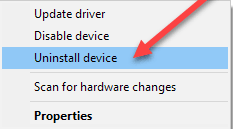
- The system may ask you to confirm the move, so do the same.
- Once the device uninstalls, disconnect the device and reconnect it to reinstall the driver.
Also Read: Fix the Requested Operation Requires Elevation Error on Windows PC
A Device Which Does Not Exist Was Specified: Solved
The error stating the message, as shown above, does not pose any threat to your system or its files. There is no reason for you to worry if this error appears. A couple of easy solutions will allow you to fix the error and get on with using the drive as you want. Once this error resolves, you can copy-paste data, run the drive, and do anything you would have done normally with any drive.
Due to one reason or the other, you may face problems in fixing A Device Which Does Not Exist Was Specified. If so, you can seek our assistance for quicker and smoother resolution. All you need to do is write your queries or explain your problems in the comments section below. We will help you get rid of the same. Additionally, if everything’s fine and you liked this guide, you can share your experience as well.
We really appreciate you taking the time out and checking out our social media pages on Facebook, Twitter, Instagram, Pinterest, and Tumblr. Take the next step and subscribe to our blog’s newsletter. Doing this will ensure that you always stay up to date with problem-solving and helpful guides like this one on how to fix A Device Which Does Not Exist Was Specified.

