How to Add Google Docs Border (Top 5 Ways)
If you want to add different types of borders on your document, take the help of this guide to add any Google Docs Border with ease.
A border may give a document an air of professionalism and help it stand out from the crowd. When working with Google Docs, you have a number of options available to you when it comes to creating borders. You may more easily style your document the way you want to by learning how to create a border, as well as how to alter or change the border. In this article, we cover the many methods by which you may add a border to a document using Google Docs. We also describe what a border is and why you would use one.
You can create documents quickly and easily using Google Docs but don’t expect the same level of functionality that you’d get from a full-featured word processor like Microsoft Word. This becomes immediately apparent when attempting to create a document with a Google Docs Border that wraps completely around the page. Although this feature isn’t officially supported, it is possible to get the desired effect by using a workaround. But before we get to it, let’s know more about borders in Google Docs.
What is Google Docs Border?
Borders are lines that enclose a paragraph, text box, or entire document. The program automatically disables these lines during file creation and does not display them during document editing. To add a border to your document, you have two options. First, you can choose the Google Docs Border option from the formatting menu. Alternatively, you can enclose your document within a table to create a border. A common practice among users is to create a border around their documents. This is done to help with organization and to draw attention to a specific section of files.
Also Read: Best Google Docs Offline Extension
Why Do I Need the Border?
A Google Docs Border or Borders has the ability to enhance the visual appeal of your document by incorporating elements like line width or color. They also serve the purpose of directing the reader’s attention to specific sections within the document. When readers are faced with a uniform text box, it can cause strain on their eyes, particularly when reading longer documents.
How to Apply Google Docs Border?
When it comes to applying the Google Docs border, there are various techniques and alternatives that you can try. These solutions allow you to apply different types of borders to your document. You can use any of these as required to do the deed.
Method 1: Set a Border to an Image
In Google Docs, there is a feature that allows you to add a border to an image. Using this tool can be beneficial if you are looking to enhance the visual quality of an image for a presentation. To add a Google Docs Border around an image, you can follow these steps:
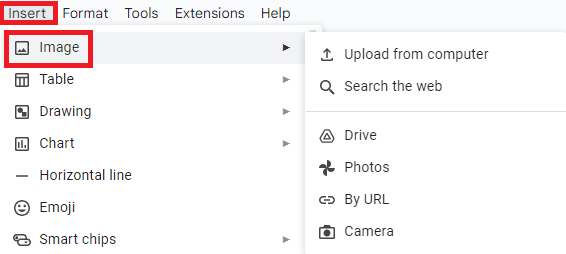
- To insert an image, please click on the “Insert” option located on the menu bar. Then, select the “Image” option. To choose the image source, you can select it from the drop-down menu. The available options include Google Drive, your computer, or Google Photos.
- Find the image file that you want to include in the document, and then select the “Open” option to add it. If needed, you have the option to adjust the size of the image by utilizing the anchor points.
- The toolbar contains icons that allow you to customize the Google Docs Border of the image.

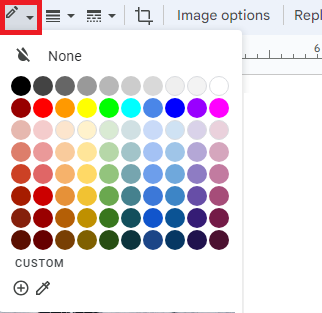
- The pencil icon located in the toolbar provides the option to modify the color of the border. Please select a color that aligns with your specific needs or preferences.
- The toolbar contains a three-line icon that enables you to adjust the width of the border. The available options for selecting a border width range from 1pt to 24pt. As the numerical value increases, the width of the border also increases.

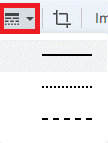
- To modify the appearance of the border, locate and select the border style icon. You have the option to choose between using dots, a solid line, or dashed lines.
Also Read: How to Double Space In Google Docs
Method 2: Set Border to Some Text
In Docs, you have the option to add borders specifically around a paragraph instead of applying them to the entire page. To add a border around a paragraph, you can follow these steps:
You can enhance the visual appeal of your document by incorporating shading and a border, regardless of the length of your paragraph. The currently selected border is now enclosed by an additional Google Docs Border. If you are unsatisfied with the outcome, you have the option to navigate to the “Format” section in the menu. From there, you can adjust the border styles to align with your specific preferences.
- Please indicate the specific paragraph to which you would like to apply a border. To perform this action, position your cursor at the desired starting or ending point of the paragraph. Then, click and hold the mouse button while moving the cursor across the remaining text in the paragraph.
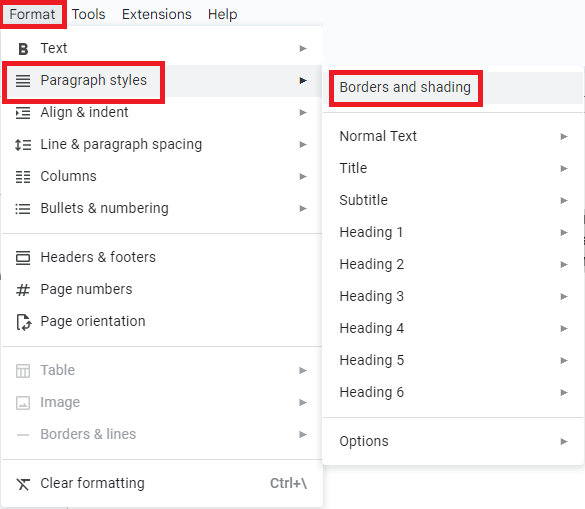
- To access the desired option, navigate to the menu bar and locate the “Format” tab. From there, choose the “Paragraph styles” option. To access the new drop-down menu, locate and click on the option labeled “Borders and Shading.”
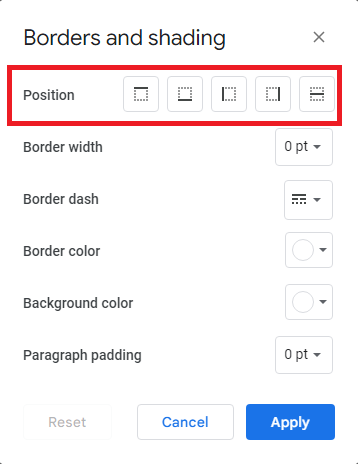
- In the “Position” section, make sure that the Google Docs Border is applied to all sides: top, bottom, right, and left. If you correctly select the icons, you will notice a distinct blue highlight surrounding them.
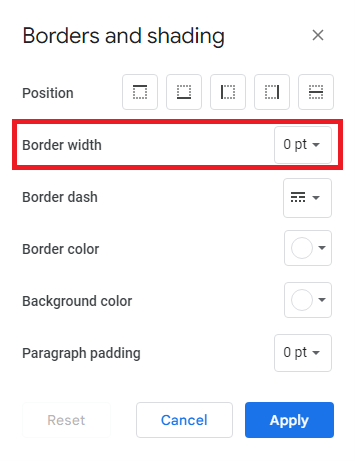
- In the same window, you can modify the border width to your desired size. A thicker border is indicated by a higher number.
- In the “Border Dash” section of the menu, select the style that you prefer. You have the option to choose between three different types of lines: a solid line, dots, or dashes.
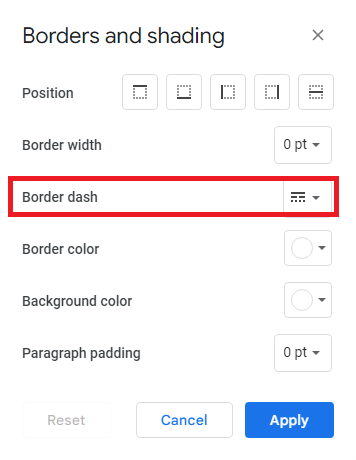
- Additionally, you have the option to customize the border color by selecting any color of your preference. Moreover, you have the option to modify the amount of space between your content and the border by adjusting the paragraph padding.
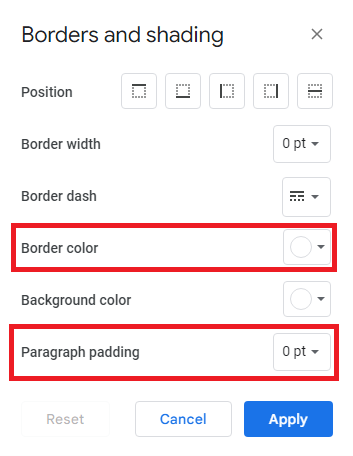
- Once you have made your desired selections, you can proceed by clicking the “Apply” button to finalize and apply the chosen Google Docs Border.
Method 3: Set a Border as an Image
Online, you can find a wide range of sources that offer free border images. These resources allow you to add a personal touch to your documents without any hassle. Users have the ability to utilize an image as a decorative border in their documents using Docs. To add a Google Docs Border using an image, follow these steps:
- To access the “Insert” tab, move your cursor to the top of the screen and click on it. Then, position your cursor over the “Drawing” option in the drop-down menu that appears. To begin, locate and select the “+ New” option. This will allow you to create a new drawing.

- The drawing box is now visible on your screen. To insert a border, locate and click on the “Image” icon.

- There are three ways to add an image to your content: by inserting the online URL of the image, uploading an image from your computer, or copying and pasting an image. If you don’t have a saved image, you can use the “Search” option to find one online by clicking on it.
- After you have added the border, locate and click on the “Text Box” icon. Then, use your cursor to drag and create a designated area within the borders where you can input your content. Users have the ability to personalize the text within the Google Docs Border by utilizing the toolbar to format it.

- To save and close the content within the border, simply click on the “Save and Close” button.
- To modify the border, simply click on it and choose the “Edit” option. This action returns you to the drawing view, allowing you to make adjustments to the content.
Also Read: How To Setup and Use Google Docs Offline
Method 4: Set a Border with Drawing
Many people like to use the drawing feature in Docs to insert a border by creating a rectangular shape. Please note that this feature is accessible on all versions of Docs, with the exception of the mobile version. The steps below will guide you on how to add a Google Docs Border to your document using Draw.
- To begin, open a new document. Next, navigate to the “Insert” tab located at the top of the screen. Then, position your cursor over the “Drawing” option without clicking. To create a drawing, click on the “New” option in the drop-down menu that has just appeared.

- The “Drawing” box is now visible on your screen. To add a page border, click on the “Shapes” icon and select the desired shape from the available options.

- To draw the shape, click and hold your cursor while moving it within the checkered area.
- Nextly, to make the shape transparent, you can follow these steps:
- Click on the “Fill” icon, which is represented by a paint bucket in the toolbar.
- Then, select the option “Transparent” from the available choices. This will help you achieve the desired transparency for the shape. The drawing toolbar allows you to make additional modifications to the shape for further customization.
- To save and close, click the “Save and Close” button once you are satisfied with the Google Docs Border. Afterward, you can go back to the document that contains the shape. Within the document, you have the ability to modify the shape by manipulating the anchor points associated with it.
- To modify the border, simply click on it and then choose the “Edit” button. This action returns you to the drawing view, allowing you to make any necessary adjustments.
Method 5: Set a Border Using a Table
Adding a border in Docs can be conveniently achieved by using a table. The table feature is available in all versions of Docs, allowing users to access it. When a table is used correctly, it enables the creation of a border that surrounds the entire document. To add a Google Docs Border to your document, you can follow these steps using a table:
- To start, you can commence the editing process by selecting a document that you wish to enhance with the addition of a border. One possible approach is to begin by creating a border and then proceed to type the content into a blank document.
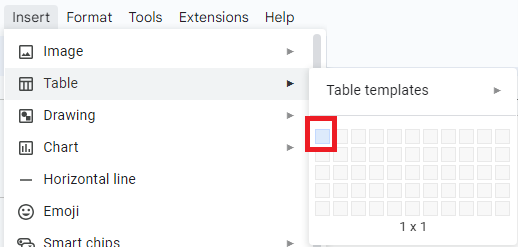
- To access the “Insert” tab, move your cursor to the top of the screen and click on it. Then, position your cursor over the “Table” option without clicking. When you open the application, a grid will be displayed on the screen. This grid allows you to choose the desired number of spaces for your table.
- Continuously decrease the number of columns and rows until you have chosen the initial box located in the upper-left corner. By clicking on this box, the document will generate a table with dimensions of 1×1.
- To interact with the table, click inside it and then press the “Enter” key on your keyboard multiple times. The code extends the table vertically on the page, creating a Google Docs Border that spans the entire length of the page.
- To access the border customization options, follow these steps:
- Click on the “Format” tab located in the toolbar.
- Hover your cursor over the “Table” option.
- From the dropdown menu, select “Table Properties.”
In this tool, you have the ability to adjust the thickness and color of the cell’s border. Additionally, you can increase the padding to create more space between the border and the content within the cell.
Also Read: How To Recover Deleted Files From Google Drive
Setting Up Google Docs Border: Successfully
So, this is how you can easily apply the Google Docs Border. In the previous sections, we covered all the ways that allow you to set a border with ease on any document. Techniques to apply a border to text as well as images with ease. As long as you follow the steps to apply the border, you will not face any problems.
However, for any queries or suggestions, use the comments section below. Explain your queries in detail and our team of experts will get back to you with accurate and helpful answers. Follow us on Facebook, Instagram, Tumblr, Pinterest, and Twitter for more such updates. Also, you can support our work by subscribing to our newsletter. That’s all we had to share with your regarding Google Docs Border.


