How to Change Date and Time in Windows 10,11
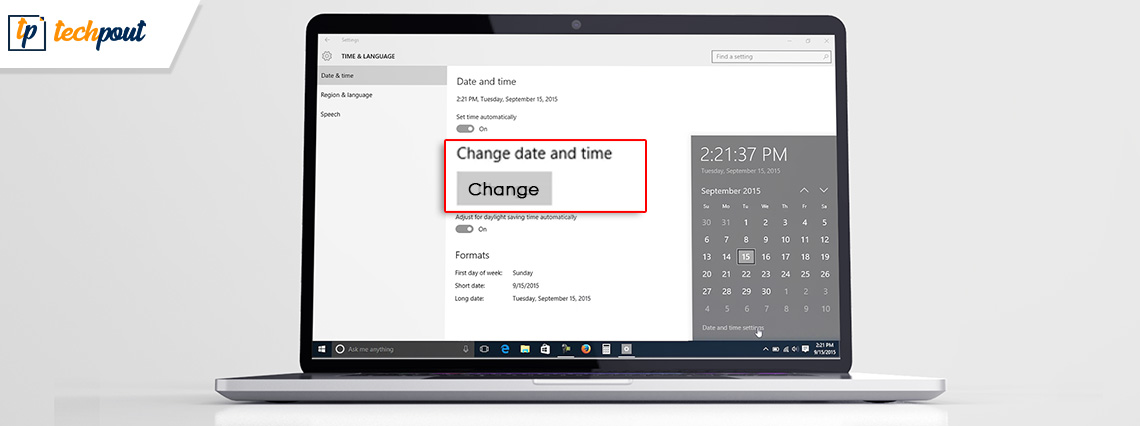
Want to change the date and time in Windows 10? Check out this simple guide with the easiest methods to change the date and time effortlessly.
Indeed, Windows 10/11 can automatically detect the time zone of your device and set the date and time of your device accordingly. However, at times it may show the wrong time or you may need to set a different date and time for your device. In such a case, you can manually update the time and use Windows as you may.
You can easily use different methods of the operating system to change the time. In this guide, you will find different methods to update the time on your Windows device according to your requirements. So, let’s have a look at methods for ease.
Methods to Change the Date and Time in Windows 10
Below are some of the easy and reliable methods to edit and set the time if you are wondering how to change the date and time in Windows 10. Use any of the methods provided to get things done with ease.
Method 1: Modify the Time Using the Taskbar
Firstly, you can take the help of the time and date section on the taskbar to change the date and time in Windows 10. For this, you can take the help of the detailed steps shown below:
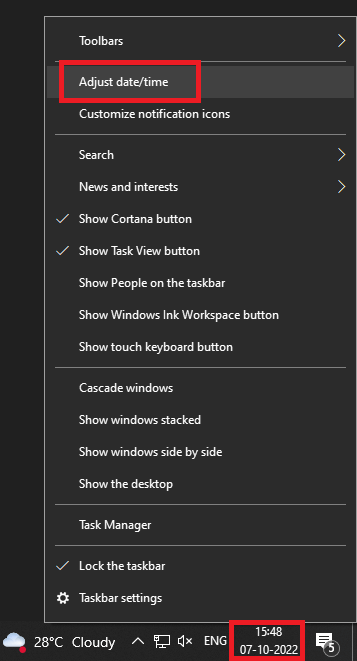
- Right-click on the time section of the taskbar and open Adjust date/time settings.
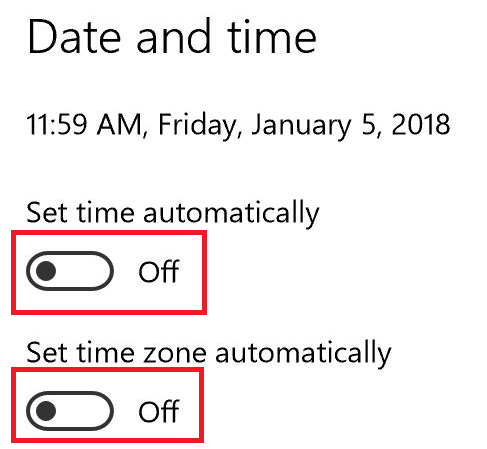
- Scroll down to the Date & time part of the settings then toggle off the Set time automatically and Set time zone automatically options.
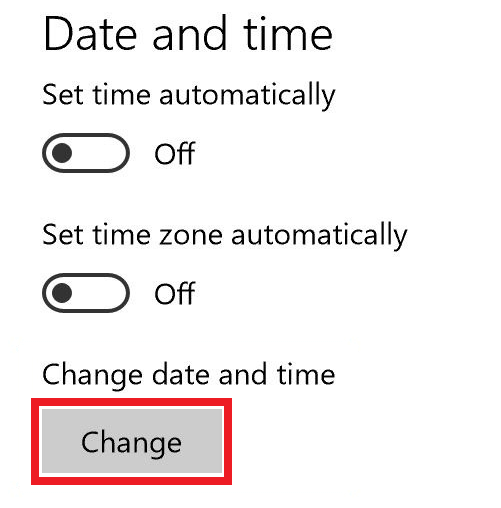
- Beneath the Change date and time category, click on the Change button.
- Lastly, a pop-up window will appear, use the same to set the desired time for your device. Click on the Change button at the end of the process.
So, this is how to set the date and time in Windows 11/10 using the taskbar settings. However, you can use the alternate method provided below as well.
Also Read: How to Hide the Taskbar in Windows
Method 2: Modify the Time In the Device Settings
The alternate method to know how to change the date and time in Windows 10 is to modify the same using the device Settings. Windows Settings also allow you to change the time when required. For this, you need to take the help of steps provided below:
- Firstly, right-click on the Windows icon or the Start menu and open the Settings of the device.
- Click on the Time & language category from the settings.
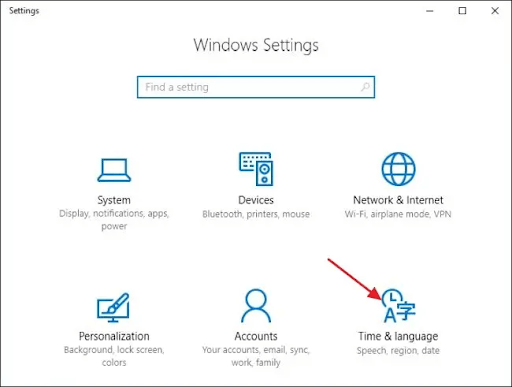
- Scroll down to the Date & time part of the settings then toggle off the Set time automatically and Set time zone automatically options.

- Beneath the Change date and time category, click on the Change button.

- Lastly, a pop-up window will appear, use the same to set the desired time for your device. Click on the Change button at the end of the process.
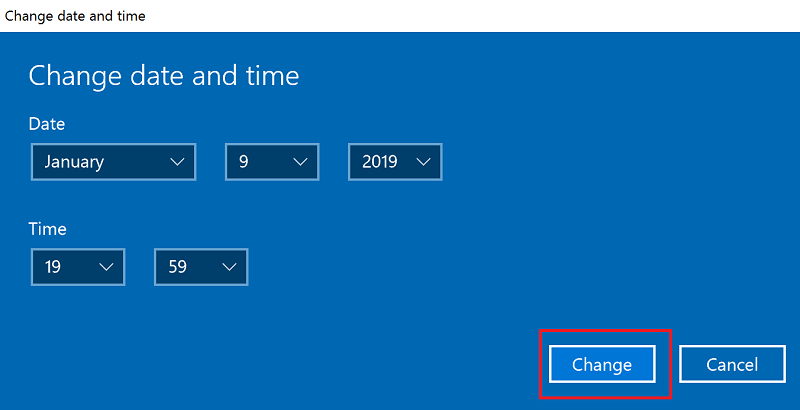
If you don’t want to change the date and time in Windows 10, the below sections may help you.
Also Read: How to Fix Windows 10 Taskbar Not Working
Pro Tip: How to Add a Clock on Your Windows Device?
Sometimes, you may not need to change the date and time in Windows 10/11 and just want to add a different clock. For the same, Windows allows you to add a clock other than the default one. You can either select the time of this clock manually or use a time zone. Follow the steps below to know how to add a clock on Windows 10/11:
- Firstly, right-click on the Windows icon or the Start menu and open the Settings of the device.
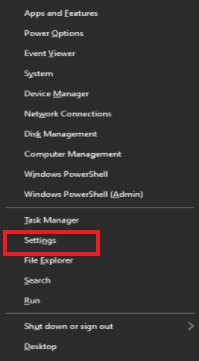
- From the right pane, click on Add clocks for different time zones.
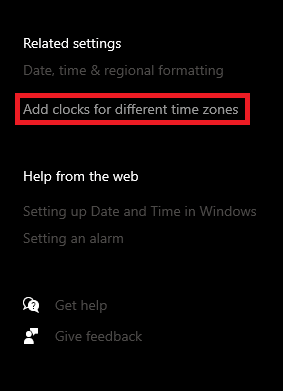
- Navigate to the Additional clocks tab and check the box named Show this clock.
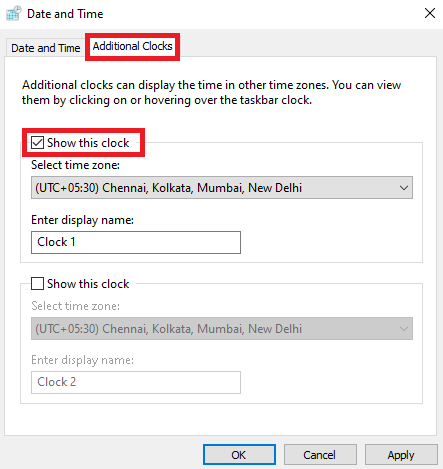
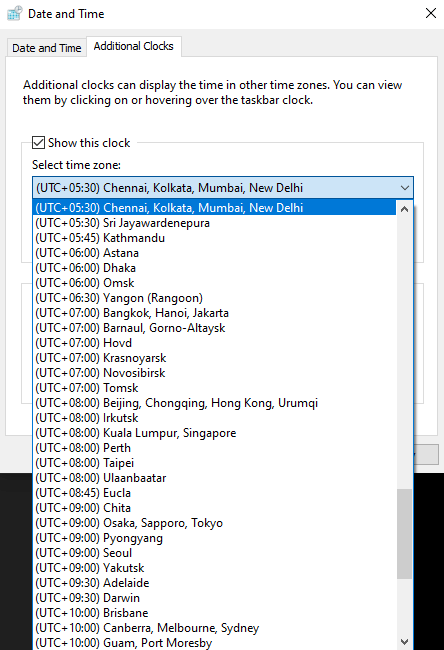
- Select the time zone as required from the drop-down menu.
- Lastly, edit the name of the second clock as you want and click on Ok.
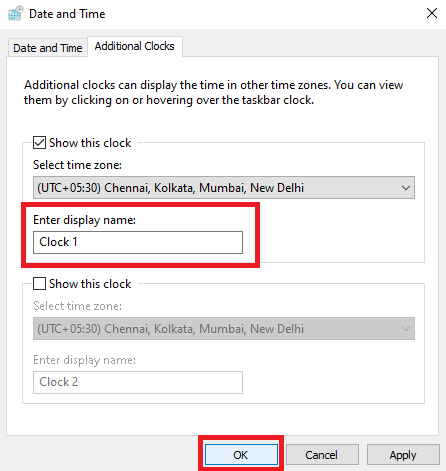
You may change the date and time in Windows 11 for this second clock using any of the above-provided methods. Additionally, you add up to two different clocks on Windows 11/10 apart from the one set as default.
Also Read: How to Turn Off the Firewall on Windows
An Extra Mile: How to Change the Format of a Clock on Your Windows Device?
You may not want to change the date and time in Windows 10 but wish to change the way you see the date and time on your Windows device. For this, you need to modify the format using the date and time Settings. Follow the instructions right below to know how to modify the same:
- Firstly, right-click on the Windows icon or the Start menu and open the Settings of the device.

- From the right pane, click on Date, time & regional formatting.
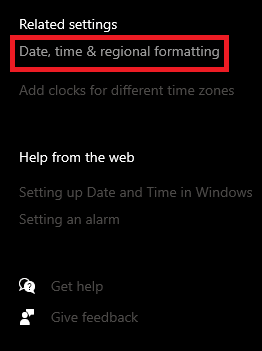
- If you want, change the Country or region from the drop-down menu.
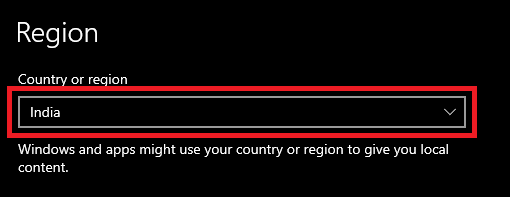
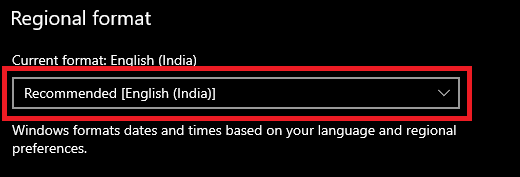
- Next, under the Regional format category, change the format according to the country you are seeking.
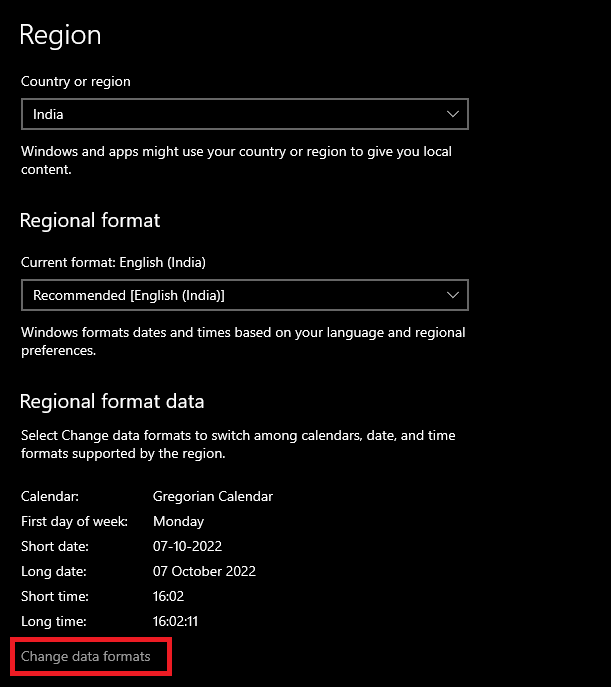
- For better control, click on the option named Change data formats.
- Using the drop-down menus of different categories, set the format of the clock as per your rudiments.
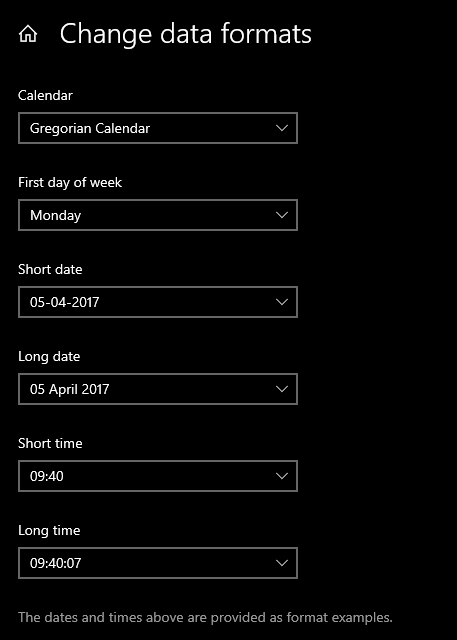
- Lastly, close the window when done.
Also Read: Clock Watchdog Timeout Error on Windows 10
How to Change the Date and Time in Windows 10?: Answered
So, here we conclude the methods to set the time and date in Windows 10 and Windows 11 devices. We hope that by using either of the two methods provided, you were able to change the date and time of your device. P. S. if you come across a message on Settings stating “Some of these settings are hidden or managed by your organization”, then you either need to activate the Windows or ask your device admin to change the time. Alternatively, in such a case it’s best to add an additional clock using the procedure provided above.
For more information or help, feel free to connect with us using the comments section below. We are happy to assist you in every way possible. If you liked this guide on the procedures to change the date and time in Windows 10, don’t forget to subscribe to our newsletter. This will allow you to get daily email updates related to new guides, tutorials, articles, news updates, and more.


