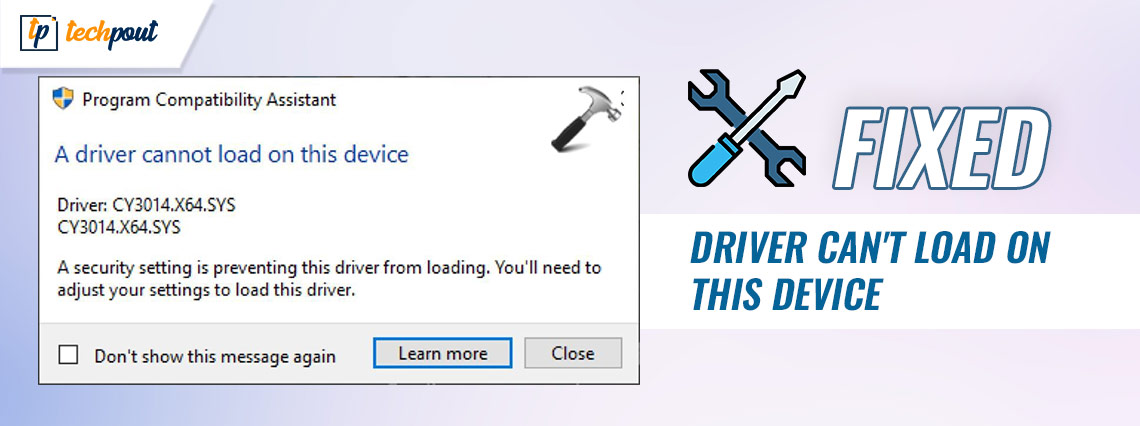
How to Fix Driver Can’t Load on this Device on Windows 11,10

This article shares the 6 best fixes to solve the driver can’t load problem on your Windows 10/11 device effortlessly.
Drivers drive your computer’s performance. A driver is an essential piece of software your system needs to communicate with an attached peripheral. Without a driver, the PC cannot understand and execute your instructions correctly. Hence, the error stating the driver can’t load on this device can be frustrating.
However, you can drop all your worries as you have landed on this article. Here, we are going to acquaint you with the best possible workarounds for the driver can’t load on this device Windows 11/10 error.
Now, before we jump to fix the problem, it is essential to figure out why it occurred in the first place. You can get rid of the issue quickly and easily if you know what may have triggered it.
Hence, let us first look at the possible causes behind Windows 11/Windows 10 driver can’t load on this device error.
Why Driver Can’t Load on this Device
Below may be the reasons you are experiencing the driver can’t load on this device issue on your computer.
- Outdated drivers
- Faulty driver update
- Memory integrity issues
- Corrupt registry entries
- Interference from recent changes or a newly installed program
- Incorrect hardware configuration or settings
These were some core factors responsible for the driver error on your device. Now, let us learn how to fix it.
Tried and Tested Fixes for the Driver Can’t Load on this Device Issue
Below are the solutions you can apply to fix the Windows 10 or Windows 11 Driver can’t load on this device problem.
Fix 1: Disable memory integrity
Memory integrity is a security feature in Windows preventing malicious programs from controlling your computer using low-level or weak drivers. Also called Hypervisor-protected Code Integrity (HVCI), the memory integrity setting may be blocking the driver, resulting in the Driver can’t load on this device.
Hence, you can turn off the memory integrity to solve the problem. Below are the detailed steps to do it.
- Firstly, access your computer’s search utility using the Windows+S keyboard shortcut.
- Now, input Windows Security in the search panel and select the best match from the results.
- Select Device Security from the on-sNow, and click Core isolation details to view them.
- Turn off the toggle for Memory Integrity
- Lastly, check whether or not the driver can’t load on this device error disappeared. You can try the below fixes if it persists.
Also Read: How to Fix NVIDIA Drivers Not Installing Issue on Windows
Fix 2: Update device drivers (Recommended)
Outdated drivers are among the most common reasons the driver can’t load on this device on Windows 11/10. If the driver is outdated, it fails to communicate with the computer correctly. Hence, updating your device drivers is the most recommended solution to the problem.
You can update the outdated drivers on your computer using traditional methods (through the manufacturer’s website, Device Manager, or Windows Update) or automatically and safely using Bit Driver Updater.
The Bit Driver Updater is among the best driver updater software to update all out-of-date drivers automatically with just a few clicks. In addition to automatic driver updates, this software offers many other features, such as driver backup and restoration, driver download speed acceleration, scheduled scans for outdated drivers, and much more.
You can navigate to the following link to download the latest version of Bit Driver Updater and install it on your computer.
After downloading the software and installing it, you get all outdated drivers listed on your screen within a few seconds of the installation. You can go through the list of outdated drivers and Update All automatically.
You can even update a single driver using the Update Now tool located alongside the driver you wish to install. However, updating all drivers is a smarter choice than updating only a particular driver to ensure smooth PC performance.
Also Read: How to Fix PCI Encryption/Decryption Controller Driver Issue
Fix 3: Roll back to the earlier driver
If the driver can’t load on this device started showing up on your screen after you tried updating the drivers, a corrupt or incompatible driver update may have caused it. Hence, rolling back the driver to the previous version can help fix the issue. Below is the process to roll back the driver.
- Firstly, click on the magnifying glass (search icon) present on the taskbar.
- Now, enter Device Manager in search and select it from the on-screen results.

- After the Device Manager appears, click on the category of problematic driver. For example, click on the Display Adapters section if you are experiencing problems with the graphics driver.
- Now, right-click on the problematic driver and choose Properties from the available options.
- Navigate to the Driver tab and click on the Roll Back Driver button.
- Select a reason for the rollback (you can choose any reason, as it makes no difference) and click on the OK button.
- After completing the rollback, restart your computer.
Also Read: Fix PCI Serial Port Driver Issues on Windows 10/8/7
Fix 4: Check the registry entries
If registry entries, particularly values relating to UpperFilters and LowerFilters, are corrupt, you may encounter the driver can’t load on this device issue. Thus, you can follow these steps to check and fix the registry entries.
- Firstly, open Device Manager on your computer.
- Now, expand the category of the problematic driver by clicking on it.
- Right-click on the problematic device driver and select the Properties option.
- Now, navigate to the Details tab and choose Class GUID from the Property menu.
- Note the value you get in the on-screen box.
- Now, use the Windows+R keyboard shortcut to call up the Run utility on your screen.
- Input regedit in the on-screen box and click on the OK button.
- Now, navigate to the Class key through the path HKEY_LOCAL_MACHINE\SYSTEM\CurrentControlSet\Control\Class.
- Locate the Class GUID you noted earlier in the Class key.
- Now, right-click the UpperFilters present on the right side of the Registry Editor window.
- Select Delete from the on-screen menu.
- Now, select Yes to complete the process of deleting the UpperFilters and delete the LowerFilter in the same way.
- Lastly, restart your computer to complete the above process.
Also Read: Intel High Definition (HD) Audio Driver Issue on Windows 10
Fix 5: Try a system restore
Recent system changes or any recently installed program may also contribute to the driver can’t load on this device issue. Hence, you can perform a system restore to solve the problem. Below is the step-by-step process to do it.
- Firstly, click on the search icon and enter Create a restore point in the search bar.
- Select the Best match to navigate to the System Properties.
- Now, click on the System Protection tab and select the System Restore option.
- Click on the Next button to proceed further.
- Now, select a restore point created before you started getting the driver can’t load on this device Windows 11/10 error.
- Click on the Next button.
- Go through the on-screen details and click on the Finish button.
- Lastly, allow your device to restart.
Also Read: How to Fix Lenovo Laptop Screen Flickering Issue
Fix 6: Perform hardware troubleshooting
Hardware faults can also lead to the driver can’t load on this device error on Windows 10 and 11. Hence, you can run a hardware and devices troubleshooter to solve this issue. Below are the steps to run it.
- Firstly, access the Run utility using the Windows+R keyboard shortcut.
- Now, copy and paste the msdt.exe -id DeviceDiagnostic command in the Run box and click on the OK button.
- Click on the Next button to run the hardware and devices troubleshooting tool.
- Lastly, follow the on-screen directions to solve the problem.
Also Read: How to Fix Windows 10 Computer Stuck on Restarting (Laptop & PC)
Driver Can’t Load on this Device: Fixed
This article discussed the tried and true solutions to the problems causing the driver can’t load on this device Windows 11/10 error. You can start fixing the problem with the first fix and then keep moving forward until the issue is resolved.
In our view, the issue is best fixed via driver update using Bit Driver Updater. However, if you know other better solutions or have any questions regarding this write-up, please drop us a comment.


