How to Fix Windows 10, 11 System Restore is Taking a Long Time
The System Restore generally does not take more than one hour. However, if it takes a long time on your computer, you can solve the problem effortlessly by applying the solutions given in this article.
You can undo the changes made to your computer using the System Restore features of Windows if things go south. However, it is annoying if the Windows System Restore is taking a long time to revert your PC to its original settings to fix any significant error.
Does this situation sound like the problem you are experiencing? If yes, you are reading the right article. Here, we have put together the most suitable solutions to the System Restore problem we found after studying the issue deeply.
However, it is crucial to understand why the System Restore behaves erratically before trying to fix the problem. Knowing the potential causes of an issue helps make troubleshooting easier. Hence, the next section of this article sheds light on the same.
Why Is Windows System Restore Taking a Long Time
The following factors may be responsible for a stuck or hung-up System Restore on your Windows 10/11 computer.
- Your hard drive has malfunctioned or has one/more than one faulty sectors
- The system restore points are unreliable or missing
- There is not enough disk space to complete the system restore
- You may have corrupt system files on your computer
After learning about what may be causing the problem, let us learn how to solve it in the best ways possible.
Fixes for Windows System Restore Is Taking a Long Time Issue
You can apply the following tried and tested solutions to the System Restore issues on your computer.
Fix 1: Try performing the system restoration in Safe Mode
Usually, Windows System Restore takes only an hour. However, if the System Restore is taking a long time, i.e., more than one hour you can try restoring your system in Safe Mode to fix the issue. Below is the step-by-step process to do it.
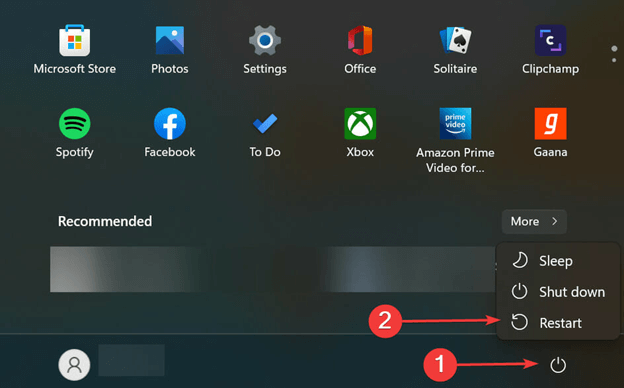
- Firstly, launch the Start menu using the Windows key.
- Secondly, click on the Power option, long press the Shift key, and choose Restart from the on-screen menu.
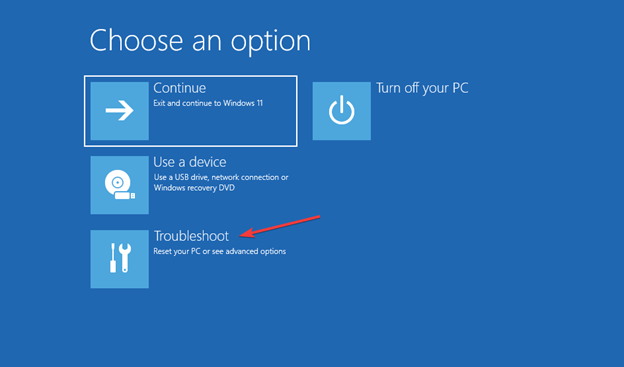
- After Windows starts in the Recovery Environment, you can choose Troubleshoot from the options on your screen.
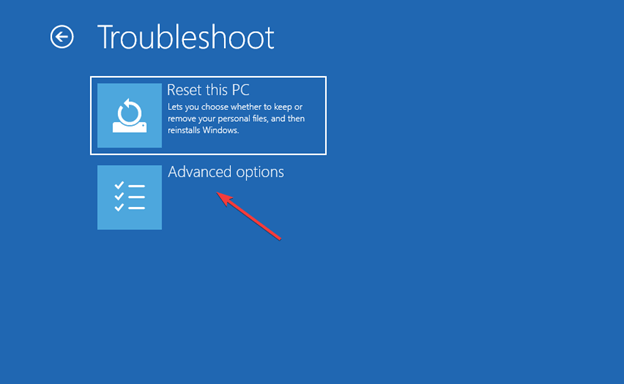
- You can now select Advanced options from the troubleshooting menu.
- The next step is to choose Startup settings from the on-screen Advanced options menu.
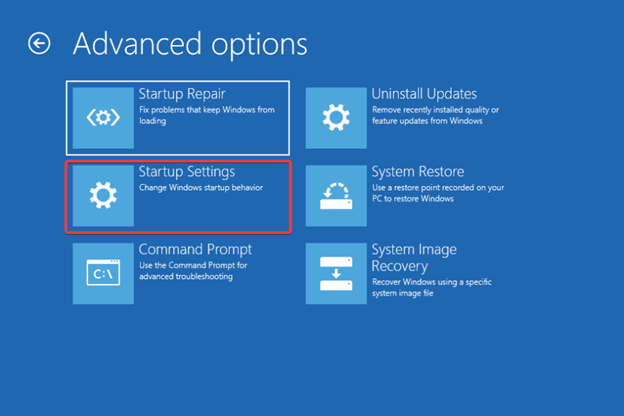
- Select Restart from the bottom right corner of the screen.
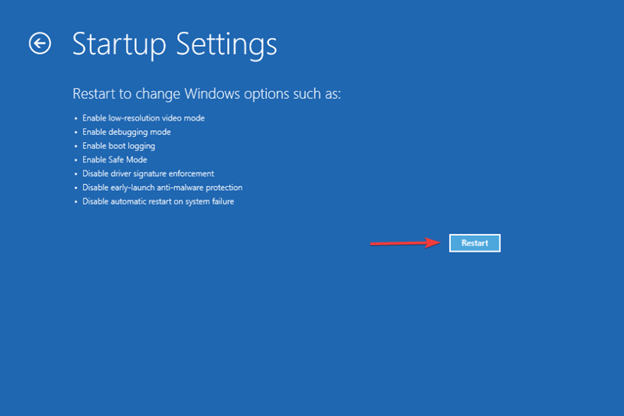
- Lastly, you can press F6 or 6 to boot your computer in Safe Mode. After the computer boots in the Safe Mode, perform a system restore to check whether or not the problem is solved. If the problem remains unresolved, you can try the below fixes.
Also Read: How to Fix System Restore Failed to Extract the File Windows 10,11
Fix 2: Scan your computer for corrupted system files
Damaged, deleted, or corrupted files can be a reason your Windows 10 or Windows 11 System Restore is taking a long time to roll back the system to its previous state. Hence, you can run a scan to find and fix the problematic files to solve the problem. Here are the directions to do it.
- Firstly, open the Terminal application (if you are a Windows 11 user) or the CMD app (if you have Windows 10) with administrative privileges. You can do it by using the Win+S hotkey to access the search utility, typing Terminal or CMD (as the case may be) in the on-screen search box, and then selecting the option to run it as an administrator.
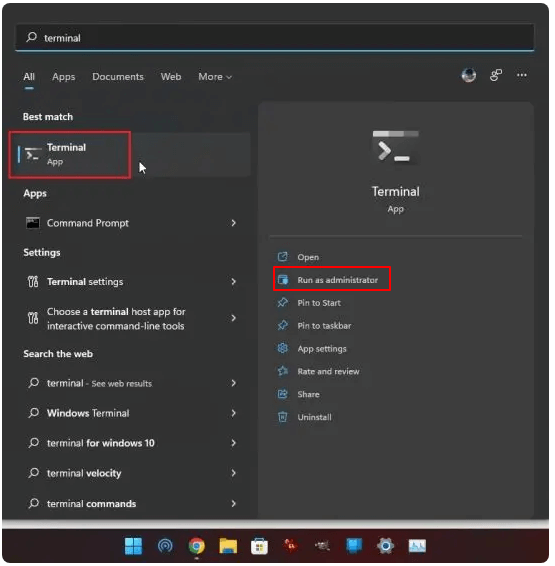
- Click on the Yes button if the User Account Control prompt appears asking for your permission to allow Terminal/CMD to make changes to your device.
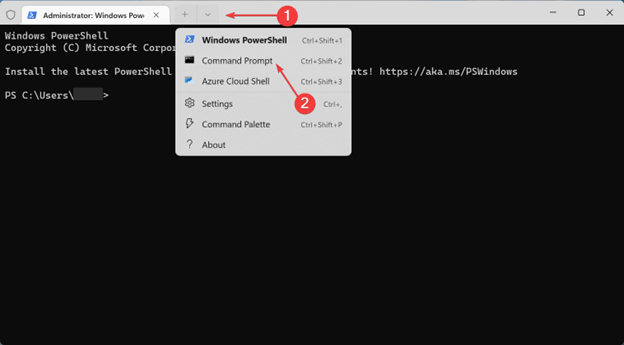 Windows 11 users can now select the top arrow and then choose Command Prompt from the on-screen menu.
- After the Command Prompt window appears, input the sfc /scannow in the on-screen command line and press Enter to scan your computer.

- Lastly, wait for the above process to complete. After it completes, try using the System Restore again.
Fix 3: Try another restore point
The restore point you are trying to use may be unreliable, or missing, or there may be some other issue with it. Hence, if the System Restore is taking more than the expected time on your computer, you can try a different restoration point by following the below directions.
- The first step is to use the Win+R hotkey to access the Run utility.
- Secondly, input rstrui.exe in the on-screen Run box and click OK to open System Restore.
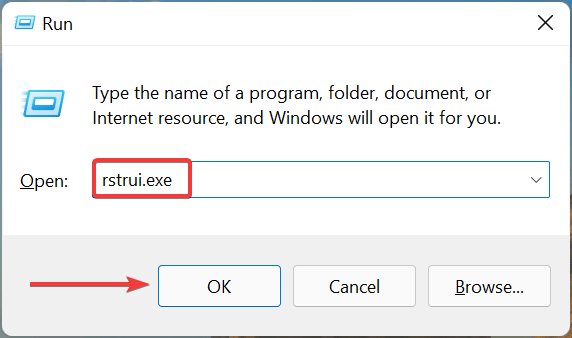
- Click on the Next button to proceed further.
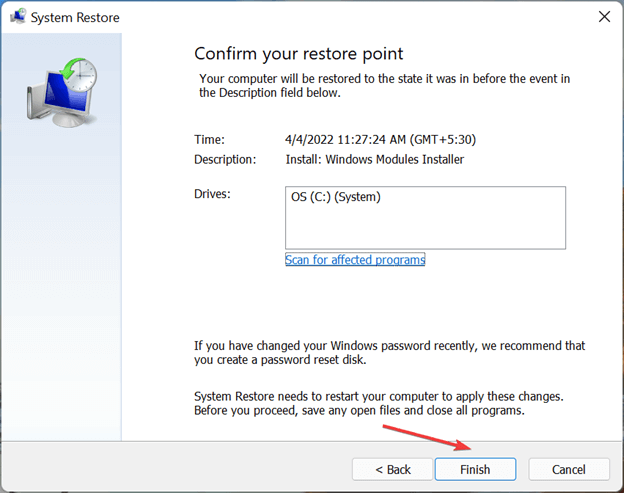
- You can now choose a restore point other than the previous one.
- After selecting a restore point, click on the Next button.
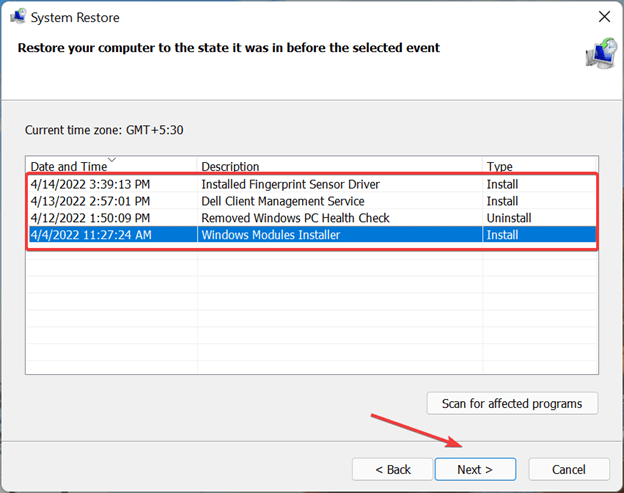
- Lastly, go through the on-screen details, and then confirm the restore point to begin restoring your system by clicking on the Finish button.

Also Read: Insufficient System Resources Exist to Complete the Requested Service
Fix 4: Use the Startup Repair tool
Boot manager malfunctions may also result in Windows System Restore problems. Hence, you can fix the problem by using the Startup Repair feature. The following steps explain how to use it.
- Firstly, call the Run utility using the Win+R hotkey.
- Secondly, input shutdown /r /o in the on-screen text box and click OK to proceed to the next step.
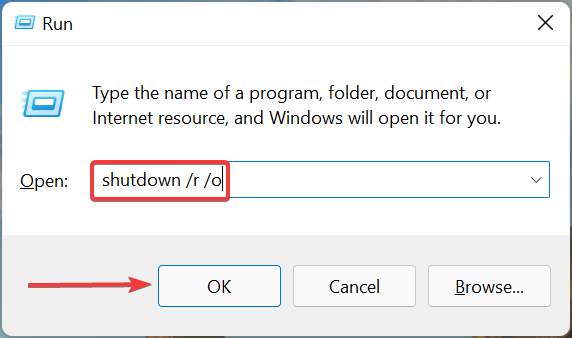
- Next, select Troubleshoot from the options on your screen.

- Choose Advanced options from the on-screen menu.

- You will now get six advanced options on your screen. Choose the first option, i.e., Startup Repair.
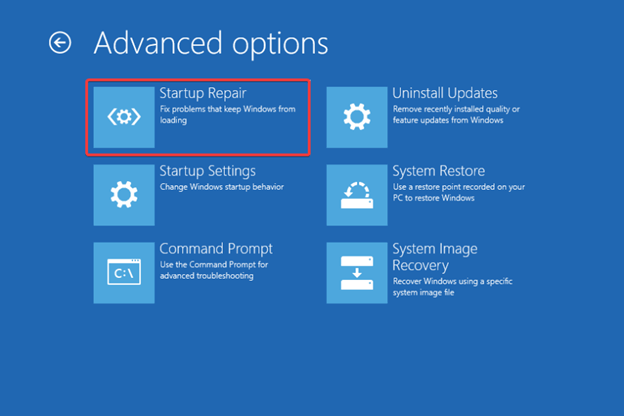
- Choose an account to go to the next step.
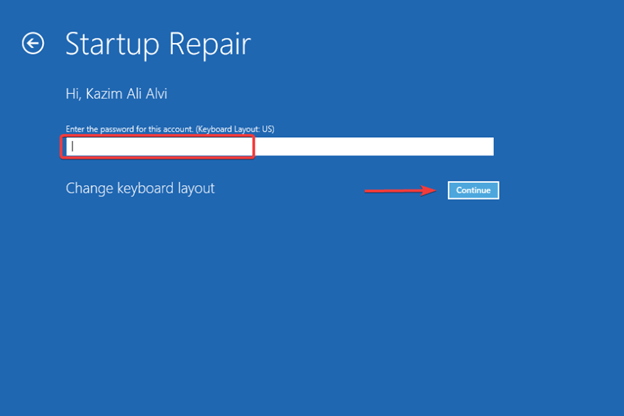
- Input your account password and click on the Continue button. You can leave the password field blank if you have not set any password to access the account.
- Lastly, wait for the startup repair process to complete.
Fix 5: Use a PC optimizer to clean space and boost performance
Non-availability of enough space is another reason the Windows System Restore is taking a long time. Hence, you can use one of the best PC optimizer software for Windows to clean space and optimize the resources to eliminate problems like the one you are experiencing.
Fix 6: Run the CHKDSK command
CHKDSK is a tool that verifies the integrity of a storage device’s system files and solves logical file system problems. Since a hard driver malfunction may have caused the System Restore issue, you can use the CHKDSK tool to solve the problem. Below is how to use it.
- Launch Terminal or CMD as an administrator on your computer, depending on whether you have Windows 11 or Windows 10.
- After launching the appropriate application, input chkdsk C: /f in the command line and press Enter.
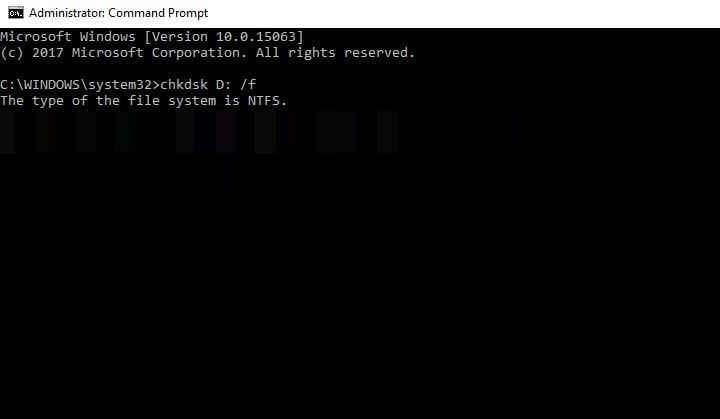
- Lastly, allow Windows to complete the system drive checking and fix the detected issues.
Also Read: How to Restore Missing Power Plans Options on Windows 10, 11
Wrapping Up
We hope one of the above solutions helps you fix the issues if Windows System Restore is taking a long time on your computer. If you know other better ways to solve this problem, have any doubts/questions or have any tips for the improvement of this article, please feel free to write us a comment. Let us now bid adieu with a promise to see you soon with another helpful tech guide.


