How to Get Rid of Activate Windows Watermark
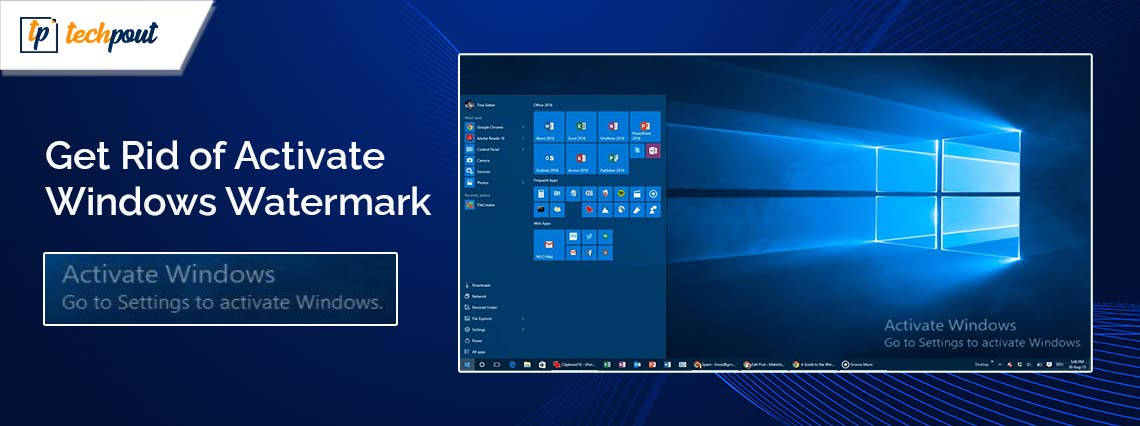
This article helps you with “Activate Windows” watermark removal by explaining the best ways to remove it.
The “Activate Windows” watermark appears frustrating when you are engrossed in some crucial task, and it hinders your focus or when it embarrassingly shows in your screen recordings. This watermark indicates that your Windows license key is invalid or has expired. However, you can effortlessly remove the “activate Windows” watermark.
Wondering how? Then, you can continue reading this article. This article is going to take you through multiple ways to drive this watermark away from your computer screen. Let us get started with the watermark removal without wasting valuable time.
Quick and Easy Ways to Remove “Activate Windows” Watermark
Here are the methods you can use to get rid of the “activate Windows” watermark on your computer.
Method 1: Use the product key to activate Windows
You must have received a product key when you purchase a licensed Windows. That key can be used to activate Windows and remove the activation watermark. Here are the steps to use it.
- The first step is to launch your computer’s settings. You can access your device’s settings using the Win+I hotkey.
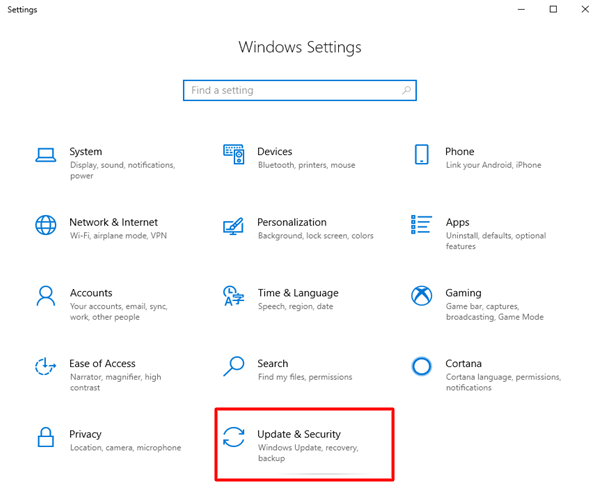
- In the second step, you are required to choose Update & security from the options available on your screen.
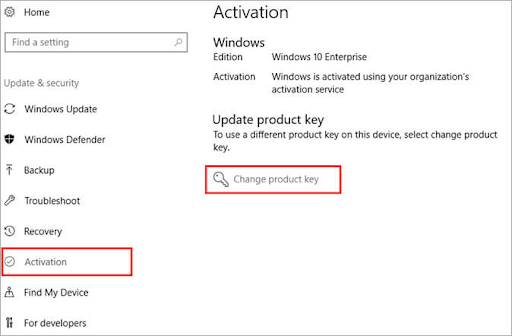
- Next, you can choose Activation from the Update & Security options.
- In this step, select the Change product key option from the Update product key section.
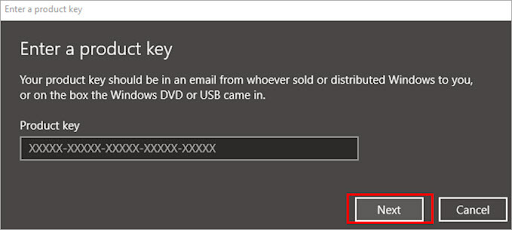
- You can now input your Product Key in the on-screen box and click Next.
- Next, find and install Windows on the system.
- Lastly, restart the computer to complete the process.
Method 2: Remove “Activate Windows” watermark on Windows 10/11 using PowerShell
You can use PowerShell scripts to communicate with the Windows operating system to remove the annoying activation watermark. Here are the directions to use it.
- Firstly, activate the Windows search using the Win+S keyboard shortcut.
- Secondly, input PowerShell in the search text box.
- Next, you choose Run as administrator from the Windows PowerShell menu.
- After opening the Windows PowerShell as an administrator, input slmgr /renew in the command line and press Enter.

- Lastly, restart your computer to ensure the watermark gets removed.
Method 3: Use the Ease of Access feature for “Activate Windows” watermark removal
The Ease of Access feature comes in handy when you wish to make any changes to your Windows system. Moreover, using the Ease of Access option to disable background images removes the watermark asking you to activate Windows. Hence, here are the steps to use it.
- Firstly, use the Win+S hotkey to access Windows search.
- Secondly, input the Control Panel in the search box on your screen.
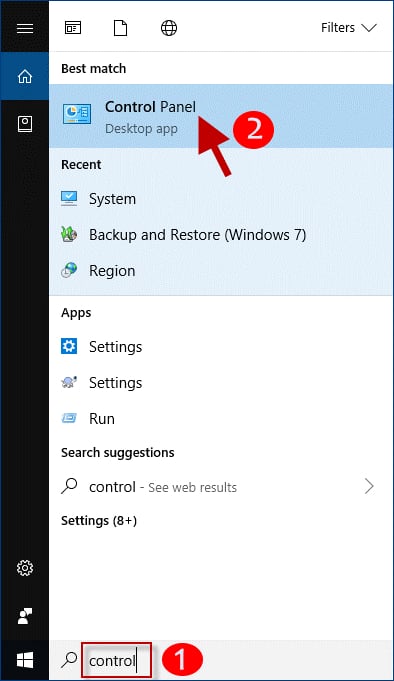
- In this step, you are required to click on the result appearing under the best match to open the Control Panel application.
- After opening the Control Panel, change the view to Large icons and choose Ease of Access Center from the on-screen menu.

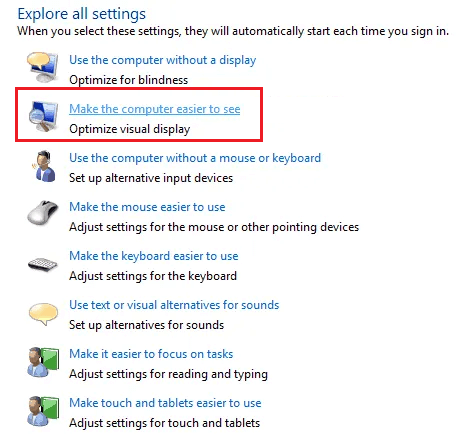
- Next, click on the link to Make the computer easier to see. You will find this link in the Explore All Settings segment.
- In this step, scroll down to find and check mark the option to Remove background images (where available).
- Lastly, click on the Apply and OK buttons to save the changes.
Method 4: Edit Registry to remove the Windows 10 activation watermark
Making some changes, as described below, in the Registry is another way to remove the watermark. Though we make the process as simple as possible for you to follow, perform the following steps cautiously to ensure no harm to your computer.
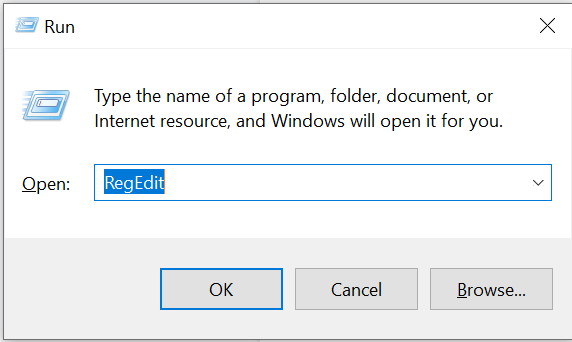
- The first requires you to activate the Run tool using the Win+R hotkey.
- Secondly, input regedit in the Run box on your screen and click OK to open the Registry Editor.
- After opening the Registry Editor, navigate folders in the Editor using the arrow symbol to reach the path HKEY_CURRENT_USER\Control Panel\Desktop.
- In this step, you are required to double-click the PaintDesktopVersion value.
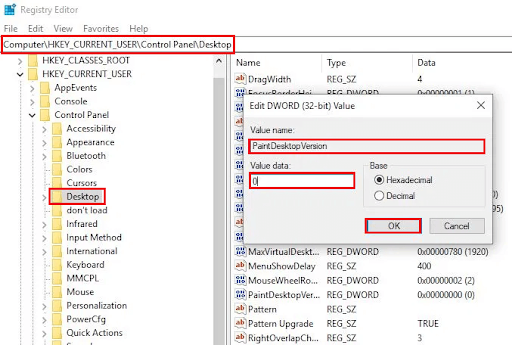
- Next, change the PaintDesktopVersion value from 1 to 0 and click OK to save the changes you have made to the Registry.
- Lastly, restart your computer to make sure the watermark is removed.
Method 5: Use the Notepad application to remove the Windows watermark
A simple Notepad Windows Notepad trick can remove the Windows 10/Windows 11 “Activate Windows” watermark. Hence, here is how to perform this action.
- Firstly, launch Notepad on your computer by searching for and selecting it from the search results.
- After opening Notepad, copy and paste the following code into the Notepad window.
@echo off
taskkill /F /IM explorer.exe
explorer.exe
exit
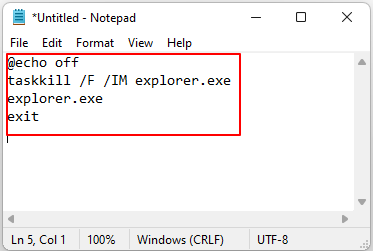
- You can now save this file. Please remember to use the .bat extension when saving this file. For instance, you can name this file as Activation.bat.
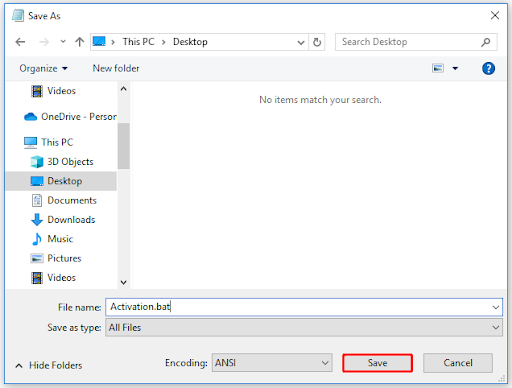
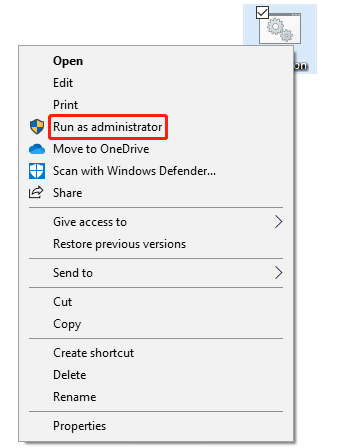
- In this step, right-click the saved file and choose Run as administrator from the available options.
- Lastly, restart your computer to finish the process.
Method 6: Disable Windows 10 tips
Windows offers tips and tricks to make your experience better. Disabling these tips can temporarily remove the Windows 10 activation watermark. Hence, here is how to turn off Windows 10 tips.
- The first step is to use the Win+I hotkey to access Windows settings.
- You will get the settings window on your screen. Select System from the available options.

- Next, select Notifications & actions from the system menu.
- You can now toggle off the “Get tips, tricks, and suggestions as you use Windows” and “Show me the Windows welcome experience after updates and occasionally when I sign in to highlight what’s new and suggested” options.
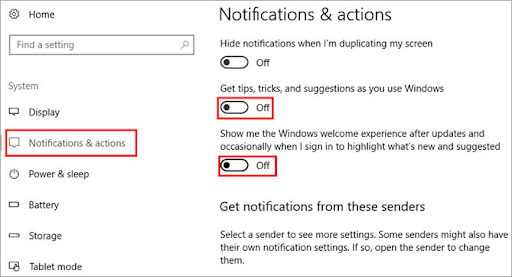
“Activate Windows Watermark Removed”
“Activate Windows” is a watermark that annoys most of the users. Hence, this article shared tried and true ways to remove it. However, instead of only removing the watermark, you should ensure that you use a licensed and valid version of Windows to avoid various problems. Please comment if you have any doubts or suggestions about this write-up.


