iTunes generates specific Lockdown certificates for devices that are synced with your Windows or Mac devices. And this is why iTunes is detected automatically with your synced devices. These lockdown certificate store UDID data of all the devices that are synced with your iTunes.
You can intervene in this process only for emergency purposes. And we advise you not to remove, copy, cut, rename, or move them if it is not required.
The guide below explains how to reset iTunes Lockdown folder for Mac and Windows. But before we proceed with the steps refer to the next section to locate the Lockdown folder on your device.
Apply the following simple steps to reset the iTunes Lockdown folder on your device.
Step 1: First of all on your Mac or Windows device Quit iTunes.
Step 2: Disconnect iOS devices that are connected to Mac or Windows devices.
Step 3: On your device click on Finder.
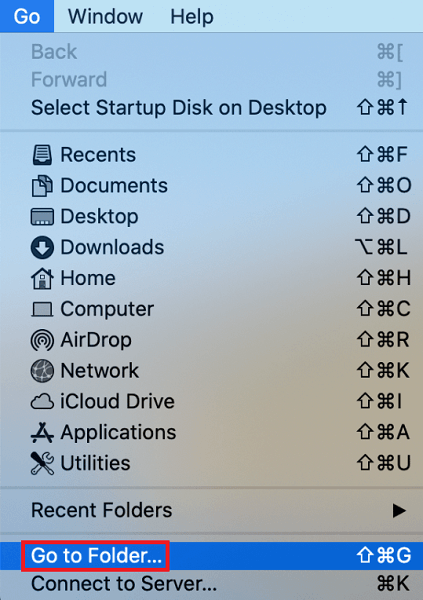
Step 4: Click on the Go menu on Finder window.
Step 5: Under this submenu click on the Go To Folder option.

Step 6: In the box present under the Go To Folder type the following
/private/var/db/
Step 7: Click on the Go button.
Step 8: Select the Lockdown Folder and drag it to the trash icon to delete the folder from your device.
Step 9: To confirm, enter the iTunes account credentials.
Step 10: Now reconnect iTunes on your Mac using your login credentials.
Also Read: How to Delete an iCloud Account
Lockdown Folder on your Windows devices is located at the following addresses
Once you locate the Lockdown Folder on your Windows device, Identify plist files associated with each device. Remove these files to the Reset iTunes Lockdown Folder.
Note: If the Lockdown folder is inaccessible here is what you can do
Also Read: How to Switch Apple ID on iPhone, iPad, Mac, or Windows PC
Hopefully, the above steps helped you in resetting the lockdown folder of your iTunes. These steps are quite simple yet workable. However, it is recommended to not mess up with these files until and unless there is an emergency.
If you still face any issues, feel free to write to us in the comments below. For more Mac/Windows guides and news hit the subscribe button below. Also, to never miss any updates follow us on Facebook, Twitter, Instagram, and Pinterest.
If you also want to place some bets on games this IPL season, here are…
If you wish to download and update the RNDIS device driver for Windows 10/11 or…
In the event that you are interested in executing the Bose Headset drivers download and…
If you are also facing the Guided Access not working issue on your iOS (iPhone)…
If you are looking for the best privacy screen protector to use the smartphone freely…
If you are looking for the perfect alternative to Apple Pay, refer to the Apple…