How to Transfer Data from Your Windows PC to a Mac
Got a new Mac? Allow us to help you transfer data from your Windows PC to a Mac using some of the easiest techniques.
Windows and macOS are two of the most popular and commonly used operating systems nowadays. If you have also switched from Windows to a macOS device, then you may need to transfer your data from the old device to a new one. This is something that we will help you with using this article.
Here, you will find various methods to transfer data from your Windows PC to a Mac with ease. All the solutions provided here are tried and tested for you and hence reliable. So, without any further ado, let’s have a look at the solutions.
Methods to Transfer Data from Your Windows PC to a Mac
Below are some of the most reliable methods to transfer data from your Windows PC to a Mac. You are free to use any of these methods and move your data from Windows PC to Mac with ease.
Method 1: Use a Memory Device to Transfer the Data
The first method that we recommend to move your data from a Windows PC to your Mac is to use a memory device. Memory and storage devices like USB pen drives, external drives, and others allow you to easily move data. You can copy your documents, files, images, videos, and other data, move the same to the memory stick and then use it to transfer data to the Mac.
However, this method does not work if you want to transfer the app data from Windows to Mac. For that, you need to take the backup of the Windows apps and restore the same to the Mac. However, there is a catch. Major backup apps and services do not support transferring data backup from Windows devices to Mac.
If you want another solution for how to transfer data from Windows to Mac, try the next method.
Also Read: How To Transfer Photos From iPhone To Mac
Method 2: Use the Windows Migration Assistant to Transfer the Data
Another way to move your data from Windows PC to Mac if you don’t have a memory stick is to use the Windows Migration Assistant. This is a tool offered by Apple specifically to help you share the data from Windows to the Apple device. However, before you use the tool for the transfer, you should ensure that:
- Firstly, both Windows and Mac devices are connected to a common network.
- Additionally, you should also keep both devices powered on at all times for a successful transfer.
- Lastly, if you are using a brand new Mac, then it may not have the latest macOS updates. Install the same to proceed.
Once you take care of all the above factors, you can proceed to download the Migration Assistant from the official Apple website and install it on Windows and Mac. If you are wondering how to transfer data from Windows to Mac using WiFi, then Migration Assistant is the answer. Follow the steps shown below for more information:
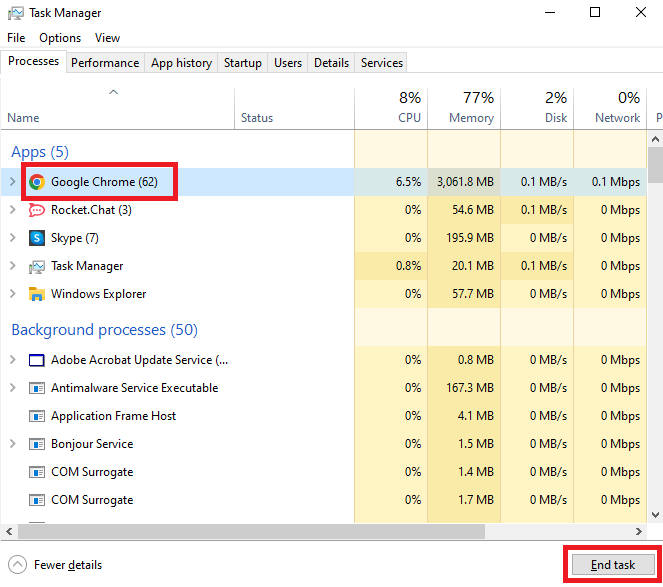
- Close all the apps and programs running on your Windows device. You may take the help of the Task Manager to do this (press the Ctrl+Shift+Esc keys).
- Run the Migration Assistant and click on Continue to proceed.
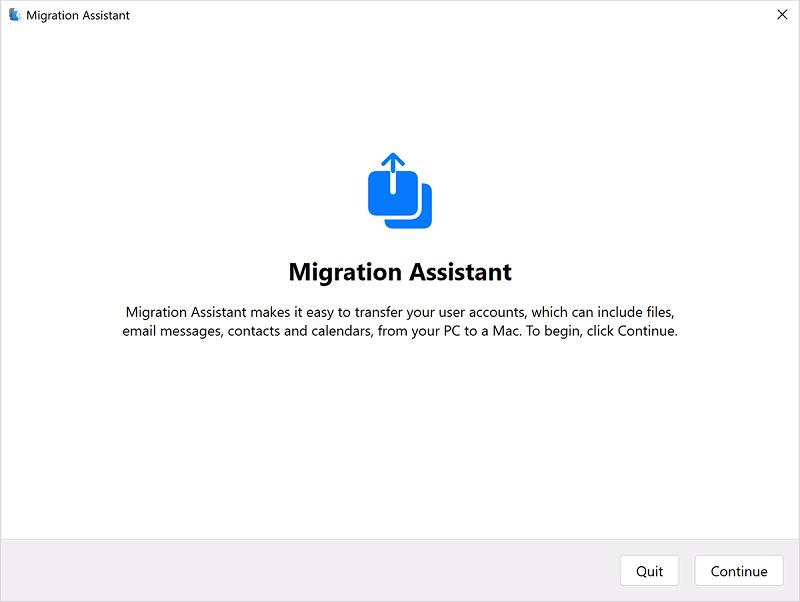
- Wait while the tool looks for updates and then install them. Click on Continue again.
- Keep the assistant running on Windows and then run the tool on Mac as well.
- Enter your device login credentials so that the device can turn off all the apps and programs running on Mac.
- Select Windows PC from the list of devices to proceed.
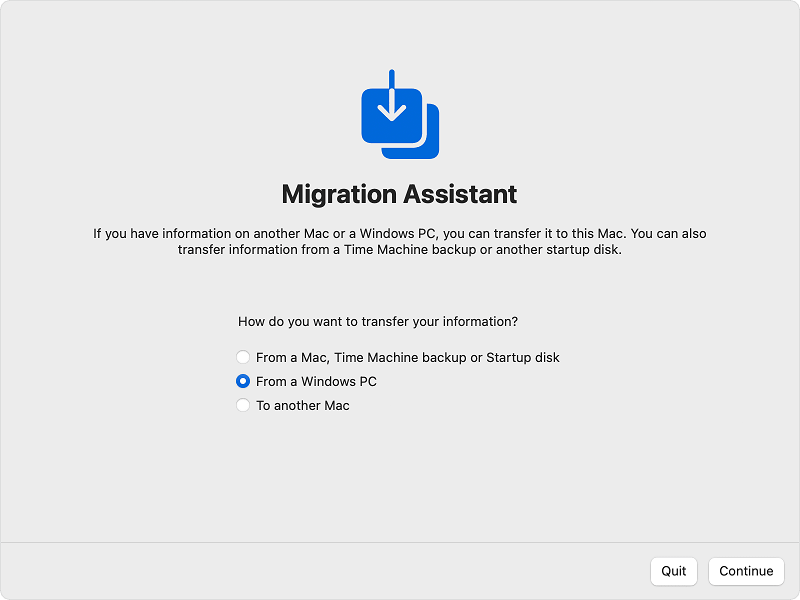
- Wait for the Mac Migration Assistant to look for your Windows device and then use the Passcode provided to connect both of the devices.
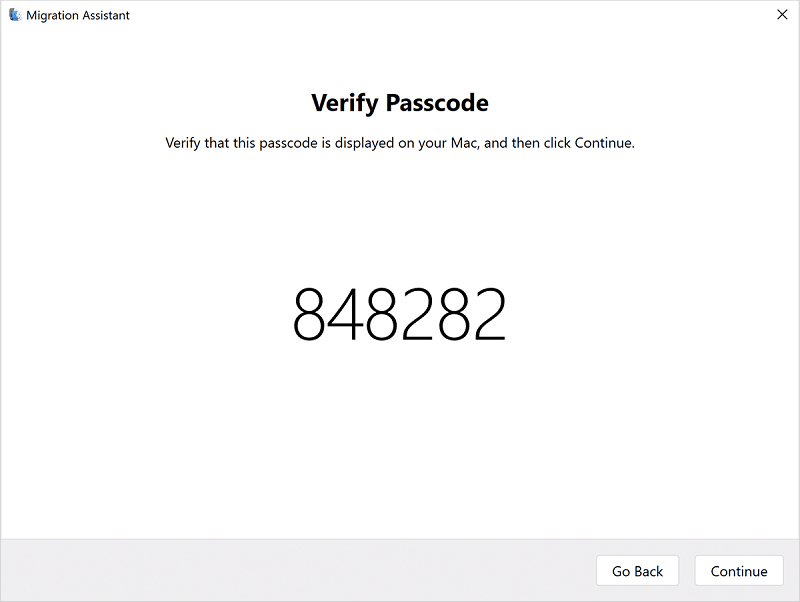
- Click on the Continue button to proceed.
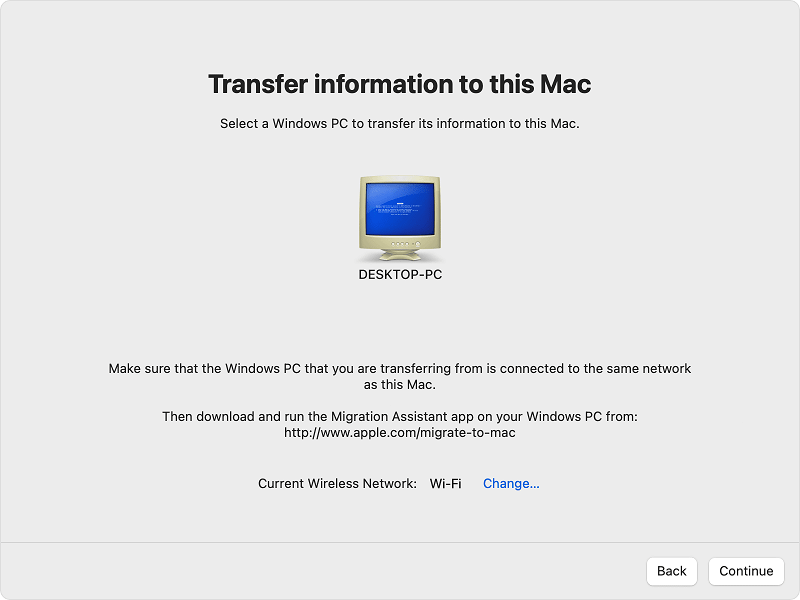
- Your Mac will take some time to look for the transferable files. When the scanning completes, select all the data you want to transfer.
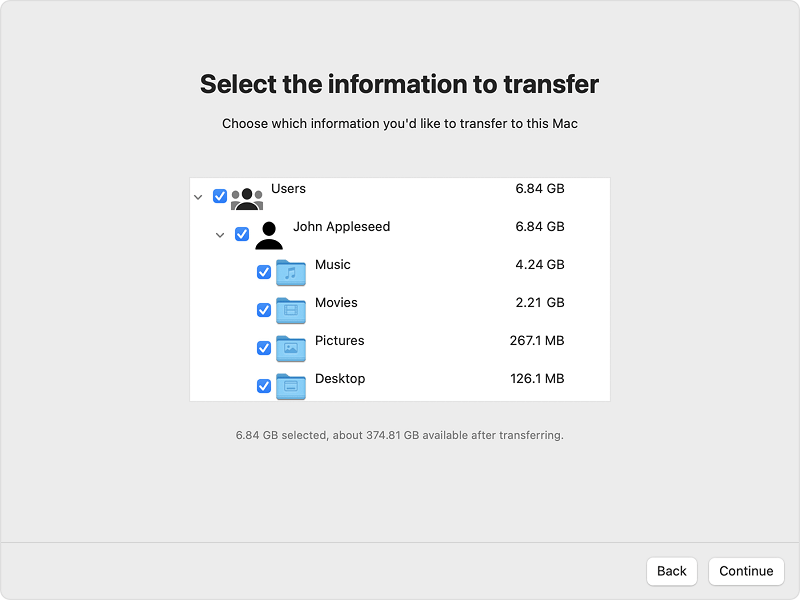
- Click on the Continue button to proceed with the transfer. But first, ensure that the files to transfer are correct.
- Keep both devices on while the transfer continues. Click on Finish after the transfer is complete.
So, this is how the Migration Assistant app can help you move your data from Windows PC to Mac. However, you may be confused about the types of data transferred by the Migration Assistant. Refer to the next section to find out about the same.
Also Read: Best Free Backup Software for Windows and Mac
Type of Data Transferred by the Migration Assistant:
The Migration Assistant can help you how to transfer data from Windows to Mac very easily. However, it can only transfer the following data:
- Data from apps like emails, calendars, messaging tools, contacts, and others.
- Bookmarks from the browser and other similar data including the homepage settings.
- Different kinds of system settings like language priorities, date and time zones, and app preferences.
- Images from different folders to one common folder on the Mac.
- Content from the iTunes account to respective and supporting apps on the Mac.
If you want another method to transfer data from your Windows PC to a Mac, try the next one.
Method 3: Use a Cloud Service
Lastly, what you can do to move your data from a Windows PC to your Mac is to use a Cloud service. There are various cloud clients like DropBox, Google Photos, iCloud, OneDrive, Mega, and various other platforms that allow you to take a backup of your Windows data and restore the same on the Mac. However, you may not be able to transfer some data like device settings using the cloud. So, it’s advised that you proceed with caution and transfer all the data possible.
Also Read: How To Backup Data From Mac Using Time Machine Backup
Transfer Data from Your Windows PC to a Mac: Successfully
So, we hope that after following the above sections showing the methods to move your data from Windows PC to Mac, you were able to do the same. All the methods provided above are listed to help you transfer the data without facing any problems. Multiple alternatives are provided so that you can easily transfer the data as and when possible. All alternatives may not be available for all, so use the ones you can.
If you have any questions related to the methods to transfer data from your Windows PC to a Mac, you can ask the same in the comments below. We will help you all the way. Additionally, subscribe to the newsletter from the blog and get more interesting updates in real time.


