Logitech K350 Driver Download and Update for Windows 10, 11
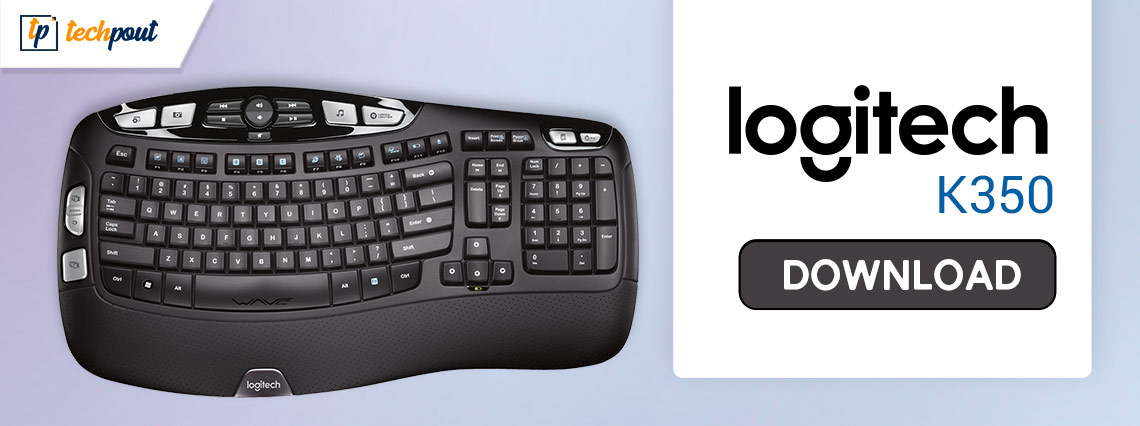
Take the help of this simple guide to know how to download the Logitech K350 driver on Windows 10/11 and run the keyboard perfectly on your system.
Logitech is a great name in the world of electronics. The brand has been offering a multitude of electronic devices for ages. From combos to standalone devices, from keyboards to mice, from imaging devices to gaming gears, you will find a variety of devices with the brand that can easily take care of your personal and professional requirements.
The Logitech K350 is one such device from the house of the tech giant. The device is quite compatible with various devices and operating systems, hence, one of the most opted keyboards of all time. Moreover, the wave-like build of the tool makes it easy for all, gamers and professionals, to make the best out of the keyboard.
It’s quite easy to set up and use the keyboard. Just plug in the USB adapter and use the device as you want. However, at times, some problems may appear in your system. Such keyboard-related problems appear because the Logitech K350 keyboard driver on Windows 10/11 is not up to date.
The simplest solution in such a case is to download and update the driver for the Logitech K350 keyboard on Windows. Doing this will ensure that the keyboard works perfectly fine with the OS. There are multiple methods that you can use to update the driver for Windows 10. In this article, we will have a look at all such methods.
Methods for Logitech K350 Driver Download for Windows 10/11
In the coming sections of this guide, we will go through some of the best ways to download the Logitech K350 driver for Windows 11/10. You can take the help of any of the manual or automatic methods to install the driver. However, to save yourself from all the trouble, you can try the last, automatic, method first.
Method 1: Update the Driver Using the Device Manager
You are able to keep track of all the devices that are attached to your computer by using the Device Manager, which is an integrated function that is provided by Windows. Additionally, you can utilize the Device Manager to update the Logitech K350 driver on Windows 10/11 by selecting the “Update Driver” option. Utilize the following guidelines as a guide to accomplish this goal:
- To open the Device Manager, right-click the Start button, then choose the appropriate choice from the context-sensitive menu that appears.
- In the Device Manager, go to the list of devices and choose the Keyboards heading from the menu.

- Select the Logitech Keyboard from the list of devices, and then right-click on it.
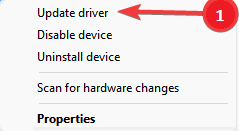
- To update the driver, choose the option to do so from the drop-down menu.
- A warning message will appear as a pop-up on the Windows screen. From the two choices, choose the one that says Search automatically for updated driver software.
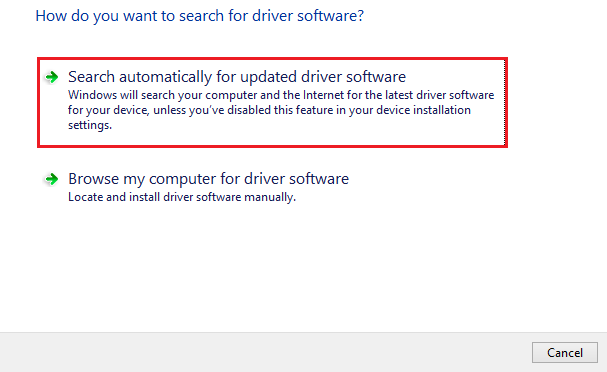
- After a brief interval of time, the driver will be installed on your machine. After the update for the Logitech driver has finished installing, you will need to restart the computer.
If this method fails to install the Logitech K350 keyboard driver on Windows 10, take the help of the next solution.
Also Read: How to Fix Logitech Wireless Keyboard Not Working
Method 2: Logitech K350 Driver Update Windows 10 with OS Update
It’s possible that Windows updates will also give you the option to update the Logitech K350 driver on Windows 11/10. You may quickly update the driver by using this Windows update option available to you. To achieve excellence, please follow the steps below:
- Try searching for Check for updates using the Windows search option, then hit the Enter key.
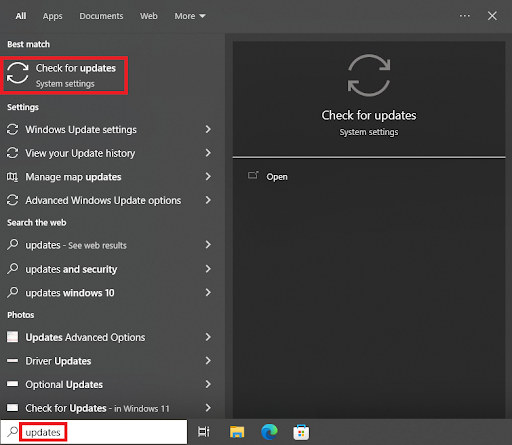
- Wait for the utility to load, and then choose the option to Check for Updates.
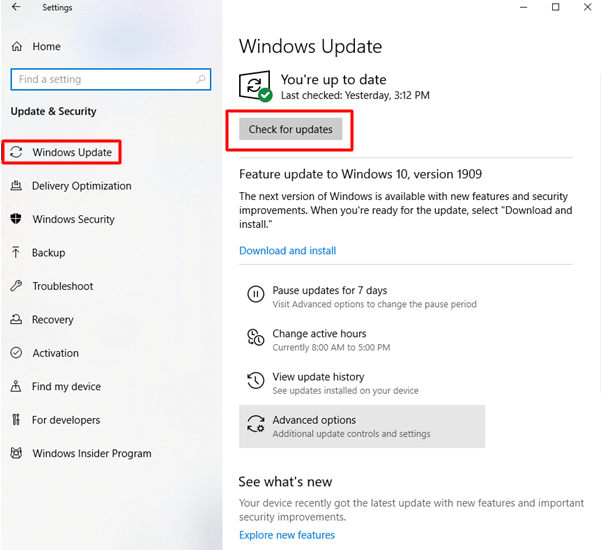
- When the updates become available, check the Optional updates for any available Driver updates.
- Get the latest updates for your Logitech keyboard by downloading and installing them.
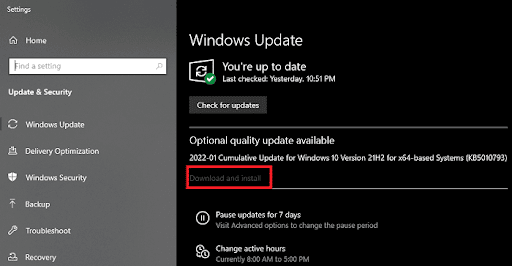
This method is manual and may pose some problems for you. Hence, if you also feel the same, follow the next solution to execute the Logitech K350 driver download on Windows 10.
Also Read: Logitech G29 Driver & Software Download for Windows 10, 11
Method 3: Automatically Update the Driver Using Bit Driver Updater
The manual processes to execute the Logitech K350 driver update on Windows 10 might be laborious and time-consuming at times. However, with the assistance of Bit Driver Updater, you will be able to automatically download the most recent versions of all of the drivers already installed on your computer.
Bit Driver Updater is an extremely useful program that retrieves the most recent driver updates directly from the websites of the relevant manufacturers as well as other reliable sources. You may also make a backup of the drivers you already have installed, and if the update does not meet your expectations, you can quickly revert back to the previous version.
It offers immediate updates for drivers compatible with Windows 10, 8, and 7. The program gives you the option to plan the upgrades at a period that is more convenient for you in the future. Let’s have a look at the various stages involved in using Bit Driver Updater to effortlessly update the Logitech K350 keyboard driver.
- To get the Bit Driver Updater, please choose the Download Now option that is located further down on this page.
- Installing and starting up the program should be done after the download is finished.
- When Bit Driver Updater has finished starting up, choose the option to Scan Now from the menu. The program will investigate the whole of the system for any available upgrades.
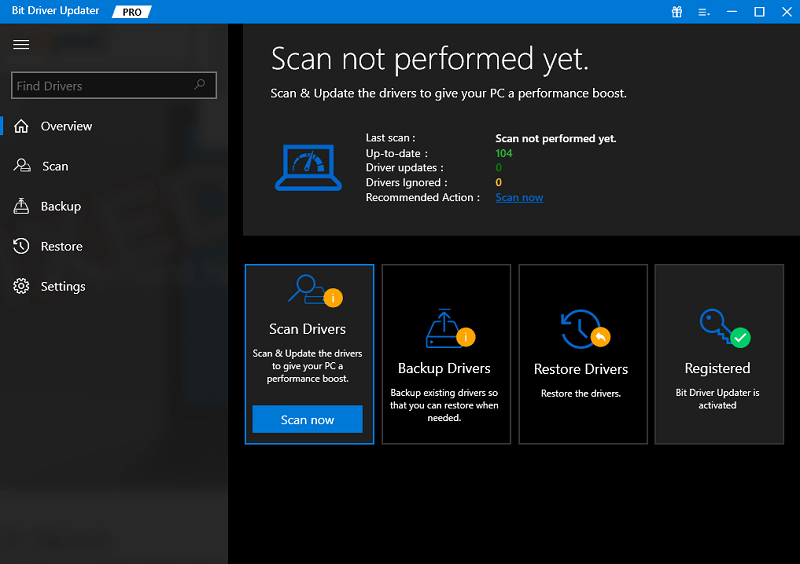
- After the application has finished the scan, it will show all of the drivers that are no longer supported. You may quickly install all of the out-of-date drivers at once by clicking the Update All option.

You will have no trouble downloading the latest version of the driver for the Logitech device if you follow the above procedure. It is possible to update all obsolete drivers with only one click using Bit Driver Updater, which is the most convenient method. However, apart from the method provided above, there is another one you can try to download the driver for the Logitech K350 keyboard.
Also Read: Logitech G29 Driver & Software Download for Windows 10, 11
Method 4: Use the Official Website of the Manufacturer
The official or registered website of the manufacturer is one of the best and safest methods to execute the Logitech K350 driver download on Windows 10. This is one of the best and safest ways to complete the download. This approach is dependable, but since it is manual, it is difficult to put into practice. Follow the steps below to learn how to successfully download the driver:
- Launch your web browser of choice and go to the official Logitech website.
- Navigate to Support on your computer and choose Downloads under the category of Individuals when you get there.
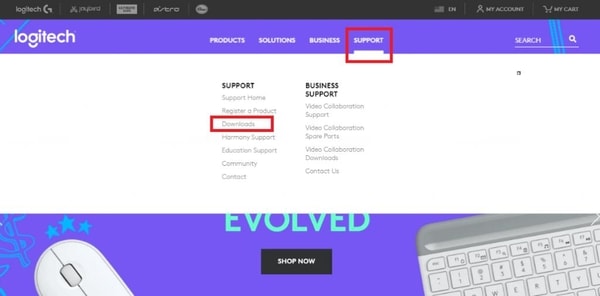
- Once you have been sent to the support website, search for Logitech K350 and choose your product from the list that appears.

- Simply choose the Downloads tab.
- Choose the operating system that’s already on your device.
- Now you may download the Logitech driver by clicking on the Download Now button.
- Install the file on your device after the download has finished.
Also Read: Logitech G27 Drivers Download and Update for Windows 11, 10, 8, 7
Logitech K350 Keyboard Driver: Download and Update Successful
So, it’s time to wrap up this guide on how to download and update the Logitech K350 driver for Windows 11/10. After undergoing one of these solutions, you can easily update the driver and run the keyboard with ease. After this, you will not face any problems or errors with the device.
If you have any queries related to the guide, you can connect with us. Write your queries in the comments section below. Our team of experts will get back to you with appropriate responses in no time. Moreover, subscribe to our newsletter and get many more such interesting updates. Also, if you liked this guide on how to update the Logitech K350 keyboard driver on Windows 10/11; follow us on Facebook, Instagram, Twitter, or Pinterest.


