How to Fix Page Fault in Nonpaged Area in Windows 10, 11
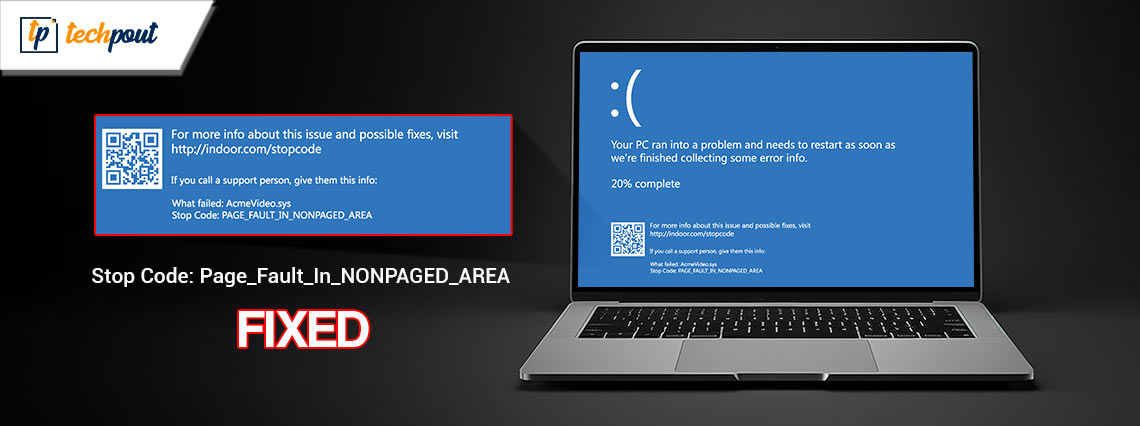
Some Blue Screens of Death, sometimes known as BSODs, can be challenging or even impossible to identify and repair, but others are quite easy to take care of. A Blue Screen of Death (BSOD) that displays the message “Page Fault in Nonpaged Area Windows 10” can, fortunately, usually be fixed. Here are some options for you to consider trying.
What are the Reasons for a Page_Fault_in_Nonpaged_Area Windows 11/10 Error?
The question is, what exactly is the page fault error? When your computer is processing tasks, it is continually loading programs and files into and out of its Random Access Memory, also known as RAM. RAM is the term most commonly used to refer to this type of memory. If your Windows computer runs out of RAM or if an application or file remains idle for an extended period of time, Windows will begin transferring data from RAM to your hard drive or solid-state drive (SSD) in order to make more room. The Page File is where those ‘items’ are kept for storage.
There is a good probability that you will get a Blue Screen of Death (BSOD) if something interferes with reading or writing to the page file (pagefile.sys) or directly with your RAM itself.
The issue known as Page Fault in Nonpaged Area Windows 11 can be brought on by a number of different factors, including the following:
- An improperly functioning driver or system service
- A hard drive or solid-state drive (SSD) that has been tainted with corruption.
- Antivirus Program That Does Not Work Properly
- Memory corruption (whether in RAM, cache, or VRAM)
So, now that the reasons behind the issue are clear. Let’s move on to the solutions.
Reliable Methods to Fix the Page Fault in Nonpaged Area Windows 10 Error
In the coming sections of this simple guide, you will find a list of solutions to fix the Page Fault in Non Paged Area error along with the detailed procedures. Follow the solutions chronologically until the issue is fixed.
Solution 1: Bring an End to the Fast Startup
The first fix for Windows Page Fault in Nonpaged Area is modifying fast startup. Fast Startup is a function that is designed to cut down on the amount of time it takes for Windows to start up; nevertheless, in the majority of cases, this feature may cause numerous black or blue screen problems. Disabling the Fast Startup option, as suggested by a number of users on the Microsoft or Reddit forum, has been suggested as a possible solution to the problems experienced during startup, including the Page_Fault_in_Nonpaged_Area Windows 10/11 error. This solution is only available to you if your computer is able to start up normally or if it is capable of starting up in Safe Mode. The instruction manual for starting up in Safe Mode may be found here:
- After two consecutive failed attempts to start Windows or an installation disc, boot into the WinRE recovery environment.
- Boot into the Safe Mode.
- After entering WinRE, you should go to the Troubleshoot menu and select the Advanced options.
- After clicking Startup Settings, there will be some waiting involved.
- To boot into Safe Mode, press the F5 key, then select the Enable Safe Mode with Networking option from the drop-down menu that appears.
- After that, you can turn off the Fast Startup option by going through the procedures that are listed below.
- Locate the “Start” button in the bottom left corner of the screen, and then select the “Settings” symbol.
- Select the System menu, then go to the Power & sleep section. After that, select the Additional Power Settings option.
- Select from a variety of other power options.
- Click on the next step. You can customize the behavior of the power button in the top left corner.
- Click the Change settings that are presently unavailable step in the process. After that, deselect the box labeled Turn on rapid startup, and then click the button labeled Save changes.
If this solution fails due to any reason, take the help of the next one to fix the Page_Fault_in_Nonpaged_Area Windows 10.
Also Read: IRQL Not Less Or Equal Error in Windows 10, 11 [Fixed]
Solution 2: Examine Both the Hard Disk and the Random Access Memory
Memory-related hardware issues can result in the Page Fault in Nonpaged Area Windows 10. This includes hard drives and random access memory (RAM). It is possible that a stop code page fault in a nonpaged area will occur if they are unhealthy. As a result, you need to inspect them in order to correct any issues. You ought to replace them if it becomes required to do so.
The instruction manual on how to inspect the disk is as follows:
- If your computer is capable of starting up or starting up in Safe Mode:
- Launch File Explorer and select This PC from the menu.
- Select “Properties” from the context menu after right-clicking a disk.
- Navigate to the Tools tab, and once you’re there, click the Check button that’s located next to the Error-checking box.
- To begin using this program, click the Scan Drive button. The file system and the logic are checked for faulty sectors, and any that are found are repaired.
- If your computer is unable to start up and you are unable to start it in Safe Mode:
- Launch WinRE and then open a window for the command prompt.
- After the prompt, type chkdsk e:/f/r to begin the check. It is important that you take note that the letter “e” represents a drive letter. You need to replace it in accordance with the situation.
The instruction manual on how to check the RAM may be found here:
When your machine is able to boot into Windows 10 normally or when it is able to boot into Safe Mode, the RAM checking process will begin. So, to fix the Page_Fault_in_Nonpaged_Area Windows 11 error, follow the below steps:
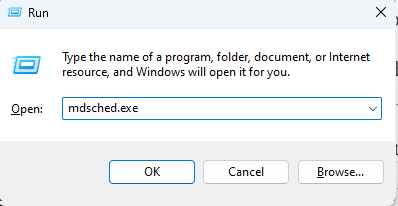
- After pressing the “Windows + R” keys, put “mdsched.exe” into the box labeled “Run.”
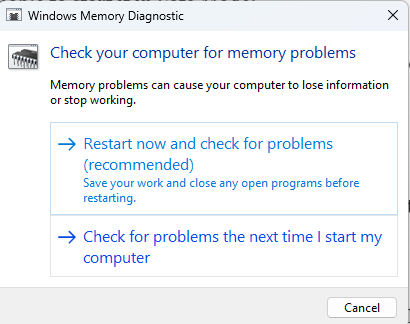
- When the Windows Memory Diagnostic application prompts you, select “Restart now and check for problems” from the menu that appears.
- Wait until the computer has finished the memory test. This procedure will, on average, take a few minutes to complete.
- Navigate to the Event Viewer to locate the outcome of the memory diagnosis.
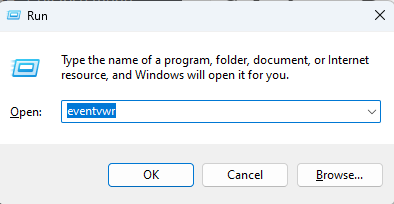
- After the computer has automatically rebooted, open the “Run” window and type “eventvwr” in it.
- Proceed to the Windows Logs > System location.
- To access this section’s window, select “Filter Current Log” from the menu on the right.
- To see all of the memory test’s result logs, choose “MemoryDiagnostics-Results” from the list of available Event sources in the drop-down menu.
- Select the OK button.
- To view the specifics of the information, you need to double-click the most recent result log.
If the hard disk or the RAM is not at fault, you can fix the Page Fault in Non Paged Area Windows 11 issue using the below solution.
Also Read: 0x0 0x0 Error Code in Windows PC Fixed (Easily & Quickly)
Solution 3: Perform a Driver Update
Let’s have a look at the next solution for Page Fault in Nonpaged Area Windows 10 error. Programs that call nonpaged memory are referred to as drivers. This error is likely to appear in Windows 10 if there are compatibility issues with the drivers. In that case, you can just update them in order to rectify the situation.
After you have determined who was responsible, you can use the methods below to bring it up to date. This method to fix Windows 11 Page Fault in Nonpaged Area is also implemented in the event that your machine is able to boot either normally or into Safe Mode.
- Select Device Manager from the pop-up menu that appears after pressing the “Windows + X” keys on your keyboard.

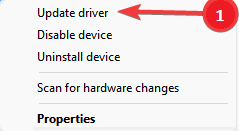
- The next step is to expand the appropriate directory in order to locate the offending driver. Then, pick “Update driver” from the context menu that appears after right-clicking the driver.
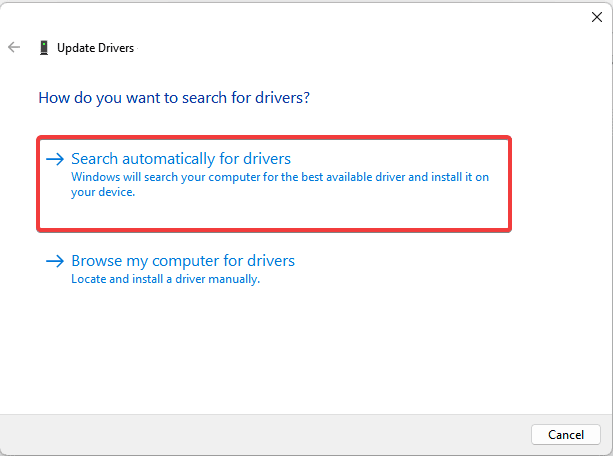
- In the pop-up box, select the option that reads “Search automatically for updated driver software.”
Because the process of manually updating drivers takes a lot of time and is prone to errors, we strongly suggest that customers go with the automatic approach to install the most recent driver versions and fix the Page Fault in Nonpaged Area Windows 11 error.
Update Drivers Automatically With Bit Driver Updater
Bit Driver Updater is now one of the greatest pieces of software that can be used to automatically update device drivers, and it is currently available on the market. The most intriguing aspect of this software is that it can increase the performance of the computer by up to fifty percent, in addition to the fact that it can update drivers with a single click. This is how you should put it to use and fix the Stop code Page Fault in Nonpaged Area error:
- After downloading and installing the Bit Driver Updater application on your computer, you should now run the program.
- Wait for the process of automatically scanning drivers to finish before continuing. You are able to start the manual scan by clicking on the “Scan Drivers” button if that is what you would like to do.
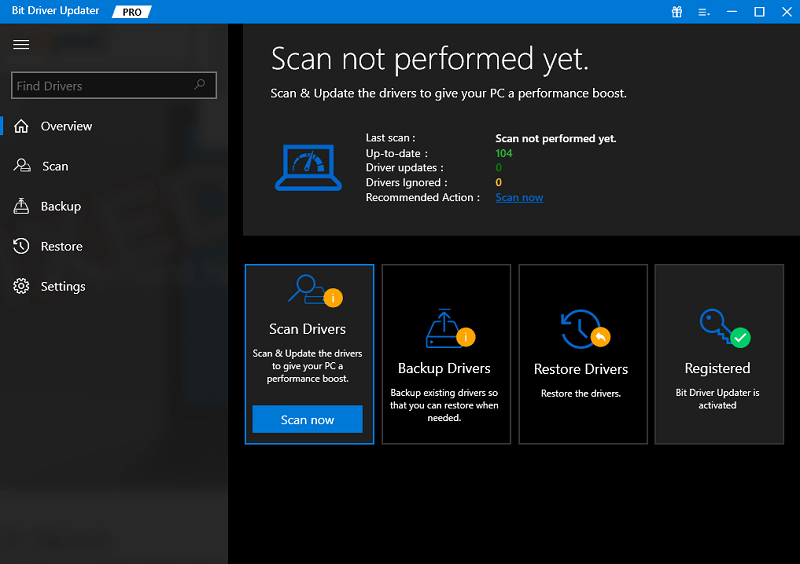
- After you have received the results of the scan, click the “Update All” option to bring all of the obsolete, missing, and faulty drivers up to date in a single step. You also have the option to update each of them individually by clicking on the “Update Now” button.

Also Read: SOLVED whea_uncorrectable_error Windows 10
Solution 4: Repairing System Files
It is also possible that corrupted system files are the root cause of the stop code Page Fault in Nonpaged Area that was encountered. If this is the case, you can attempt to repair corrupted system files by using built-in utility tools such as the System File Checker (SFC) and the Deployment Image Servicing and Management (DISM) tool.
This Windows 11 Page Fault in Nonpaged Area solution is accessible to you regardless of whether or not your computer is able to boot into Safe Mode or normal mode. This will easily fix the Page Fault in Nonpaged Area error. If it is possible to do so, you should bring up the Command Prompt and operate it in administrative mode by following the procedures below:
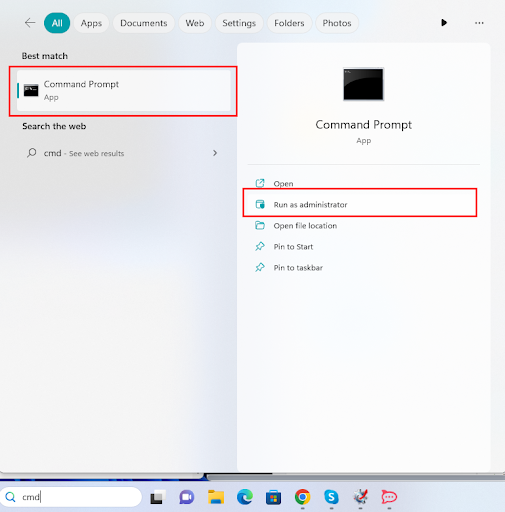
- Enter “command prompt” into the search box on Windows and then right-click the command prompt icon to select the “Run as administrator” option.
- In the event that it cannot, you need to boot into WinRE and then launch Command Prompt. After that, you can start SFC by typing the following command into the command prompt:
sfc /scannow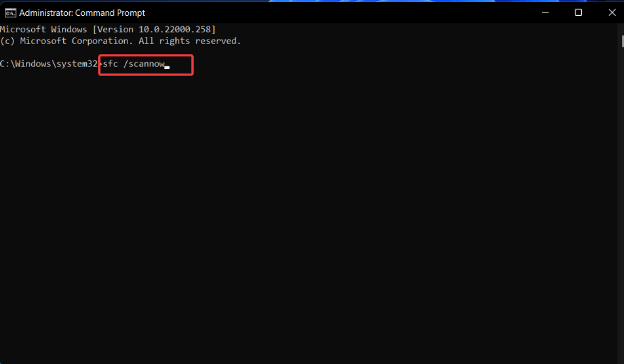
- Close the Command Prompt window and check to see if the page fault in the nonpaged section of Windows 10 has been fixed. If this is not the case, you can launch the DISM program, which can recover system files, by opening the Command Prompt and entering the following commands.
exe /Online /Cleanup-image /Scanhealth
exe /Online /Cleanup-image /Restorehealth
Also Read: How to Fix Bad_Pool_Caller Error on Windows 10 {SOLVED}
Windows Page Fault in Nonpaged Area Error: Fixed
So, now it’s time that we conclude this simple guide on how to fix the Page_Fault_in_Nonpaged_Area Windows 11/10 error. After executing all the solutions, you will not face this issue anymore. Just follow the solutions and procedures provided for your assistance.
If you want our help in any way or have some questions for our experts, write to us in the comments section below. We will get back to you with reasonable and helpful solutions. Apart from that, subscribe to our newsletter and never miss an update from our blog page just like this one on Page Fault in Nonpaged Area Windows 11.


