How to scan documents on an iPhone? If you have the same question, then you have come to the right place as here we discuss all the potential methods to scan on an iPhone any time any place.
It is true that your iPhone can also function as a document scanner. Despite the fact that it does not create images that are as sharp as those that would be produced by a dedicated scanner, it performs a reasonable job, even when the phone is positioned at unexpected angles in order to capture text.
In order to accomplish this, you will not be required to download any additional software or pay for a third-party application because the Notes app that is preinstalled on iPhones is everything you need. The good news is that scanning a document, saving it, and sending it to the location where it needs to be sent is a time- and labor-saving process.
This hidden function has been available on iPhones ever since the release of iOS 11 in 2017, but as the cameras that are incorporated into Apple phones have received improvements, so has their capacity to take scans of documents that are of satisfactory quality.
However, that’s not the only method. Other methods are also available to help you downscan any document on an iPhone. As far as the matter of how to scan documents on an iPhone is concerned, you will find everything that you need to know right below.
Method to Scan a Document on an iPhone
In the coming sections of this guide, we will have a look at some of the most trusted and reliable methods to scan documents on an iPhone. Multiple techniques are available for scanning. You can opt for any of the three methods described below as per your requirements.
Method 1: Download and Install a Scanning App
The first method to scan documents on an iPhone is to use a third-party app. There are apps that are created expressly for scanning on mobile devices. In the App Store for your iPhone, you may find a variety of scanner applications, some of which are free and others of which need payment. You just need to look for the one that you prefer and then download it. Each application comes with its unique set of instructions, but they all make use of the camera on your mobile device.
When it comes to scanning, the majority of scanning apps offer a free version that can be downloaded rather readily. Nevertheless, if you desire more features, there are choices to upgrade to a higher version. As part of their paid versions, several apps provide users with a variety of premium features along with the ability to scan on an iPhone. By combining the results of several scans, certain applications enable users to generate a single document from a collection of scans.
To add insult to injury, commercial editions of many applications offer the capability to export PDF files to Microsoft Word or PowerPoint, apart from the one on how to scan a document on an iPhone. This might be of great use in certain situations. Additionally, in order to ensure the safety of your scanned documents, you can remove watermarks, search text, add digital signatures, or safeguard them with a password.
Also know: Best Photos Cleaner Apps for Android and iPhone
Method 2: Use the iPhone’s Camera
Here’s another method that you can use to scan documents on an iPhone. You can use the iPhone’s camera to scan any document of your choice. Although this method of scanning is simple, it does not allow for much flexibility. The steps are all described below for your ease:
- Launch the camera application on your device.
- Take a picture of the image or document using your camera.
- Make any necessary changes to the scanned document or image you have.
So, that’s what you can do to scan with an iPhone. Following the completion of the scanning process, you will be able to utilize an additional application to upload and/or share the image that you have saved. You will need to hunt for a dedicated scanner app in order to make more extensive alterations, export your image into a PDF file, or tweak it further as required.
Method 3: Use the Notes App for Scanning
Alternatively, you can utilize the “Notes” app to scan documents on an iPhone. The app is pre-installed on your device and suitable if you do not frequently need to scan papers. You should, however, think about downloading a scanner software from the App Store if you do have the capability to do so. There are more complex capabilities available in these programs, which will help increase the quality of your scans. If you want to scan a document on your iPhone, these are the five steps you need to take:
- Launch the Notes app
- Now, choose an existing note or make a new note as required.
- To begin scanning a document in Notes, hit the Camera button.
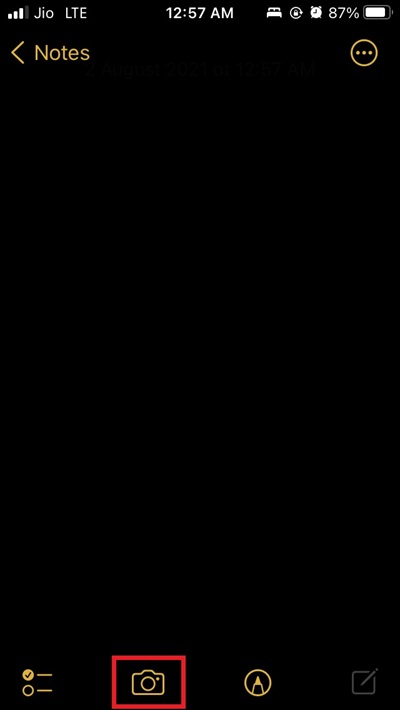
- Next, tap the Scan Documents icon.
- Position your document so that it is visible to the camera.
- When your device is set to Auto mode, the document you are scanning will be scanned automatically. To manually take a scan, you can do so by tapping either the Shutter button or one of the Volume buttons available on the device. Next, modify the scan so that it fits the paper by dragging the corners, and then press the Keep Scan button.
- Choose to either save the document or add further scans to it.
Once you follow the steps to scan on an iPhone, you have the ability to make adjustments to the corners so that it fits the document in the manner that you desire, alter the color scheme of the document, rotate it, or add additional pages. You should be able to find the completed scanned paper in your notes menu after you click the save button.
Also know: Best Alternative Scanner App For CamScanner
Final Words: How to Scan with an iPhone
The documents scanner is just one of many overlooked iPhone features that come preinstalled with Apple’s phones. These features are frequently hidden within the applications that come with your phone from the manufacturer. The same are available on the iPhone as well which allows you to scan documents on an iPhone.
We have discussed all the methods available for iPhone users to scan documents. If you face any problems deploying these solutions, you can communicate with us using the comments section below. Also, subscribe to our newsletter and follow social media pages for daily updates.