A step-by-step guide on how to use Microsoft’s photos to find and remove duplicate photos on Windows PC.
Duplicate pictures are one of the most common problems faced by numerous Windows PC users. These pictures not only occupy unnecessary space but also make your photo collection disorganized and messy with repeated pictures. Apart from that, duplicate photos also make your PC sluggish and weak. Hence, it is important to get rid of duplicate photos for better PC performance. You can find and delete duplicate pictures either manually with Microsoft’s Photos app or automatically using any reliable third-party photo cleaner software.
Microsoft Photos comes in-built into Windows 10 OS and is extremely easy to use. The Photos experience empowers you to do more with your pictures and videos on your PC. Basically, it is an image viewer, image organizer, a photo-sharing app, raster graphics editor, and video clip editor developed by Microsoft. This all-in-one solution can also be used to keep your photos library organized by deleting the dupe shots. Below are the simple steps to remove duplicate photos from Windows 10 this way:
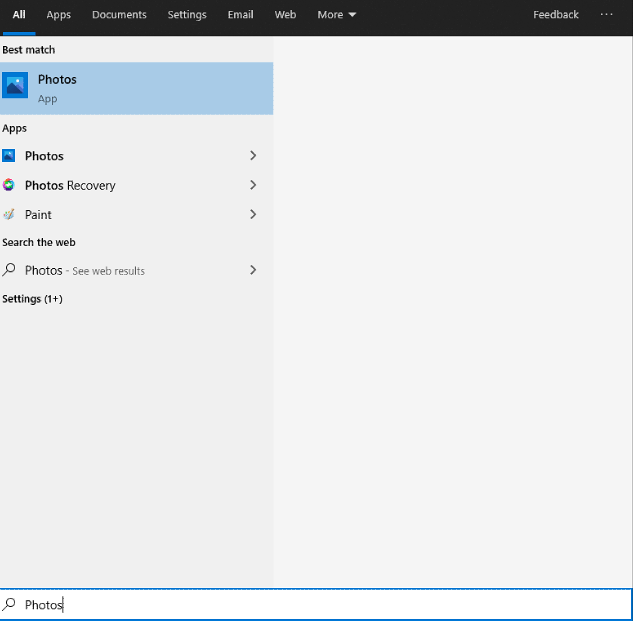
Step 1: On your keyboard, altogether press Windows and S keys to invoke the Windows search tool. And, type Photos.
Step 2: And, choose the best match from the search results.

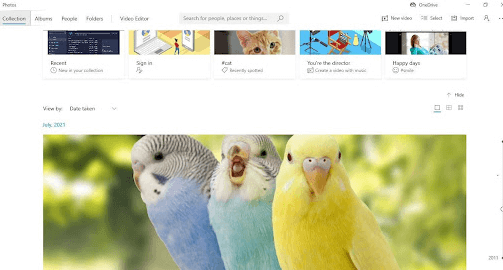
Step 3: When the program opens for the very first time, you may not be able to see all your pictures. Make a click on the Folders tab that appeared in the upper left corner.
Step 4: Click Add A Folder box and find the correct location of your pictures saved on your hard drive.
Step 5: After adding all the folders containing your pictures, make a click on the Collection tab. This will list all your pictures in one place.

Step 6: Then, you will see a View Small button on the upper right corner of the picture displayed, click on it to proceed.
Step 7: Now, you will see small thumbnails of the pictures which will help you identify if there are any duplicates in your photo collection.
Step 8: Once you find a duplicate image, then click right on it and choose delete from the context menu that appeared.
Step 9: After that, a confirmation box will appear asking you, “Are you sure you want to delete this file?” Click the Delete button to affirm your actions.
A Point to Remember: The deleted picture will move from its original place to the Recycle Bin.
That’s how you can use Microsoft’s Photos to find and remove duplicate photos in Windows 10 free. However, do keep in mind that this is a manual process of detecting and deleting the dupe shots, which also requires a lot of time and effort. So, if you do not have time to delete duplicate photos manually, you can also use any trusted third-party software like Quick Photo Finder to automatically remove duplicate photos on Windows 11, or 10 PC. For more information, read ahead!
Know how to find and remove duplicate files in Windows.
Quick Photo Finder is an ideal photo cleaner application that you can use in order to detect and erase duplicate photos with just a few clicks of the mouse. It is an industry-standard software to get rid of dupe shots on the Windows operating system. This is a simple and lightweight software that not only helps you remove unnecessary copies of identical pictures but also frees up a good amount of storage space that you forgot you had.
In addition to this, the software also provides interactive and short in-app tutorial videos on how to find and remove duplicate pictures so that beginners can perform the necessary actions effortlessly.
Most Prominent Features of Quick Photo Finder:
Quick Photo Finder presently ranks among the best app to remove duplicate photos in Windows 10. Now, have a look at its most notable features.
How Does Quick Photo Finder Work?
Follow the steps outlined below in order to remove duplicate photos in Windows 10 using Quick Photo Finder:
Step 1: Download and install Quick Photo Finder.
Step 2: Run the photo cleaning application on your system and add folders or photos containing duplicate pictures for scanning. The user can also use the drag and drop feature to add folders/ photos to the scan area.
Step 3: After that, you’ll need to set the preferred picture matching parameters in order to get the most authentic scan results.
Step 4: Click the Scan option to kick-start the scanning process. Wait for the process to be completed. After scanning, you will see a detailed list of identical and exact pictures in well-organized groups.
Step 5: Check the scan results and select all the duplicates with ease by clicking on the Auto Mark option.
Step 6: Once done, click the Remove Similar Photos option to remove the unwanted copies of the space-hogging dupe shots in one go.
See how convenient it is to find and remove similar-looking photos from Windows PC by using Quick Photo Finder.
Undoubtedly, Microsoft’s default Photos application is an excellent tool to view and manage your picture collection on Windows PC. But, when it comes to finding and deleting duplicate or even identical images, then you have to rely on a highly-advanced photo cleaner app like Quick Photo Finder. This application utilizes smart algorithms and techniques to identify dupes depending on the content of the picture and is one of the most effective ways to remove dupe shots on your computer.
Was this guide helpful? Please let us know in the comments below. Additionally, do subscribe to our Newsletter for more tech-related informative articles. Lastly, follow us on social media – Facebook, Twitter, Instagram, and Pinterest.
If you also want to place some bets on games this IPL season, here are…
If you wish to download and update the RNDIS device driver for Windows 10/11 or…
In the event that you are interested in executing the Bose Headset drivers download and…
If you are also facing the Guided Access not working issue on your iOS (iPhone)…
If you are looking for the best privacy screen protector to use the smartphone freely…
If you are looking for the perfect alternative to Apple Pay, refer to the Apple…